Like many it seems my drivers door stopped locking and unlocking with the remote or by pressing the lock button on the inside of the door. The problem started intermittently but soon became a permanent feature.
The solution is to replace the entire lock mechanism. VW quoted approx. £250 to repair. Part is approx. £75 new from the stealers.
I was very luck and managed to get a brand new one of ebay for £25!
Basically I followed the workshop repair manual found here
http://www.mk5golfgti.co.uk/forum/index.php/topic,1797.0.htmlfor the front door (57-01).
Its pretty straight forward – basically you will be removing the outer door skin to get access to the lock. Daunting as this seems I found this much easier than taking the inner door skin off.
I’ve recently moved house and can’t find the charger for my camera so unfortunately phone pics will have to do.
What you’ll need:
Door Lock – 3D2 837 016 (drivers door)
T20 Torx Driver
T30 Torx Driver / bit for ratchet.
M6 Spline
Small flat bladed screwdriver.
First order of business is to remove the black plastic strip on the inside of the door frame. Start at the bottom and gently pull the clips out. Slide your fingers up beside each clip to support it and avoid cracking the trim piece.

This exposes some of the bolts holding the door skin on and the access point to release the lock cylinder. Note the round ‘sticker’ near the top of the door: peel this back to get access inside the door with a T20 torx driver. I’d recommend a dedicated driver for this one as I don’t think anything with a thick shaft (oh er …) will work.

You have to ‘feel’ for the bolt head as there is no way to see what you’re doing.
Once you’ve found it, pull the door handle fully out and loosen the screw. DO NOT FULLY UNDO!
Periodically check the lock cylinder to see if its loose enough to pull out – the door handle will have to be pulled out to do this.

All the way out – note the orientation of the lever and make sure it goes back in this way.

Next up is to remove the handle completely. To do this use a small screwdriver to pop the little tab out as shown – this disconnects the handle from the lock mechanism.

Note that the flat side of the cable termination faces out and the ribbed side into the handle – this is important later.
With the cable disconnected its just a matter of swinging the handle out towards the front of the car completely. I found it was easier to push it into the door and slide the handle towards the back of the car slightly to clear the carrier assembly before pulling it off. Its self explanatory when you come to this.
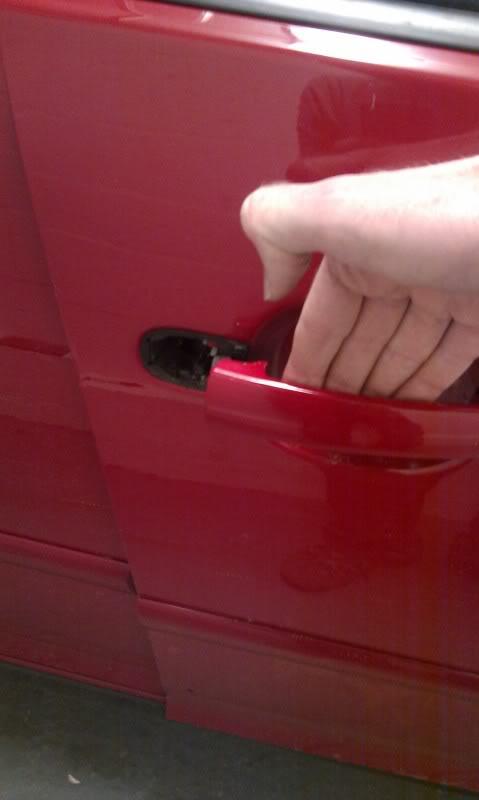

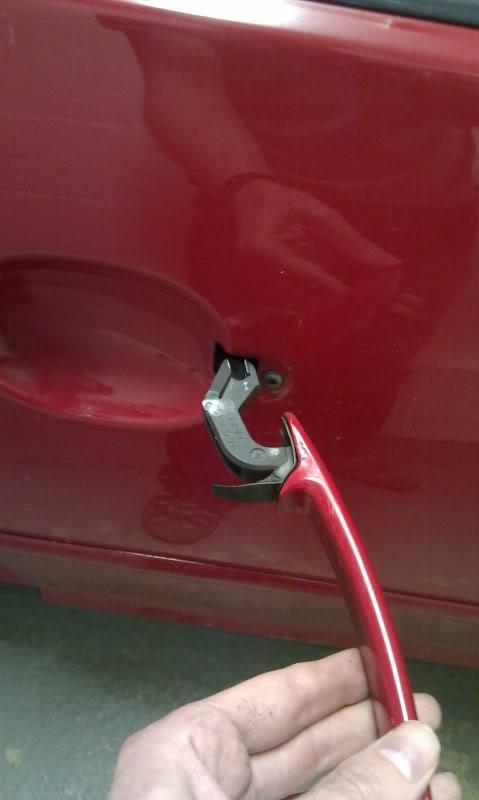
You will have exposed a small T20 screw where the front end of the handle used to be. Take it out.
Now take out the bolts around the door skin with a T30 bit.
Take great care to note which bolts came from where as if you put them back in the wrong place you WILL cause damage to the skin.
Taken from the workshop manual:

Once all the bolts are out its just a matter of lifting the skin away from the door – doesn’t take much effort at all to remove. A couple of small ‘hooks’ on the lock carrier will be clipped to the door skin but will fall away easily once you start moving the skin from the door.
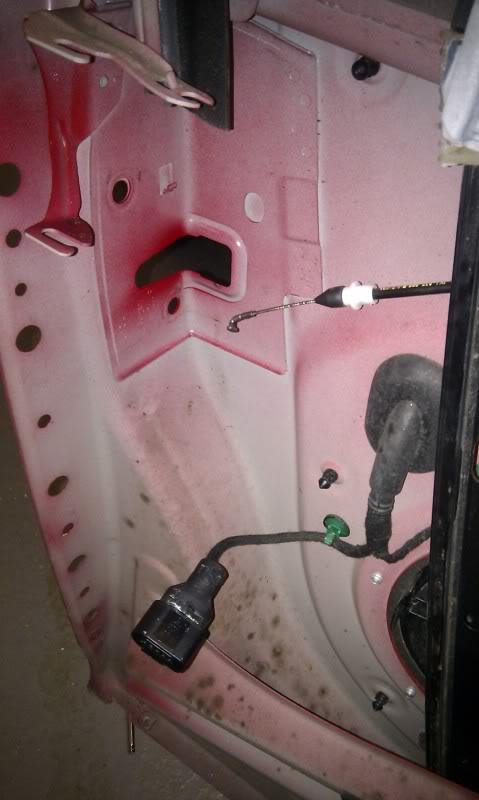
You will be left with:

Next up is to remove the carrier – dead easy. Just undo the rubber band and slide it towards the front of the car. Done. Don’t break the rubber band …
I think its just an aid to hold the carrier in place during assembly.


The new lock won’t be supplied with this plastic cover – its just clipped on so pull towards you to remove.
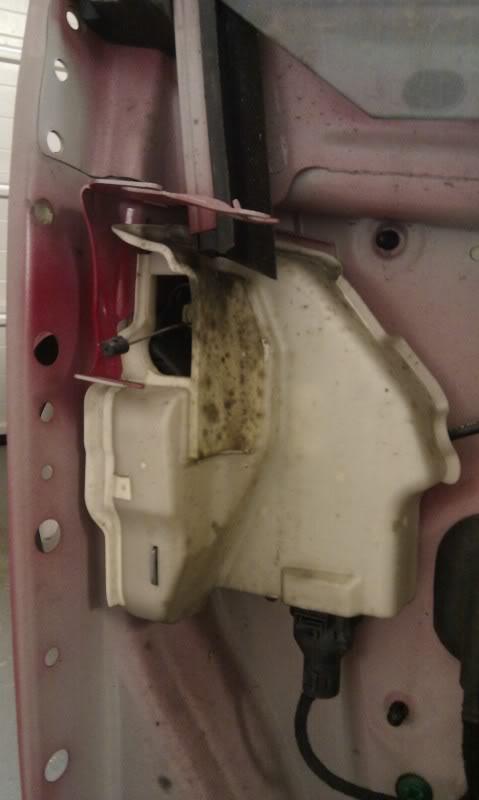
You will now be looking at the offending article

Drivers side part number above.

Undo the electrical connection in the normal way of putting a screwdriver in the tab and pulling it away. Note that the little cable connecting the lock to the handle has to be recovered from the old lock as the new one doesn’t come with it.
Next undo the M6 Spine bolts holding the lock module to the door.

Once these are out there is a little tab on the door frame that engages with the lock unit – just slide the lock towards the front of the car and jiggle it a little bit. The tension in the interior door handle cable works against you here…
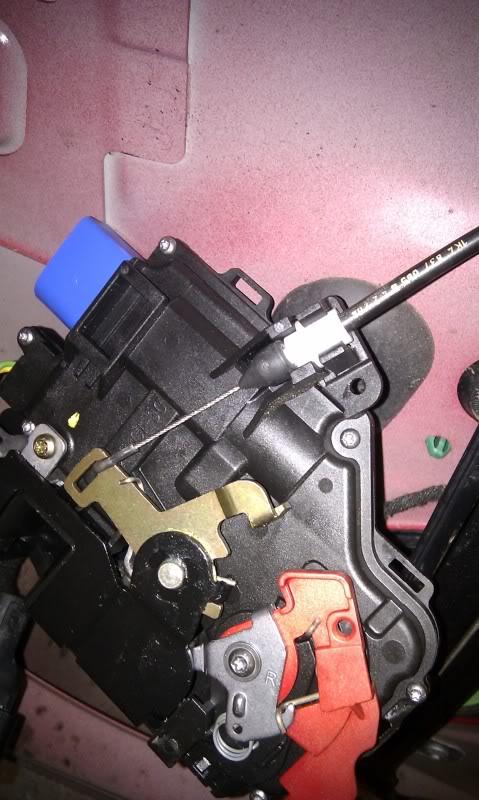
Picture above shows the ‘back’ of the lock unit and the interior handle cable going into it. Pull (or lever) the cable out of the retaining tab and disconnect the end. Its self explanatory how when you come to it.

Picture above shows the retaining tab between the two bolt holes.
Next recover the little cable for the outside handle from the old lock and put it on the new lock. Its released by rotating it and pulling the lever forward. Again self explanatory. Remember to put it on the right way on the new lock with the ribbed side ready to face into the handle and the flat side towards the barrel.

And what you will be left with before fitting the new lock
In the finest Haynes tradition, refitting is the reverse of the above.
Hope this helps!