Ive copied this from
http://www.golfmkv.com/forums/showthread.php?t=135872 Its was what i followed when i did my cambelt. Noticed the images are missing so thought i would copy it here and scrape the images.
This is not my work but i found it a great help and it would be a shame to loose such a great resource. 

Figured I'd throw together a little how-to for us with transverse mounted engines to let peeps know more of what's in store to get the job done. Having the engine mounted sideways makes it a little more difficult. If I had to do it again I'd start on Saturday instead of Sunday to not be so rushed. If you don't strip a bolt plan on it taking about 8 hours the first time ...maybe 4-5 hours second time around.
ECS Tuning and DBC Performance offer relatively complete timing belt kits online. I'd get a kit that includes the timing belt, tensioner, both idlers, A/C belt, and coolant. If the kit does not come with the 6 crank pulley bolts and 4 engine mount bolts, you may want add those to your order. They are one time use stretch bolts.
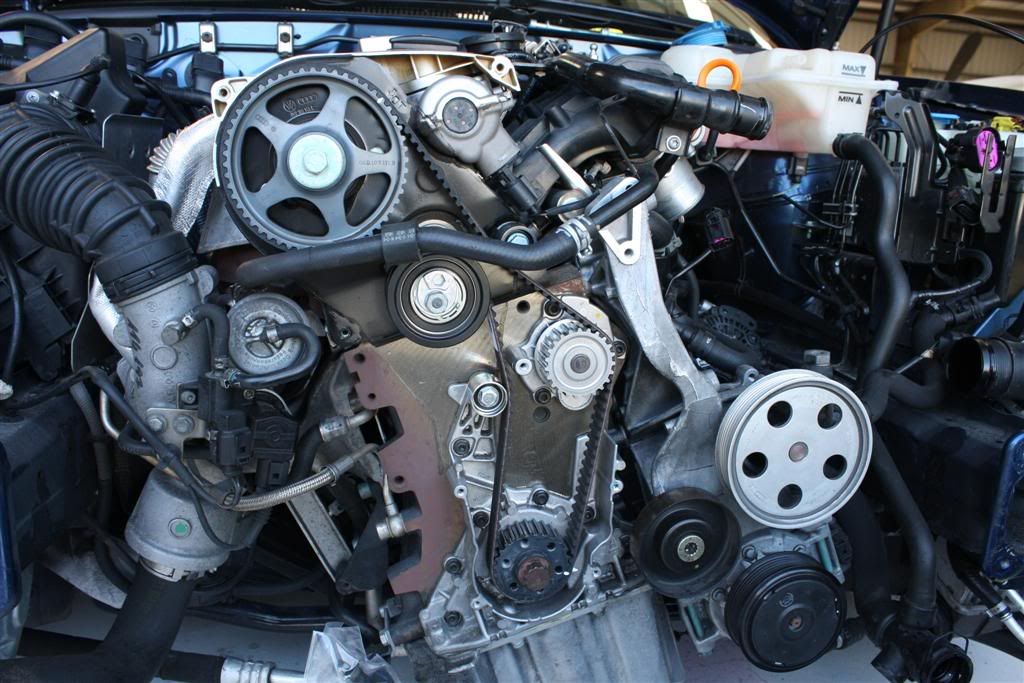
I stole a few pics from the Audizine DIY since the front of their engines is more viewable. More pics later. PM me if you notice any mistakes or want to make a suggest to improve this DIY.
Tools Needed:
Basic socket set
Breaker Bar
T20, T30 Torx bits
6mm, 8mm Allen bits
Pliers
Flathead Screwdriver
5/8" wrench
Torque wrench
19mm 12pt socket
1) Before jacking up the car make sure to loosen the passenger wheel lug bolts.
2) Remove passenger wheel.
3) Unplug MAF sensor and remove factory air box/engine cover.
4) Remove factory "noise pipe" if equipped (quick release at each end, 1 8mm screw, 1 T30 Torx screw).
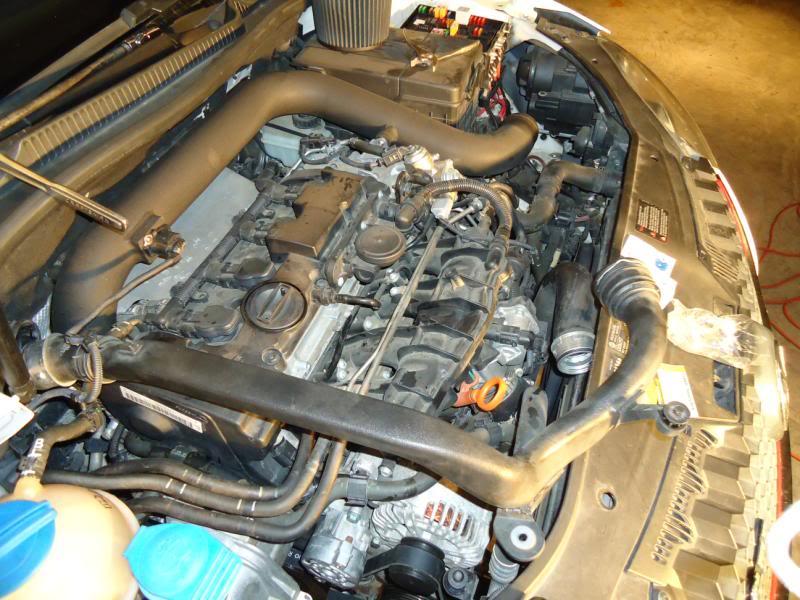
5) Disconnect washer tank from bracket and push to side (1 10mm screw).
6) Disconnect coolant reservoir and push to side. Unplug connector, disconnect small upper hose near cap, and remove screws holding rear of tank (2 T20 Torx screws).
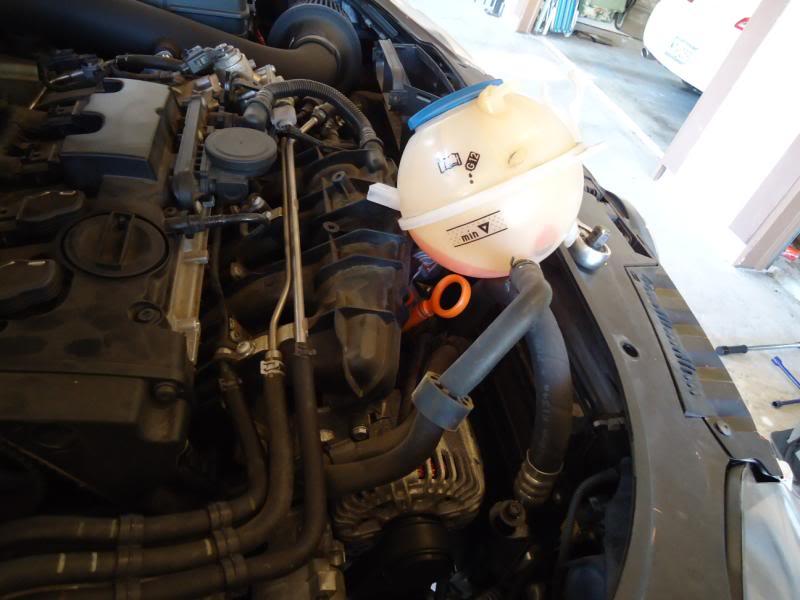
7) Remove black washer bottle support bracket (2 13mm bolts)
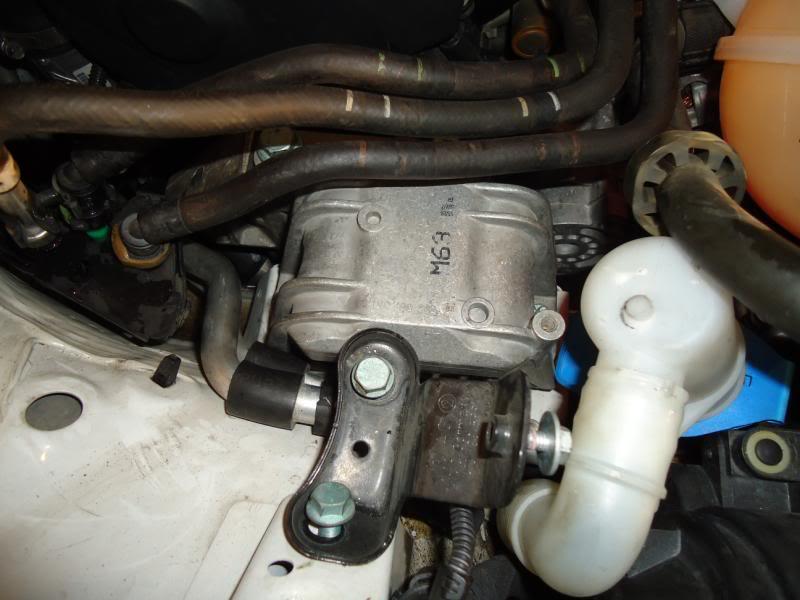

Disconnect coolant hose and push to rear of engine bay. Hose passes in front of belt cover.
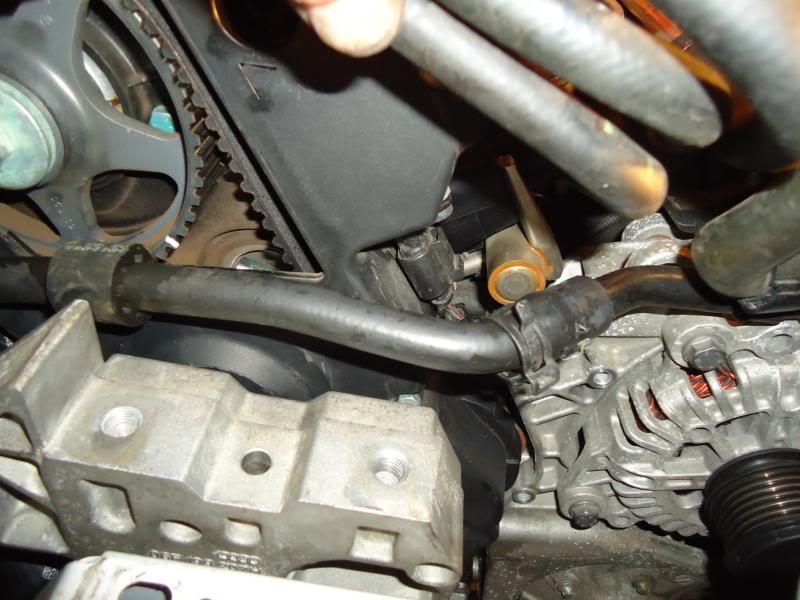
9) Unlock and remove cam sprocket cover using flathead screwdriver.
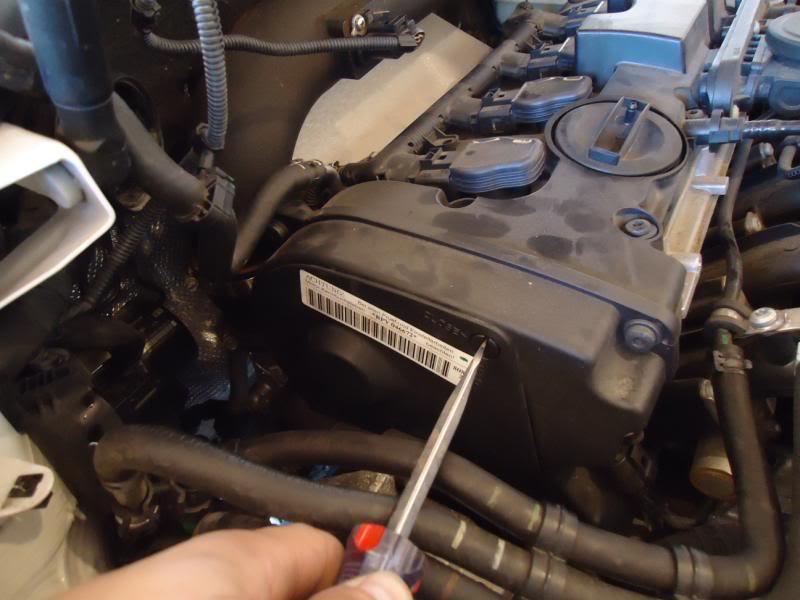
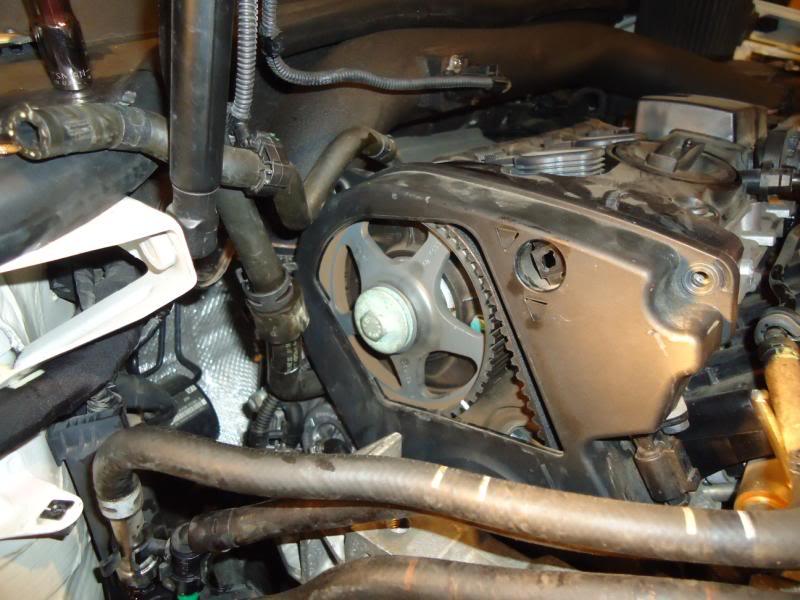
10) Remove under engine plastic dust guard (8 T20 Torx screws)
11) Remove passenger side front lower wheel well liner (7 T20 Torx screws).
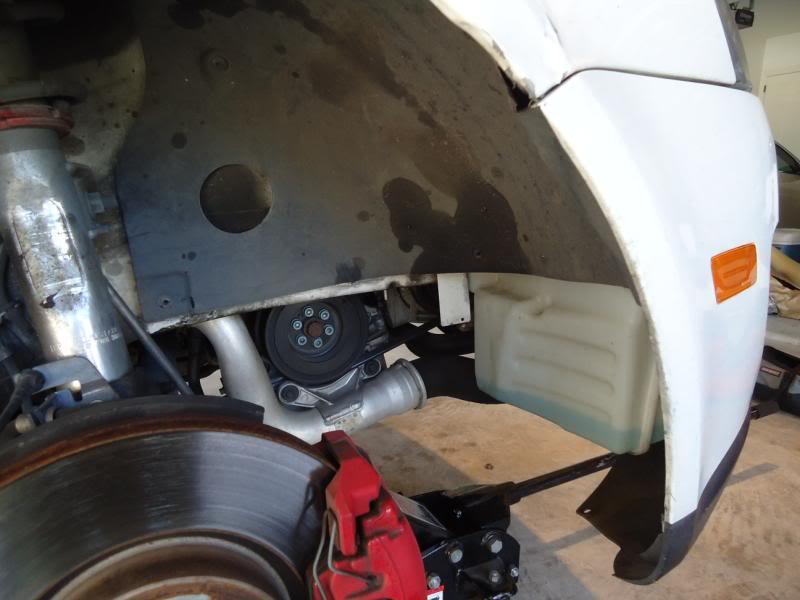
12) Disengage ribbed belt tensioner using open-ended wrench and nail. Remove ribbed belt.
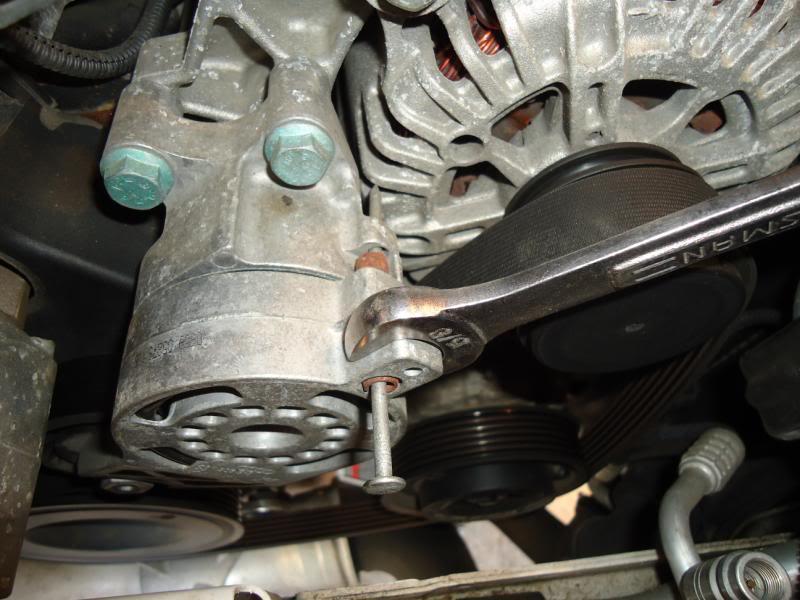
13) Remove ribbed belt tensioner (3 13mm bolts)
14) Remove crankshaft pulley (6 6mm Allen bolts). Have one person hold crankshaft center bolt stationary while another loosens the hex bolts. Be VERY careful not to strip or you may have to drill one out (Don't ask how I know). These are stretch bolts and should be replaced with new bolts upon reassembly.
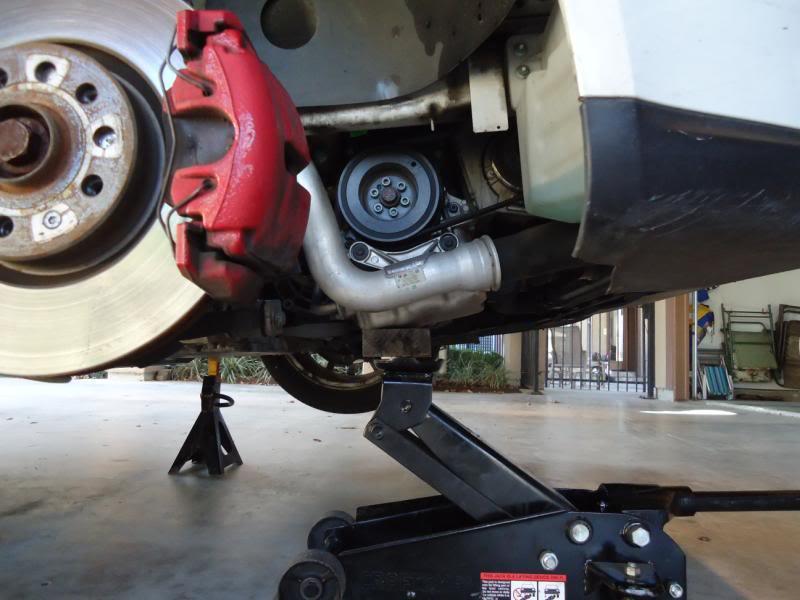
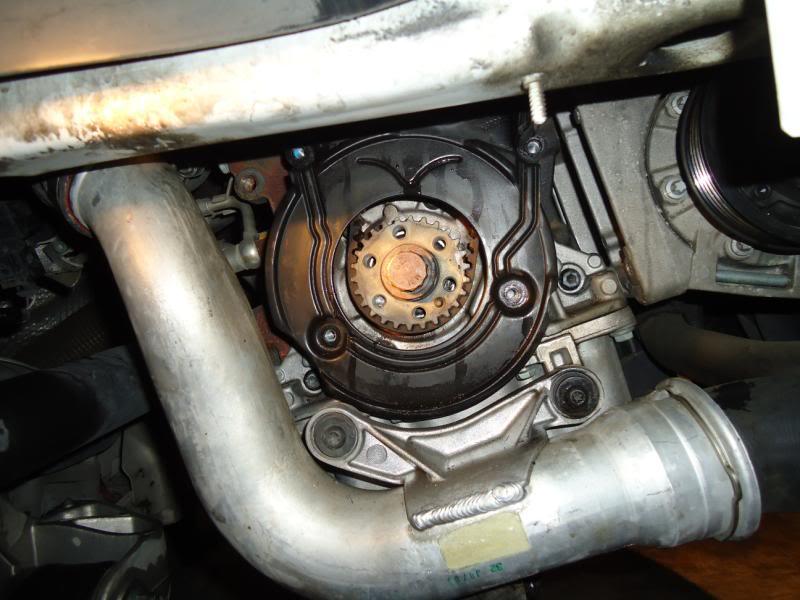
15) Remove black lower timing belt guard (4 10mm bolts)
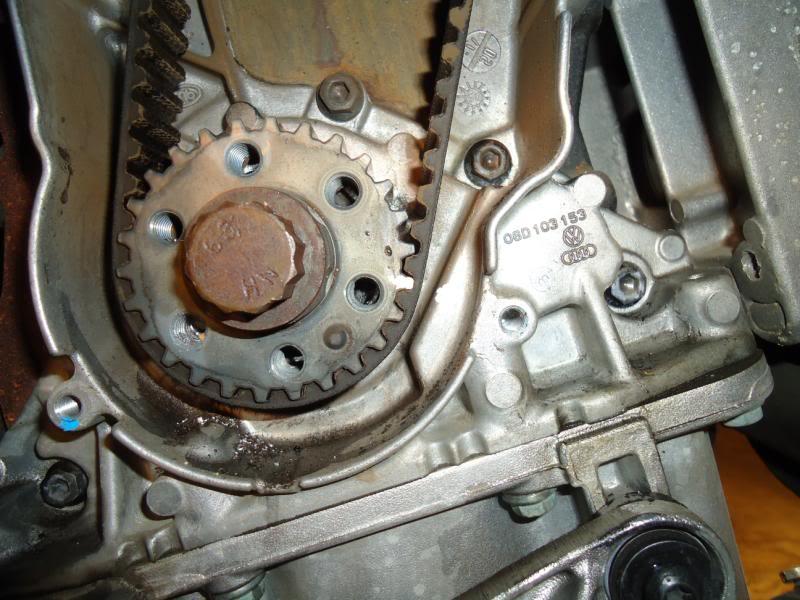
17) Turning clockwise, bring camshaft gear to marking for TDC cylinder 1 by turning crankshaft center bolt (1 19mm 12pt). Marking on camshaft gear must align with arrow on timing belt guard.
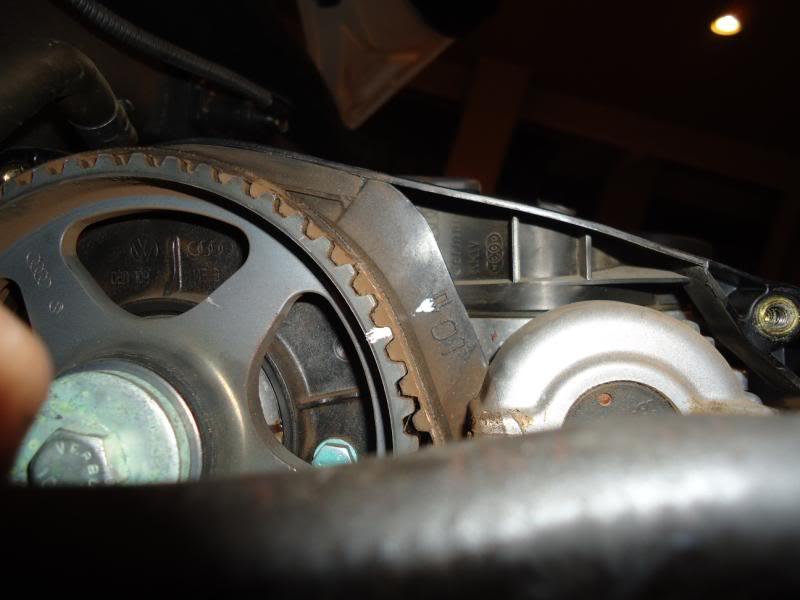
18) Mark bottom sprocket with paint or white out. In case the sprocket is bumped or accidentally spins you will need to have it marked.
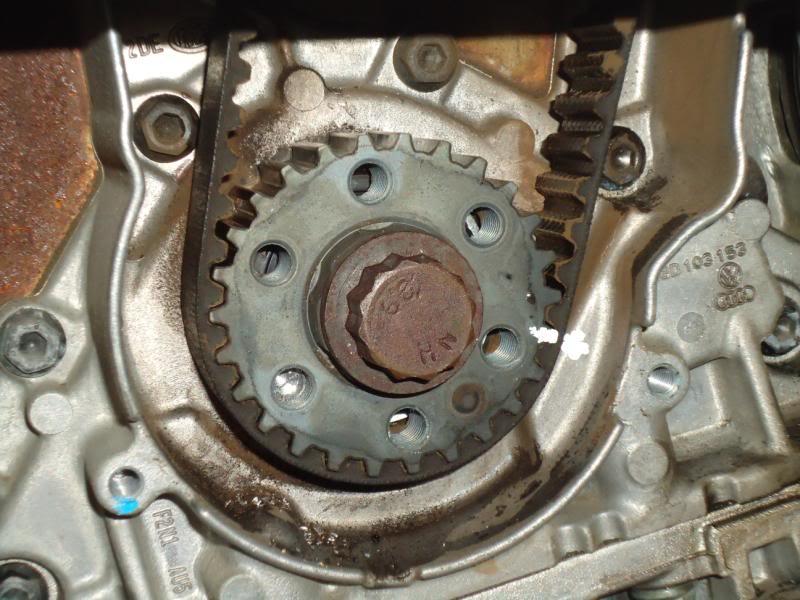
19) Support passenger side of engine using jack or engine lift.
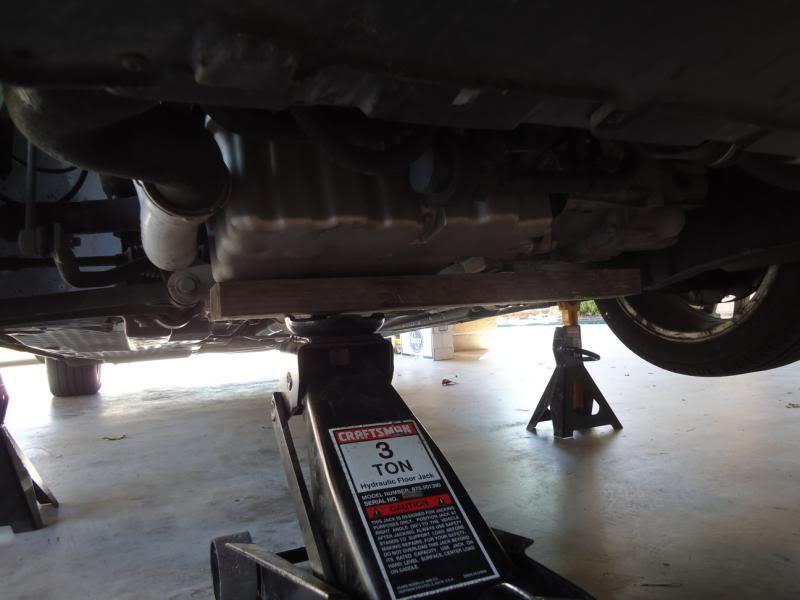
20) Remove side engine mount. Remove the larger bolts first (2 18mm) which connect the mount to the engine followed by removing the smaller bolts (2 16mm) that connect the mount to the car. All 4 of the mount bolts are stretch bolts and should be replaced with new bolts upon reassembly. This may or may not apply if you are using aftermarket mounts and hardware.
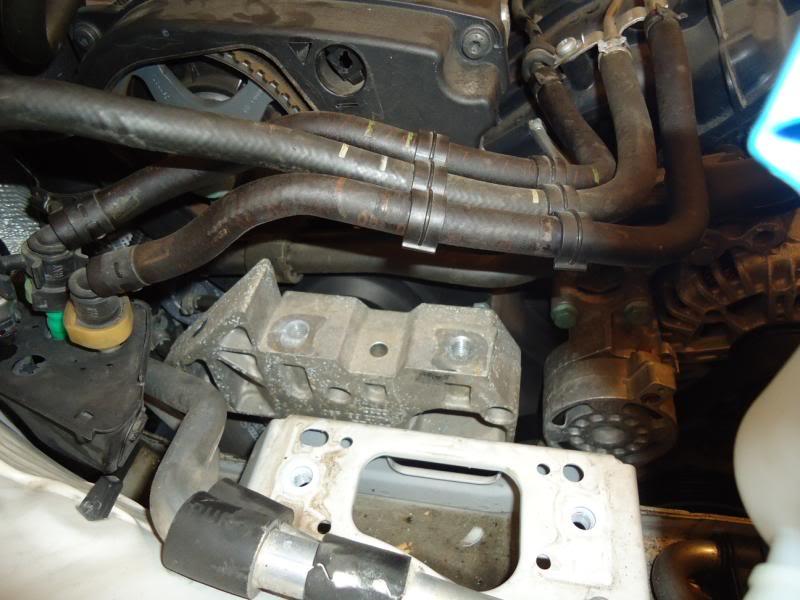
21) Remove lower bolt from engine bracket (16mm bolt).
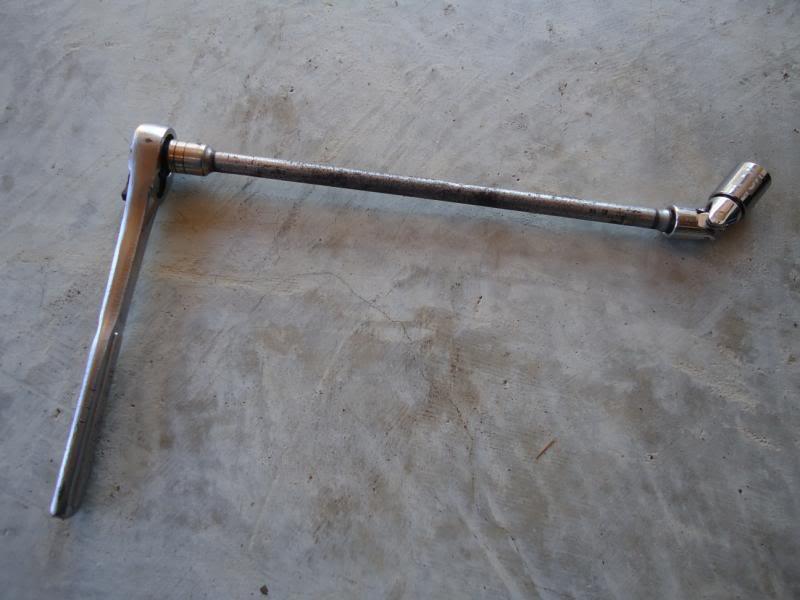
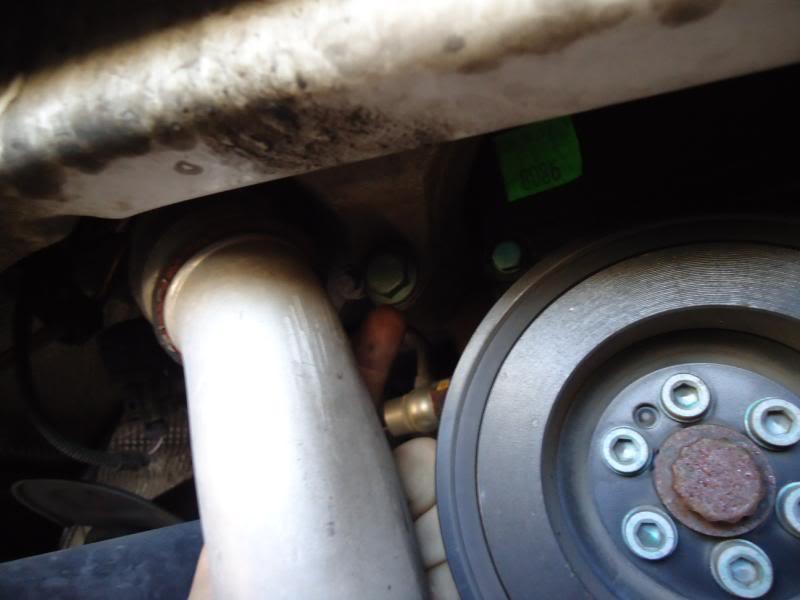
22) Raise engine to gain access to upper engine bracket bolts.
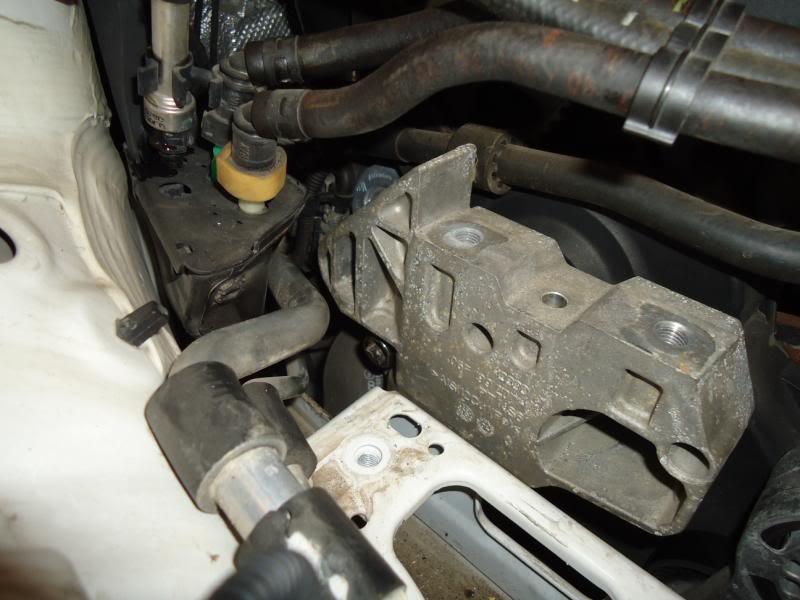
23) Remove upper engine bracket bolts (2 16mm bolts).
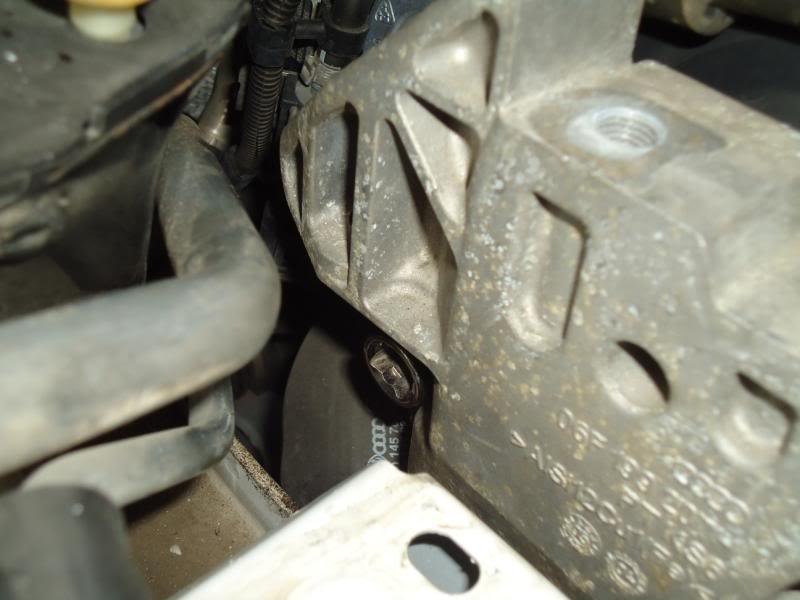
24) Work engine bracket up and out of engine bay. Contrary to what the Bentley manual says, it is not necessary to disconnect the lower engine mount, axles, and downpipe to get the bracket out. Fuel lines do not need to be disconnected either. Bracket will squeeze between fuel lines and plastic timing belt cover.
25) Remove plastic timing belt cover (7 total; 2 T30 Torx, 5 10mm bolts).
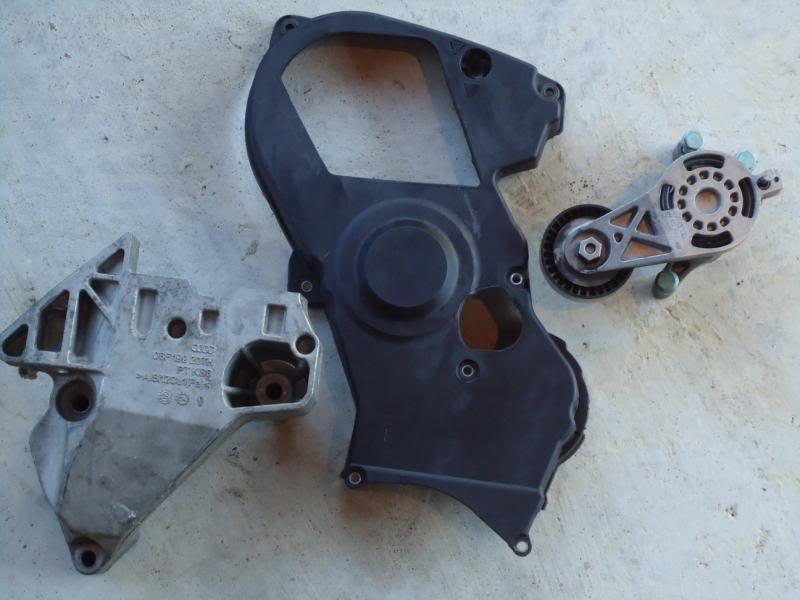
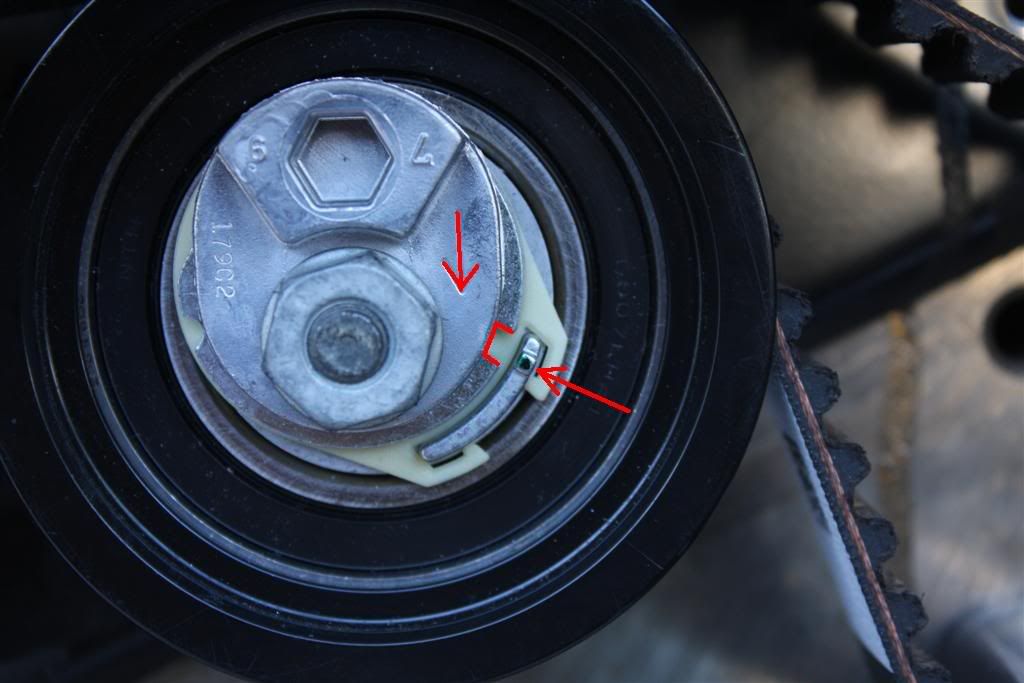
26) Loosen and remove timing belt tensioner (1 13mm nut, 1 8mm Allen). Loosen main 13mm nut then use rotate 8mm Allen bit counter-clockwise to loosen tensioner.
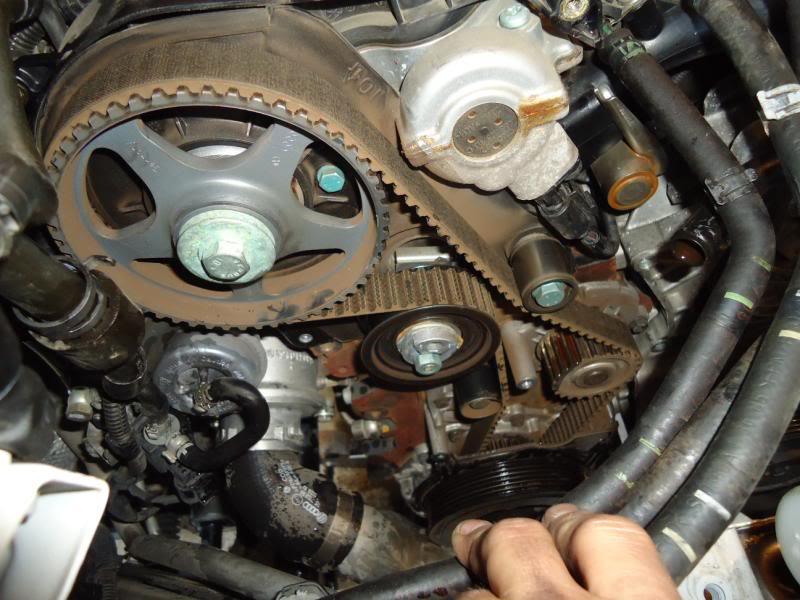
27) Remove timing belt tensioner, timing belt, both idlers
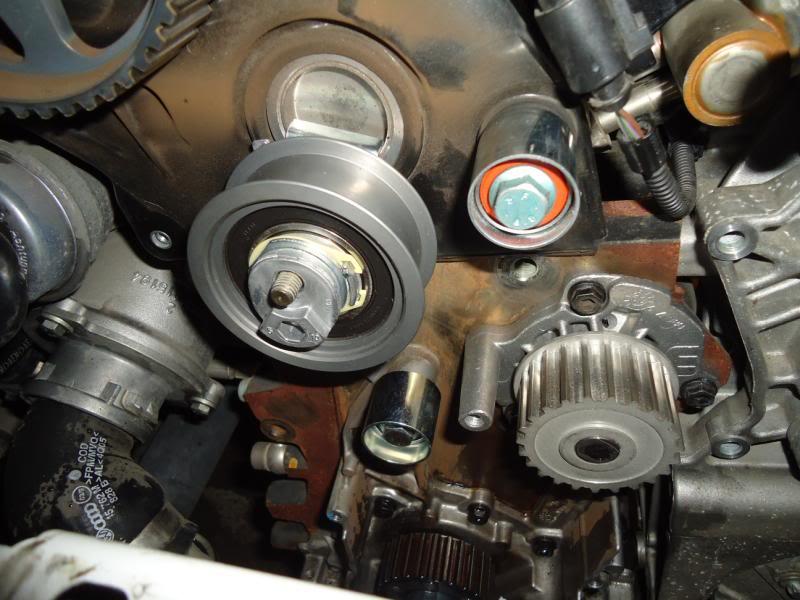
28) If replacing water pump, do so now. Drain coolant from lower passenger radiator hose and from coolant hose going to oil cooler. The oil cooler hose is directly behind the larger radiator fan. Remove and replace water pump (3 10mm bolts). Water pump bolts are 15nm.
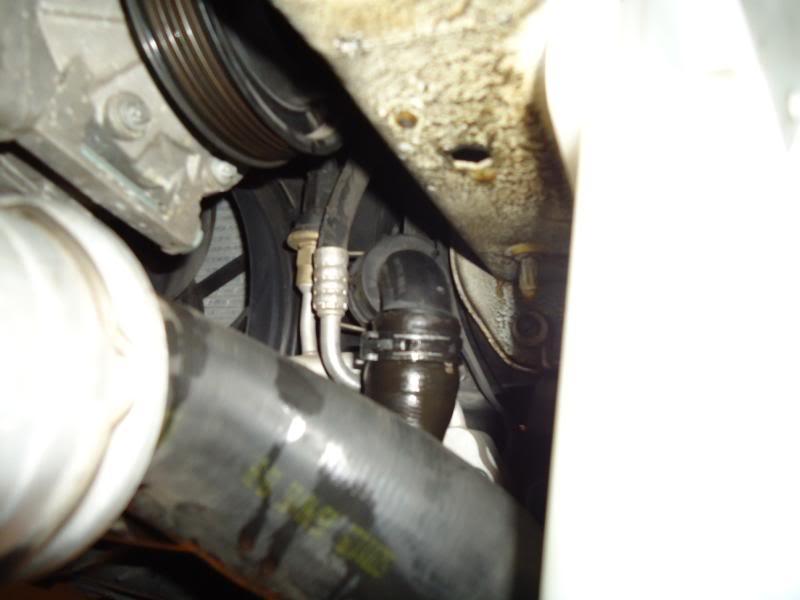
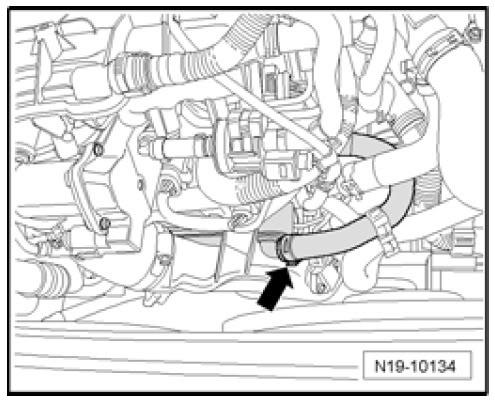
29) Replace idlers. Upper idler is 25nm and lower idler is 35nm
30) Replace timing belt tensioner and timing belt. See my "***TIPS TO PUTTING ON BELT" below at bottom of DIY.
31) Hand tighten tensioner 13mm nut. Using 8mm Allen rotate clockwise until tab aligns with notch. Torque 13mm nut to 25nm.
32) The 4 engine mount bolts, 6 crank pulley bolts, and 2 washer bracket bolts are stretch bolts that should be replaced with new bolts every time. The 3 engine bracket bolts do not need to be replaced. 6mm crank pulley bolts are 10nm + ¼ turn. The 3 16mm engine bracket bolts are 45nm. The 2 18mm mount bolts are 60nm + ¼ turn. The 2 16mm mount bolts are 40nm + ¼ turn. 13mm washer bracket bolts are 20nm + ¼ turn. Wheel lug bolts are 110nm.
***TIPS TO PUTTING ON BELT:
The belt should always be put on the crankshaft gear last. Start by putting it on the tensioner, looping it over the top of the cam gear, and down past the waterpump and idlers, leaving the crankshaft gear for last.
The cam gear is at the top of the loop. The crankshaft gear is at the bottom of the loop. The tensioner is on the left side of the loop, so when the tensioner finally is tightened later on, it will take most of the slack from the left side of the loop, not the right. Before you can tighten the tensioner you must have the belt fully on the engine. When putting the belt on the gears, take all the slack out of the right side of the loop. The right side of the loop (the side with the water pump) needs to be extremely tight with all excess slack on the left side of the loop (the side with the tensioner).
If for some reason you do this and the belt is still a tooth off after 2 rotations, it's because the right side of the loop was not tight enough when putting it on the crankshaft gear. If you're having trouble pulling the belt down far enough on the right side to set it in the proper tooth, there is a way you can kind of "cheat" to get it on the proper tooth. To do this, pull down on the right side of the loop just as you did the first time (making sure the cam gear doesn't rotate when doing this, obviously). When doing this, you can turn the crankshaft gear counter-clockwise just a little. You are essentially bringing the tooth on the gear to the correct notch on the belt. Do not turn the crankshaft gear more than a tooth in the counter-clockwise direction as the cam gear is stationary up at the top of the loop. When you set the belt on the right tooth, turn the crankshaft back to where is was. At this point the belt should be tight on the right side, with the slack on the left side. Set the belt tensioner and rotate the crank 2 times to check again you have it on the correct tooth.
__________________
 European Auto Gruppe
 aka EAG - Houston-based Euro club going on 11 years