Make a donation

Author Topic: How-To: Replacing Tailgate Wiring Loom  (Read 37570 times)

Offline Mykkael

  • Can't Read PM's Yet!
  • *
  • Thank You
  • -Given: 0
  • -Receive: 4
  • Posts: 3
How-To: Replacing Tailgate Wiring Loom
« on: July 29, 2014, 11:23:11 am »
I had been having intermittent issues with the car locking with the boot open, when I looked in the left hand side rubber boot between the hatch and body, 3-4 wires had snapped with several more on the way. Ordered a new loom from VW 1K6971147H, around £72.

Took some photos whilst I did this:

Tools used:
Socket Set/Ratchet
Torx bits
Stanley Knife
Penknife
Patience
Swearing

I disconnected the battery first due to working around the rear airbag.

Took me about two hours total; 1/2 hr trim removal, 1 hr wiring, 1/2 hr replacement.

End result, no more random car locking issue with the boot open. Downside, my issue with the boot taking 2-3 attempts to get it to open is back, so will need to get a new latch fitted, job for another day :)

Remove rear seat bench:


Pull off seat side cushion, upwards and outwards. Undo Bolt at base for side trim:
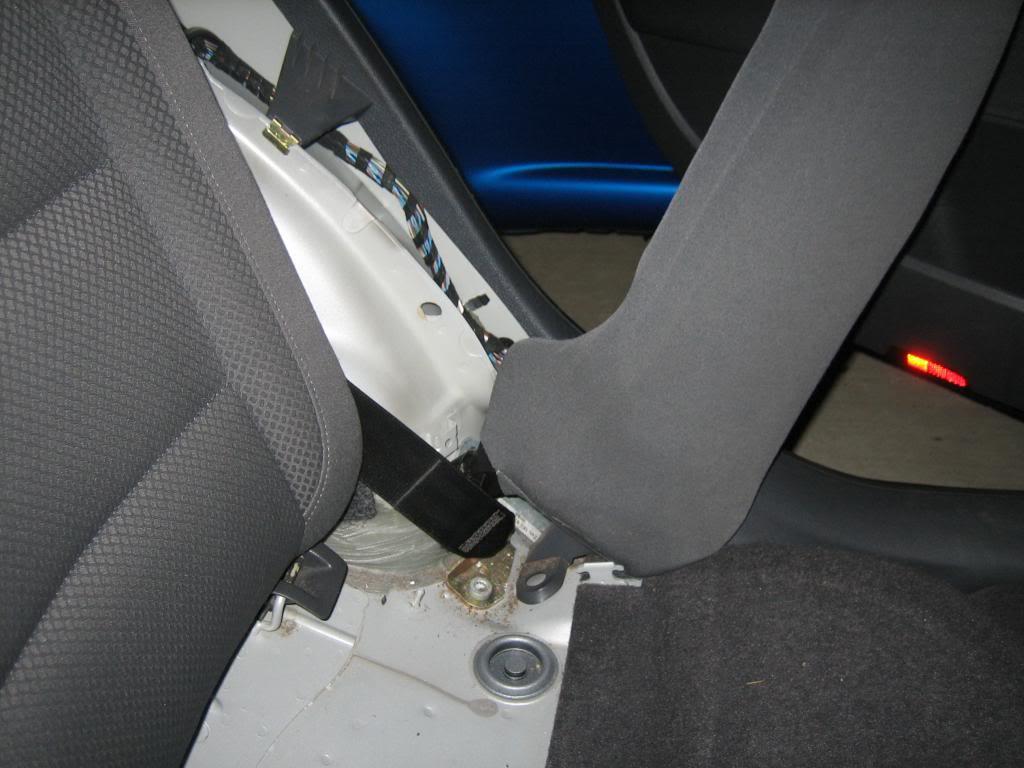


Undo torx bolt at top of boot side trim:
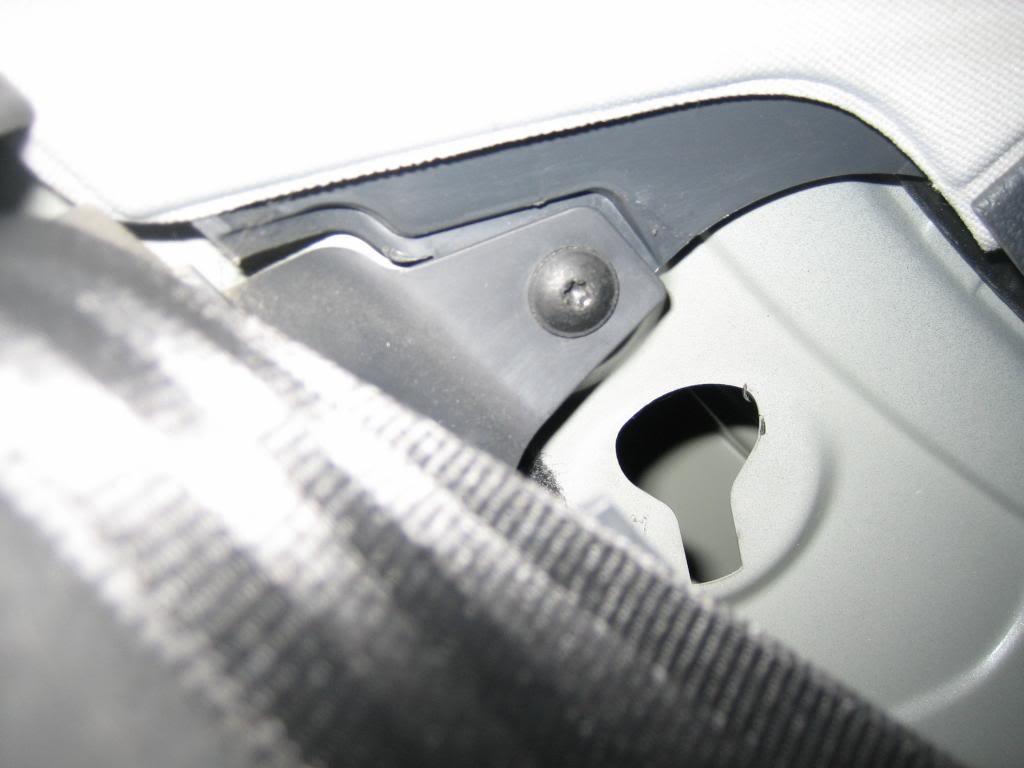


Undo torx bolt at hatch side of boot side trim (I just pulled the boot lip trim aside to access rather than fully remove as I'm lazy :) ):
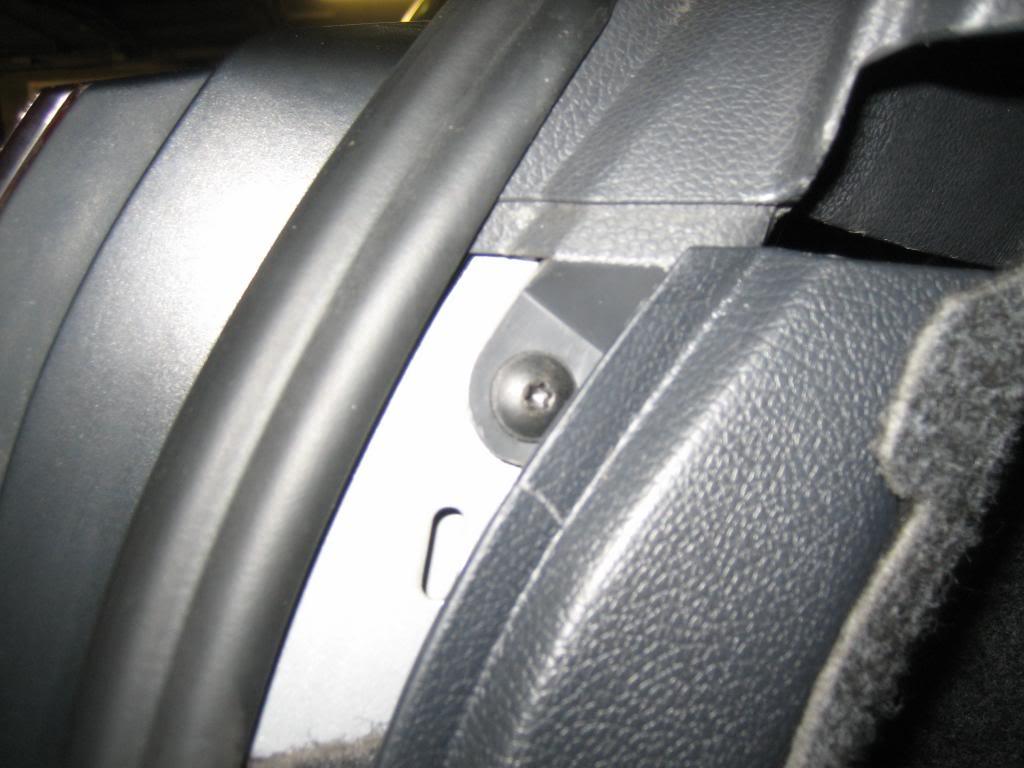


Remove boot side trim:


Pull down rear liner edge trim:


Undo C-Pillar trim bolt:


Undo rear side sill trim torx and remove trim:
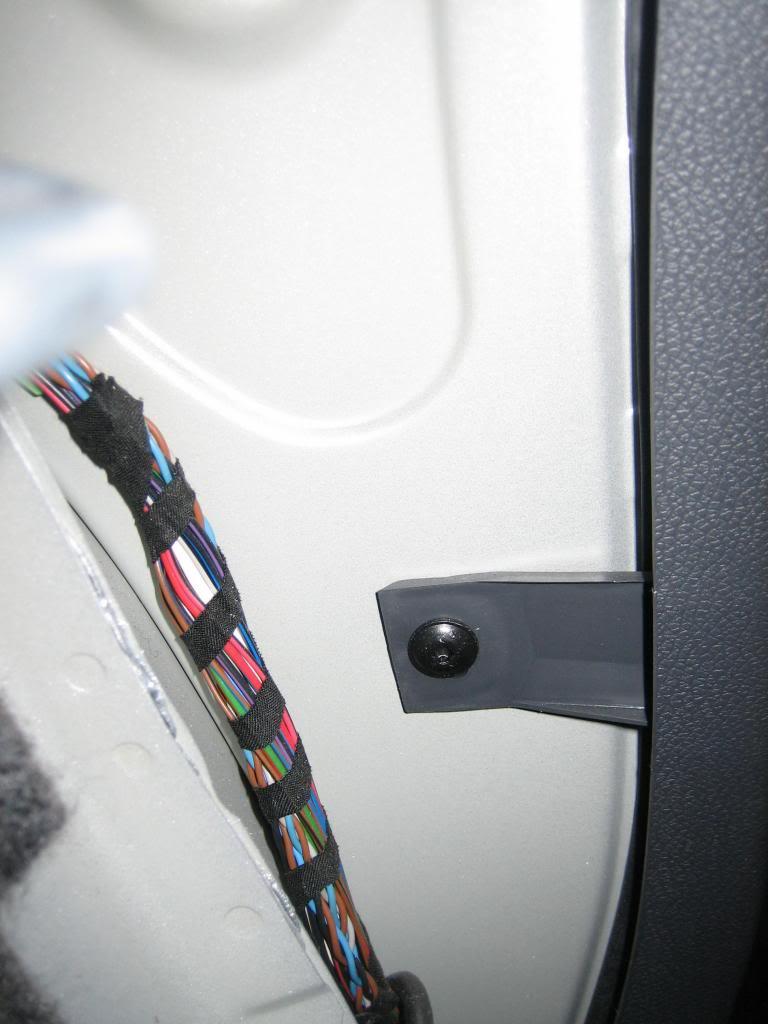


Remove Airbag emblem and undo torx bolt:


Remove C-Pillar trim and unplug the three old connectors from the harness:
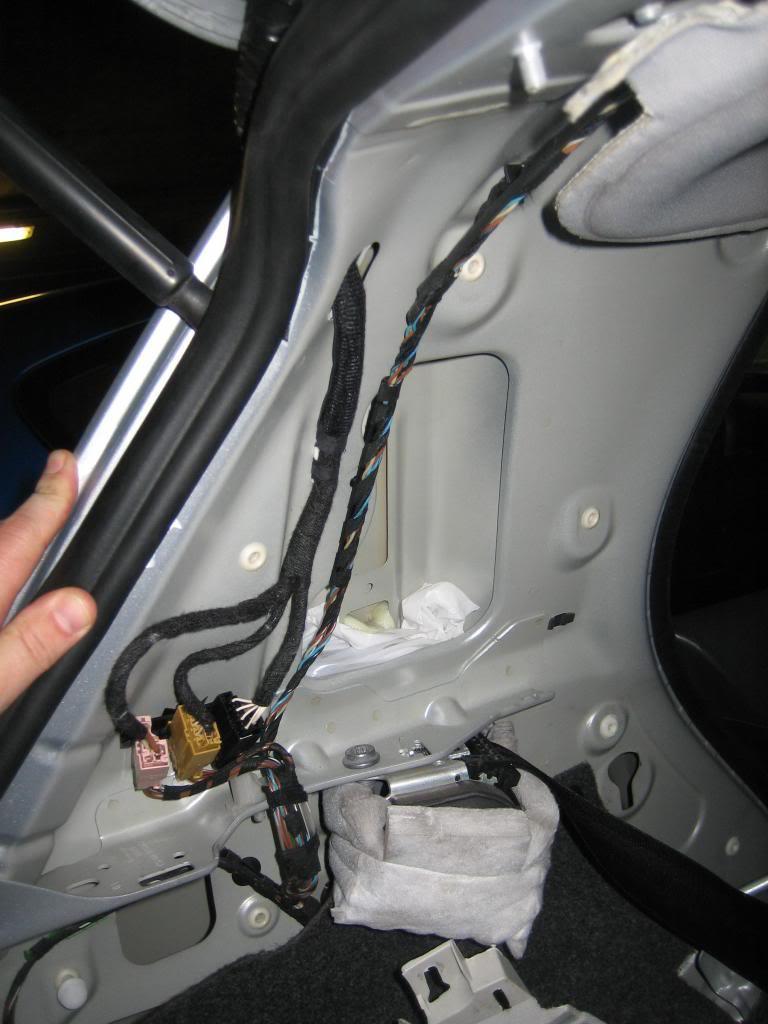


Thread the old harness back through the tailgate. I cut the old cable to the high level brake light at this point as I hadn't worked out how to remove it. I later worked out you could carefully pop out the brake light with a penknife in the end and disconnect that way:


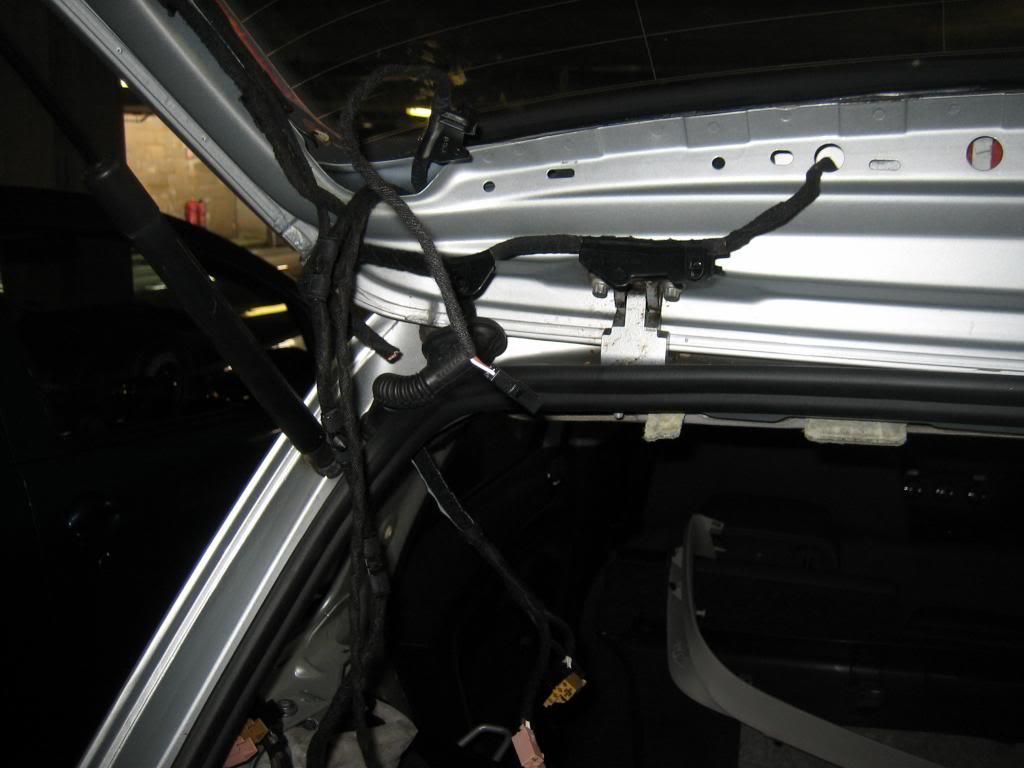
Remove inner boot trim (two screws recessed in inner grab handles and then just pull, there are 4 clips along top, 4 at the bottom and two at the sides) Also just pull and remove inner rear window trim and then you should have access to everything:


To avoid confusion I cut the old loom at the hatch side and threaded the new one through to the body. I then only removed the old wiring as I had connected up the replacement as its a long loom with various plugs/connectors. Push the high level brake light cable back in through the hatch and connect up and carefully push light back in.

Golf 2.0 GT TDI 2004 - BKD | Passat 2.0 Sport 2002 - AZM | VCDS 12.12.2 HEX-USB+CAN

Offline Degudodger

  • Just look at my post count
  • ******
  • Thank You
  • -Given: 53
  • -Receive: 86
  • Posts: 1547
    • Flickr
Re: How-To: Replacing Tailgate Wiring Loom
« Reply #1 on: July 29, 2014, 09:11:22 pm »
Good write up  :happy2:
2016 Mk7 Golf GTD - Reflex Silver with stuff.

VCDS Hex+Can - Will code for beer!

Offline holepunch

  • Always Involved
  • ****
  • Thank You
  • -Given: 9
  • -Receive: 7
  • Posts: 99
    • Email
Re: How-To: Replacing Tailgate Wiring Loom
« Reply #2 on: July 30, 2014, 10:32:33 pm »
Thanks for posting this. My rear wash wipe has died and I noticed that several of the passenger side wires have broken/fractured. I've previously taken off the c pillar trim and dropped the headlining to fit a DAB aerial but it's helpful to see how some has approached the problem.


Offline JIEEE

  • Taking part
  • ***
  • Thank You
  • -Given: 0
  • -Receive: 0
  • Posts: 27
Re: How-To: Replacing Tailgate Wiring Loom
« Reply #3 on: August 10, 2014, 07:03:33 pm »
V good guide indeed.

Offline GTIEagles

  • Won't Shut up.
  • *****
  • Thank You
  • -Given: 10
  • -Receive: 22
  • Posts: 582
    • Email
Re: How-To: Replacing Tailgate Wiring Loom
« Reply #4 on: October 08, 2015, 12:47:24 pm »
@Mykkael Thanks for writing up a great guide.

I was just reading it through and I'm slightly concerned about the part where you need to remove the high level brake light. Am I right in saying that you need to remove the light in order to connect it up to the new loom? If you do I'm not sure that you can remove it without breaking it (on the GTI at least) as I have been reading through a few guides where people have replaced the high level brake light and the only means of replacing it was by breaking apart... See here: http://www.golfgtiforum.co.uk/index.php?topic=121067.0

I'm hoping to tackle this job next week and don't want to be in the position where I can't finish it all on one day!

Offline GTIEagles

  • Won't Shut up.
  • *****
  • Thank You
  • -Given: 10
  • -Receive: 22
  • Posts: 582
    • Email
Re: How-To: Replacing Tailgate Wiring Loom
« Reply #5 on: October 09, 2015, 10:57:18 am »
Does anyone else know if you have to remove the high level brake light in order to connect the new loom?

Offline GTIEagles

  • Won't Shut up.
  • *****
  • Thank You
  • -Given: 10
  • -Receive: 22
  • Posts: 582
    • Email
Re: How-To: Replacing Tailgate Wiring Loom
« Reply #6 on: October 14, 2015, 05:20:10 pm »
I managed to change the harness in mine on Monday, much help to the brilliant guide. No major horror stories to report apart from one the clips breaking on the upper tailgate trim and a couple of broken lugs on the bottom trim when removing.

Regarding the high level brake light, there is no way of connecting the plug without removing the light so what I did instead was cut the old lead that was connected to the light and I crimped in some miniature spade connectors and connected this directly into the plug from the new harness. Bearing in mind I had no idea if the light would work anyway as it hasn't worked since I have had the car I was pleasantly surprised when it worked! Which is great news when I nearly brought a replacement light when it wasn't needed! £50 saved :)
« Last Edit: October 14, 2015, 05:22:11 pm by GTIEagles »

Offline dale.edwards

  • Just Arrived
  • **
  • Thank You
  • -Given: 2
  • -Receive: 1
  • Posts: 10
    • Email
Re: How-To: Replacing Tailgate Wiring Loom
« Reply #7 on: October 16, 2015, 07:47:56 pm »
Hi Guys,
I found this guide on the forum and changed my tailgate wiring harness this week.
Was so happy with the instructions that I signed up as a member.
The only issue was the high level break light, on the GTi you cannot remove the high level break light without removing the spoiler, which will break, and this is very expensive to replace.
There is a guide to cheat this and break the light out, replacing it all without removing the spoiler, this involves buying a light from VW which will be around £50 inc VAT.
However with a lot of patience I managed to connect the new wiring into the plug of the old light though the small holes in the tailgate using a screwdriver, torch and pair of tweezers. Took me hours but worth it in the end as I did not spend any extra money at all.
Thank you for the guide, I had been trying to figure out why my rear wiper motor was not working for around six months, really happy to have it sorted.

Offline GTIEagles

  • Won't Shut up.
  • *****
  • Thank You
  • -Given: 10
  • -Receive: 22
  • Posts: 582
    • Email
Re: How-To: Replacing Tailgate Wiring Loom
« Reply #8 on: October 19, 2015, 09:04:43 am »
Hi Guys,
I found this guide on the forum and changed my tailgate wiring harness this week.
Was so happy with the instructions that I signed up as a member.
The only issue was the high level break light, on the GTi you cannot remove the high level break light without removing the spoiler, which will break, and this is very expensive to replace.
There is a guide to cheat this and break the light out, replacing it all without removing the spoiler, this involves buying a light from VW which will be around £50 inc VAT.
However with a lot of patience I managed to connect the new wiring into the plug of the old light though the small holes in the tailgate using a screwdriver, torch and pair of tweezers. Took me hours but worth it in the end as I did not spend any extra money at all.
Thank you for the guide, I had been trying to figure out why my rear wiper motor was not working for around six months, really happy to have it sorted.

@dale.edwards Hats off to you for managing to do this, you must have the patience of a saint! I was lazy so I left the old lead plugged in, cut the end and crimped some mini spade connectors to it and connected that straight into the plug of the new loom. I'm amazed you actually managed to unplug it and connect using tweezers! Nice to see it can be done though.

Offline Rampage

  • Always Involved
  • ****
  • Thank You
  • -Given: 16
  • -Receive: 6
  • Posts: 190
Re: How-To: Replacing Tailgate Wiring Loom
« Reply #9 on: July 09, 2016, 05:31:08 pm »
A massive thank you for this great write up. Replaced my rear loom and took a little over 4 hrs
thanks to this guide  :congrats:

Offline Rampage

  • Always Involved
  • ****
  • Thank You
  • -Given: 16
  • -Receive: 6
  • Posts: 190
Re: How-To: Replacing Tailgate Wiring Loom
« Reply #10 on: July 09, 2016, 05:39:24 pm »
This link is useful for anyone with a 3 door for trim removal

http://www.mk5golfgti.co.uk/forum/index.php/topic,5474.0.html

Offline r5gtt

  • Just look at my post count
  • ******
  • Thank You
  • -Given: 342
  • -Receive: 334
  • Posts: 5586
Re: How-To: Replacing Tailgate Wiring Loom
« Reply #11 on: July 12, 2016, 10:23:01 am »
Brilliant write up mate people who never knew and couldn't do can now have a go  :happy2:

Offline probedb

  • Always Involved
  • ****
  • Thank You
  • -Given: 16
  • -Receive: 7
  • Posts: 242
Re: How-To: Replacing Tailgate Wiring Loom
« Reply #12 on: July 25, 2021, 06:29:01 pm »
Just another thanks. Sorry this is such an old thread but it's really useful! Getting the bloody back seat out was the worst for me  :grin: One thing to add for me is you'll need to loosen off the rear wiper to get the driver's side lights connector through.

For now I've shorted the high-level brake light connector otherwise none of them work. I think you can get the connector out blind. Just wish I could get my index fingers through the holes instead of just my little fingers.

I now have working boot latch and rear wiper again. Fingers crossed when it gets to winter I'll have rear demist again as well 😀