Make a donation

Author Topic: What did you and your MKV do today?  (Read 2736314 times)

Offline 99hagued

  • Always Involved
  • ****
  • Thank You
  • -Given: 5
  • -Receive: 23
  • Posts: 203
Re: What did you and your MKV do today?
« Reply #10770 on: September 29, 2017, 07:14:21 pm »
@MIJ_JAGGER
Any photos with them illuminated?

Also interested any chance of a pic of the lights against a wall to see what the beam pattern is like mate

Offline MIJ_JAGGER

  • Won't Shut up.
  • *****
  • Thank You
  • -Given: 103
  • -Receive: 78
  • Posts: 765
Re: What did you and your MKV do today?
« Reply #10771 on: September 29, 2017, 09:52:27 pm »
@MIJ_JAGGER
Any photos with them illuminated?
Your inbox is full

Offline v4rley

  • Just look at my post count
  • ******
  • Thank You
  • -Given: 29
  • -Receive: 104
  • Posts: 1026
Re: What did you and your MKV do today?
« Reply #10772 on: September 30, 2017, 07:09:53 am »
Sorted  :laugh:

Offline thenorthster

  • Taking part
  • ***
  • Thank You
  • -Given: 5
  • -Receive: 0
  • Posts: 30
Re: What did you and your MKV do today?
« Reply #10773 on: September 30, 2017, 04:30:48 pm »
Had the alloys and calipers repainted - Oxford Performance Autos

2005 Mk5, 3 door, tornado red (naturally)

Offline neilw

  • Always Involved
  • ****
  • Thank You
  • -Given: 16
  • -Receive: 26
  • Posts: 385
Re: What did you and your MKV do today?
« Reply #10774 on: September 30, 2017, 08:56:43 pm »
A few little jobs this afternoon. Put some cable ties through my intake to stop it falling off into the fans again. Dirty but effective.

I fitted a new steering wheel surround trim, as the one on the car was creaking and driving me mad, looks like it was being caused by a bit of missing sound deadening material, which was making the whole thing not sit straight.

Then got some tiny flys out of the interior light lens, and polished out a scratch on it.
Edition30 #0002 R-Tech Stage2

Offline The Red Warrior

  • Always Involved
  • ****
  • Thank You
  • -Given: 20
  • -Receive: 32
  • Posts: 279
    • Email
Re: What did you and your MKV do today?
« Reply #10775 on: October 01, 2017, 01:43:24 am »
As I mentioned in another thread, I'm upgrading my speakers in my GTI. Mine has the 10 speaker option and I'm just upgrading the 6 speakers in the two front doors. (Well, that's the plan for now anyway).
I've chosen Morel components (mostly based on GLIDN's recommendation) and have gone with their Virtus 3 way components and their recently released 4 channel amplifier.

Initially I was going to install the amp in the boot behind the carpet behind the left wheel well. I wanted to install it under the driver's seat but it wouldn't fit there. I then decided I might try installing it under the passenger seat and move my Bluetooth module that is currently there to under the driver's seat. I removed the front seat this time to properly work out what could be done. I worked out that it only required a small amount of trimming of the carpet and removal of the seriously over-engineered housing for the airbag plug.

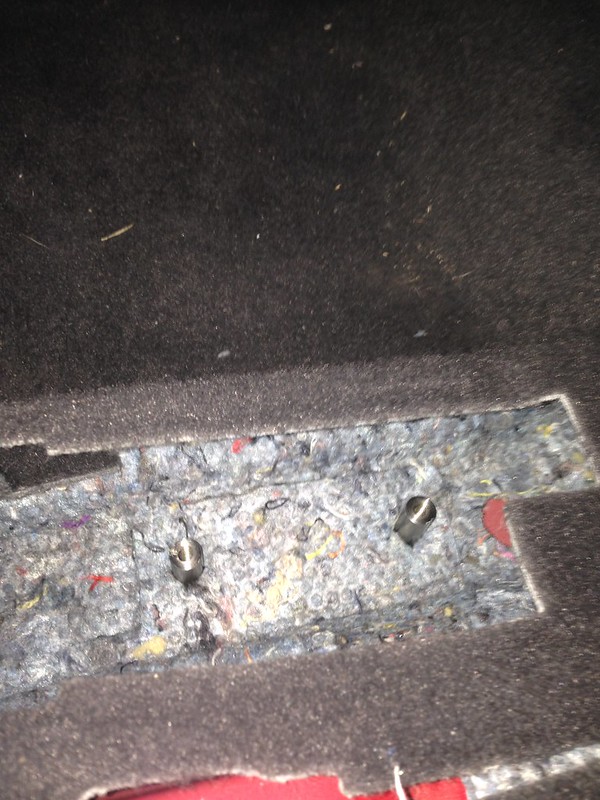
Under the carpet and sound proofing I found these 2 M6 studs on the floor:


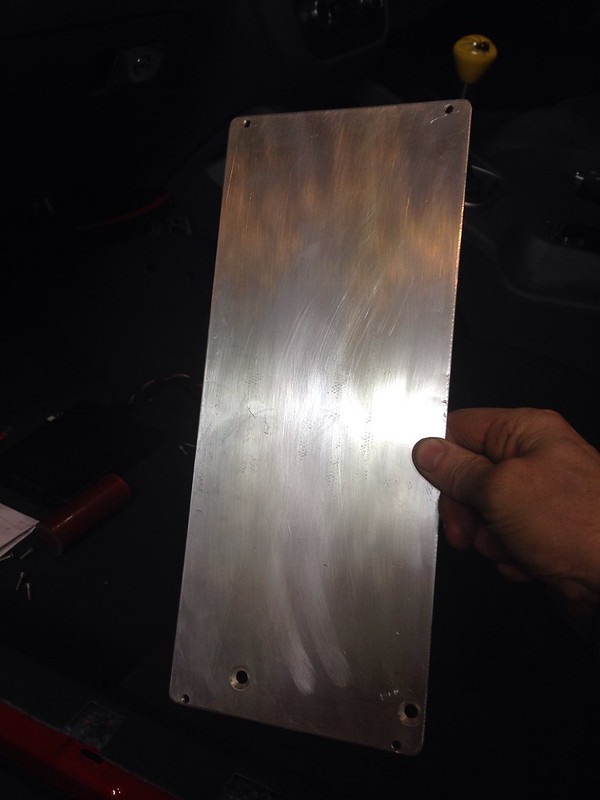
I'm not sure what they are there for. Maybe to bolt down a factory amp? Anyway, I decided to use them to mount an adaptor plate that the amp could then bolt to. So I made the adaptor plate from 3mm aluminium:


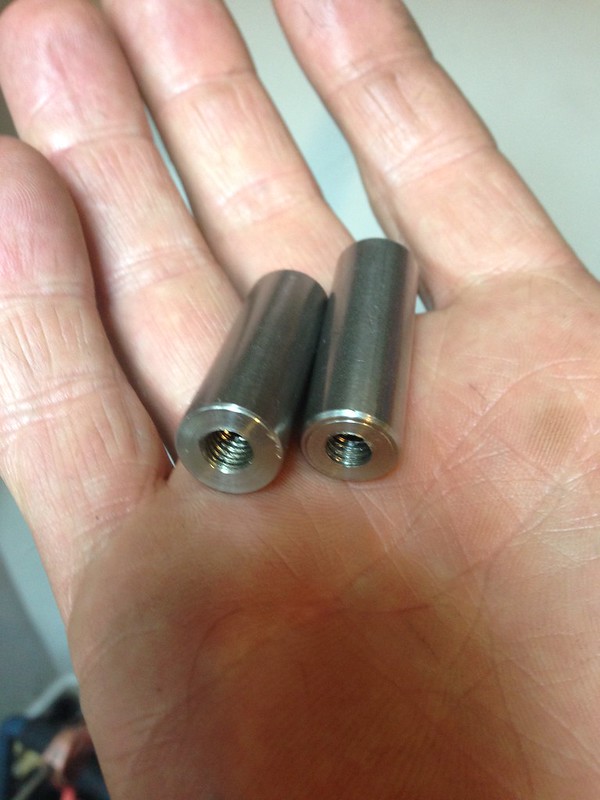
I also turned up some stainless spacers to raise the adaptor plate to the correct height under the carpet:


and installed them onto the M6 studs:


and bolted the adaptor plate to the spacers which I don't seem to have a photo of.

Installing the amp here made doing the wiring much simpler as I ran the power lead along the left into the engine bay and will run the sound wires into the exiting holes in the carpet for the Bluetooth module and up to the radio.

After removing the housing for the airbag plug, it left this hole:
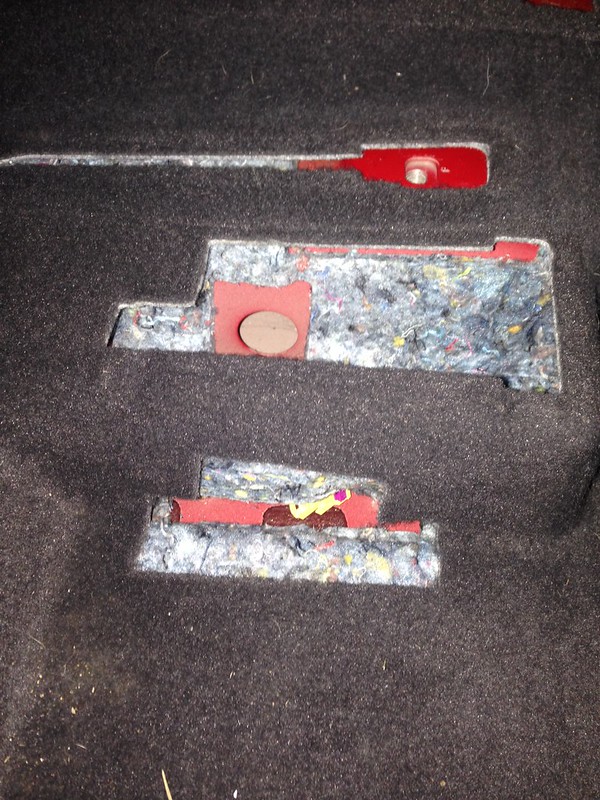


which was perfect for running the power and ground wires and then joining the factory loom. So a urathane grommet was turned up to go in the hole to protect the wires:
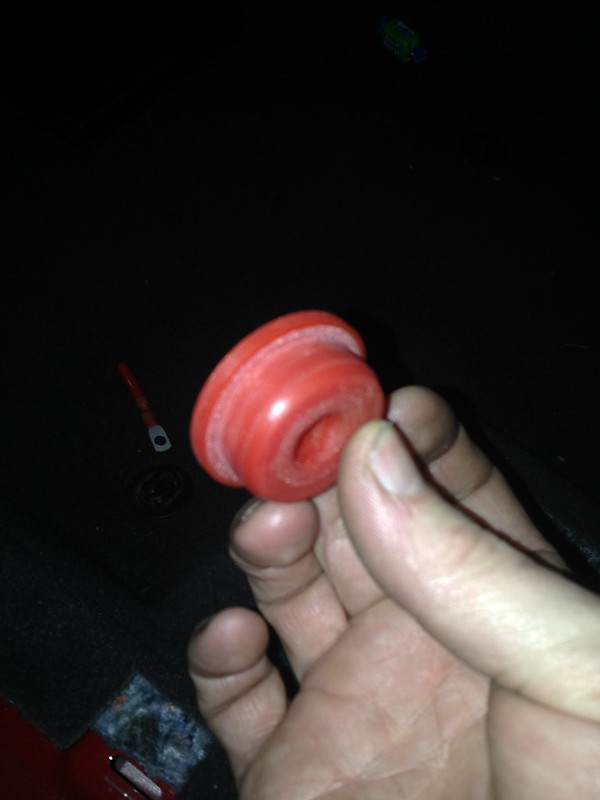


and installed into the hole:


The ground wire was attached to an existing grounding point:
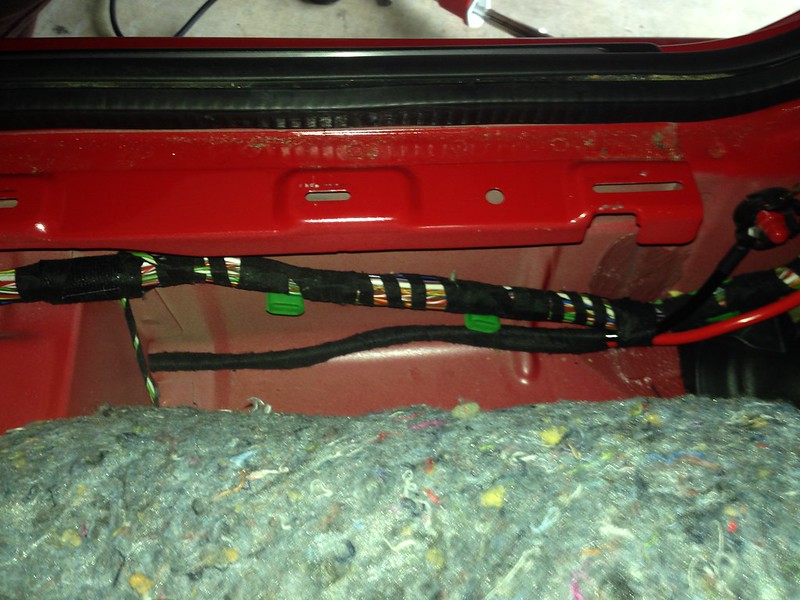


and the power wire fed up along the factory loom and through the rubber grommet in the fire wall to behind the battery. I had already run a tube through here for my boost gauge so at least this step was familiar to me. I also wanted to connect the power wire to the bus bar with a factory fuse for a cleaner look than directly to the battery. I'd seen a few posts on this set-up before and definitely wanted to copy it. I picked up the necessary parts from a wrecker. They even came off a red Mk5 GTI so I couldn't have asked for a more OEM solution  ;) The fuse was also a 50 amp which was what the Morel amp recommended.
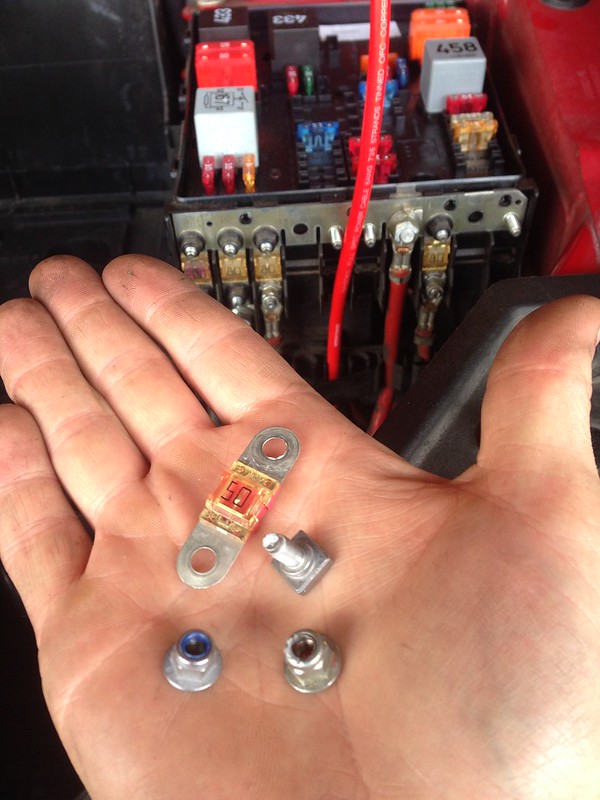


and bolted it all together:
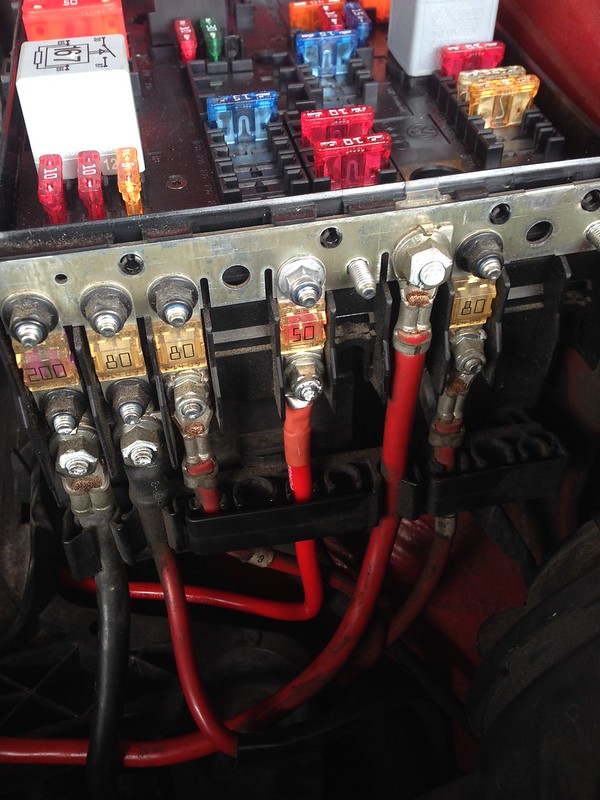


So, that was the amp installed, and powered:
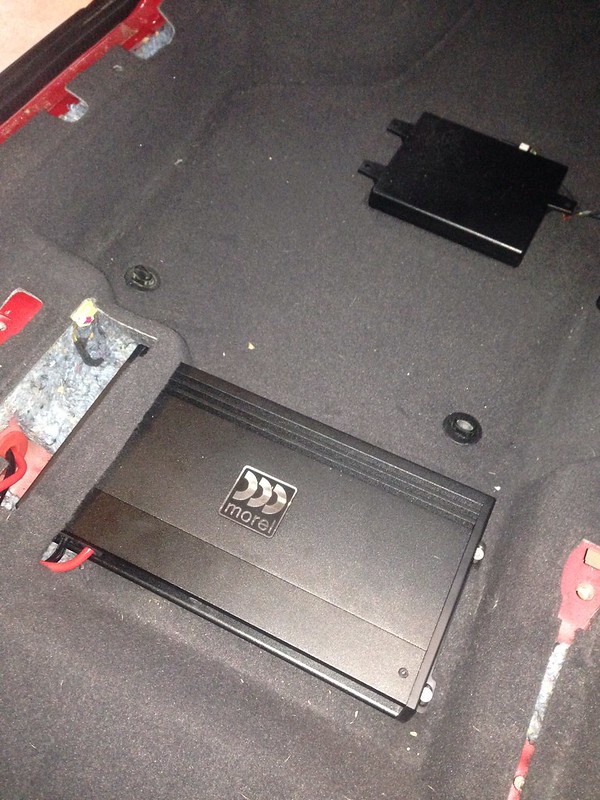


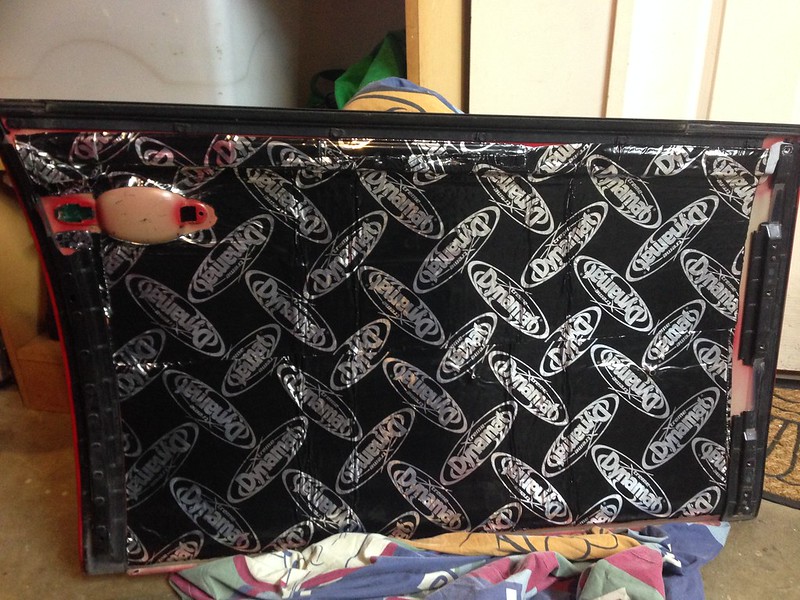
Next step was to install sound deadening to the doors. Fortunately the Mk5 outer door skins can be unbolted making applying the sound deadening simple. I used Dynamat as it was readily available close to my work. Initially I was going to use Stinger brand but it would have been the same price and taken time to deliver and I was keen to get started. I thought I'll do only the left door, then the right door as I can learn on the left before doing the right. That way I can still drive around with no passenger seat and left door card. So I Dynamatted (is that even a word?) the outer skin. I then removed all the wiring loom, grommets, woofer and crossover from the inner skin and Dynamatted that. I re-installed the loom and grommets and then the outer door skin. Hmmm, my door handle wasn't returning properly. Looking up inside the door I could see there is very little clearance behind the recess behind the door handle and the mechanism it bolts to. The Dynamat there was interfering with it's operation so I had to remove the outer door skin and trim back the Dynamat there. Doh!
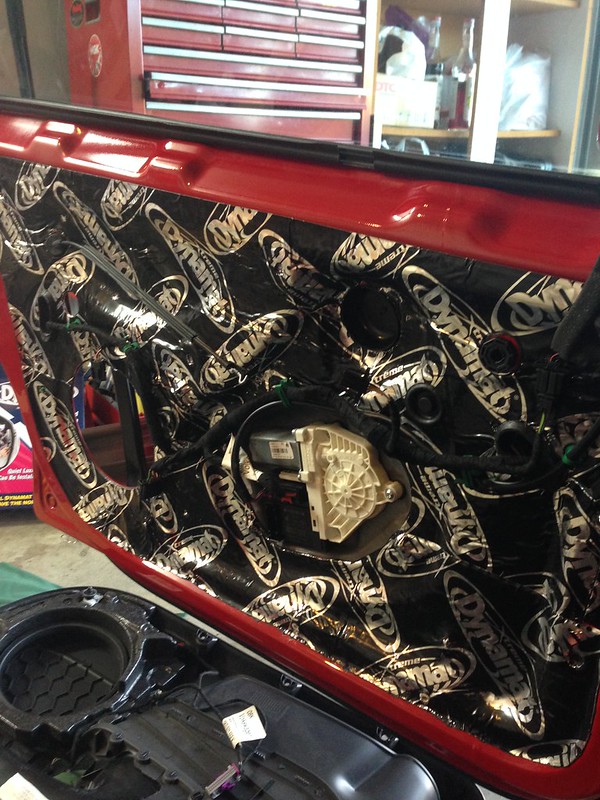


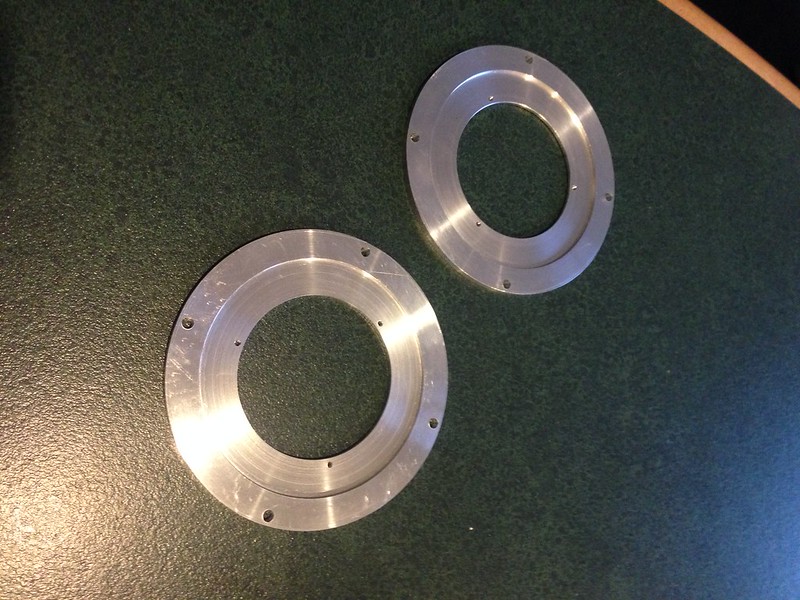
Of course nothing was going to be straight forward installing different speakers and crossovers, but I knew that going in so was prepared to make what was needed. Measured up existing mounting points and bolt patterns for the new speakers and set about making some adaptor spacers.

Mid adaptors:


Woofer adaptors coming along nicely:
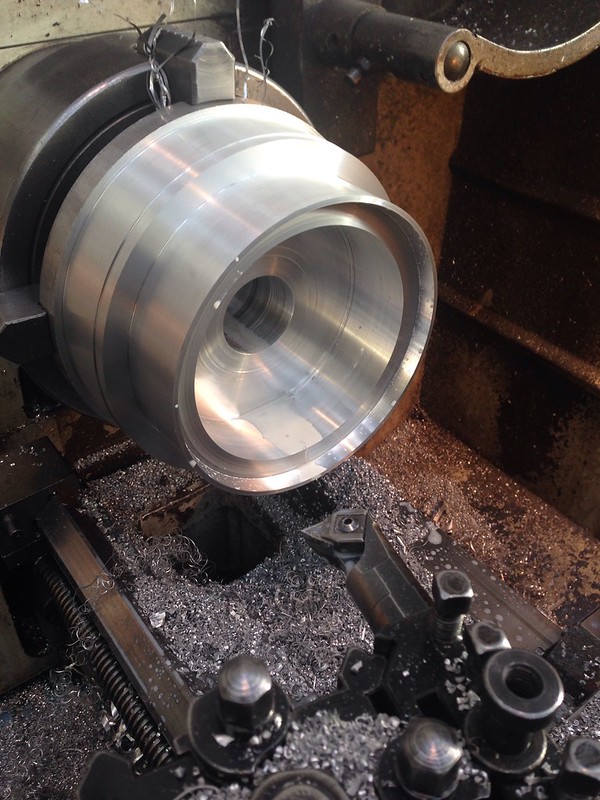


and complete:


That's about as far as I've got so far. I didn't have all the stainless steel bolts to bolt the adaptors and speakers on so that will probably happen tomorrow. I'm still waiting for my Stinger RCA leads and Audio Control line out converter to arrive too. Hopefully I'll finish all this next weekend.

After all this work and money it better sound good  ::)
« Last Edit: October 01, 2017, 02:19:58 am by The Red Warrior »

Offline ROH ECHT

  • Just look at my post count
  • ******
  • Thank You
  • -Given: 113
  • -Receive: 149
  • Posts: 2116
  • K04 PLAY....ZOOM DIS!
Re: What did you and your MKV do today?
« Reply #10776 on: October 01, 2017, 03:44:58 am »
Finally found a moment to finish installing the Torqbyte PM3 today. It's running well, and low actual fuel pressure now stays equal to the specified request.
&t=64s
« Last Edit: October 05, 2017, 02:43:21 am by ROH ECHT »
K04 PLAY...K04 turbo/S3 INJ. & FMIC/FORGE FMTC, TB hose, & WG actuator/GIAC's H.O. K04 & DSG TUNES/AWE DV/NEUSPEED P-FLO,TURBO OUTLET & TB pipe/AUTOTECH hpfp/BSH Eng.&Trans Mounts/H&R ARB's/Whiteline Performance springs & W.A.L.K./ECS stage-3 BBK/BILSTEIN B8's...ZOOM'DIS...GIAC K04 tune-2007 Volkswagen GTI: 12.823 @ 112.050 MPH__Voting for my Dragtimes link: http://www.dragtimes.com/Volkswagen-GTI-Timeslip-25700.html?r=1

Offline pudding

  • Global Moderator
  • Just look at my post count
  • *
  • Thank You
  • -Given: 2
  • -Receive: 690
  • Posts: 8353
Re: What did you and your MKV do today?
« Reply #10777 on: October 03, 2017, 10:47:24 am »
As I mentioned in another thread, I'm upgrading my speakers in my GTI. Mine has the 10 speaker option and I'm just upgrading the 6 speakers in the two front doors. (Well, that's the plan for now anyway).
I've chosen Morel components (mostly based on GLIDN's recommendation) and have gone with their Virtus 3 way components and their recently released 4 channel amplifier.

Initially I was going to install the amp in the boot behind the carpet behind the left wheel well. I wanted to install it under the driver's seat but it wouldn't fit there. I then decided I might try installing it under the passenger seat and move my Bluetooth module that is currently there to under the driver's seat. I removed the front seat this time to properly work out what could be done. I worked out that it only required a small amount of trimming of the carpet and removal of the seriously over-engineered housing for the airbag plug.

Under the carpet and sound proofing I found these 2 M6 studs on the floor:


I'm not sure what they are there for. Maybe to bolt down a factory amp? Anyway, I decided to use them to mount an adaptor plate that the amp could then bolt to. So I made the adaptor plate from 3mm aluminium:


I also turned up some stainless spacers to raise the adaptor plate to the correct height under the carpet:


and installed them onto the M6 studs:


and bolted the adaptor plate to the spacers which I don't seem to have a photo of.

Installing the amp here made doing the wiring much simpler as I ran the power lead along the left into the engine bay and will run the sound wires into the exiting holes in the carpet for the Bluetooth module and up to the radio.

After removing the housing for the airbag plug, it left this hole:


which was perfect for running the power and ground wires and then joining the factory loom. So a urathane grommet was turned up to go in the hole to protect the wires:


and installed into the hole:


The ground wire was attached to an existing grounding point:


and the power wire fed up along the factory loom and through the rubber grommet in the fire wall to behind the battery. I had already run a tube through here for my boost gauge so at least this step was familiar to me. I also wanted to connect the power wire to the bus bar with a factory fuse for a cleaner look than directly to the battery. I'd seen a few posts on this set-up before and definitely wanted to copy it. I picked up the necessary parts from a wrecker. They even came off a red Mk5 GTI so I couldn't have asked for a more OEM solution  ;) The fuse was also a 50 amp which was what the Morel amp recommended.


and bolted it all together:


So, that was the amp installed, and powered:


Next step was to install sound deadening to the doors. Fortunately the Mk5 outer door skins can be unbolted making applying the sound deadening simple. I used Dynamat as it was readily available close to my work. Initially I was going to use Stinger brand but it would have been the same price and taken time to deliver and I was keen to get started. I thought I'll do only the left door, then the right door as I can learn on the left before doing the right. That way I can still drive around with no passenger seat and left door card. So I Dynamatted (is that even a word?) the outer skin. I then removed all the wiring loom, grommets, woofer and crossover from the inner skin and Dynamatted that. I re-installed the loom and grommets and then the outer door skin. Hmmm, my door handle wasn't returning properly. Looking up inside the door I could see there is very little clearance behind the recess behind the door handle and the mechanism it bolts to. The Dynamat there was interfering with it's operation so I had to remove the outer door skin and trim back the Dynamat there. Doh!


Of course nothing was going to be straight forward installing different speakers and crossovers, but I knew that going in so was prepared to make what was needed. Measured up existing mounting points and bolt patterns for the new speakers and set about making some adaptor spacers.

Mid adaptors:


Woofer adaptors coming along nicely:


and complete:


That's about as far as I've got so far. I didn't have all the stainless steel bolts to bolt the adaptors and speakers on so that will probably happen tomorrow. I'm still waiting for my Stinger RCA leads and Audio Control line out converter to arrive too. Hopefully I'll finish all this next weekend.

After all this work and money it better sound good  ::)

Good work!  :happy2:


2007 ED30 | 2009 TDI 140 | 2016 BMW 330D

Offline swight

  • Taking part
  • ***
  • Thank You
  • -Given: 0
  • -Receive: 1
  • Posts: 29
  • My Ride: 2007 Golf GTi Edition 30 in Candy White
Changed the thermostat!
« Reply #10778 on: October 07, 2017, 07:19:04 pm »
Just finished after many hours changing my main thermostat on my Edition 30. Still got a couple of jobs to do before firing her up.

I have done all sorts of jobs on many cars over the years, but I can honestly say this job was a pig! No room to work, very badly designed engineering in my opinion.

I thought French cars were bad to work on, but this Eddy beats them all.

I will probably forget how bad the job was once I am driving her again  :smiley:

Offline Christiank

  • Won't Shut up.
  • *****
  • Thank You
  • -Given: 6
  • -Receive: 39
  • Posts: 616
  • My Ride: http://www.mk5golfgti.co.uk/forum/index.php/topic,110924.0.html
Re: What did you and your MKV do today?
« Reply #10779 on: October 07, 2017, 08:56:24 pm »
Had alot of rain today so had the time to finish this side assist indicator in my tweeter trim.


MK5 TDI 2.0 MY2005 - FULL OF RETROFITS:
MK6 dashboard - BCM converted - MK7 cruise control MFSW - PLA 2.0 - 3D instrument cluster - Discover Media 2 - Highline TPMS - 10ch Dynaudio system - KESSY with start button

Offline neilw

  • Always Involved
  • ****
  • Thank You
  • -Given: 16
  • -Receive: 26
  • Posts: 385
Re: What did you and your MKV do today?
« Reply #10780 on: October 07, 2017, 10:25:54 pm »
I Installed a new CV boot. Snapped off a ball joint bolt in the process so had to go get a new one of those too!
Edition30 #0002 R-Tech Stage2

Offline rich83

  • Just look at my post count
  • ******
  • Thank You
  • -Given: 165
  • -Receive: 802
  • Posts: 13444
    • MK5 Golf GTI
  • My Ride: https://www.mk5golfgti.co.uk/forum/index.php?PHPSESSID=5fumcbqd631pkmse9uvpuj4qea&/topic,19740.0.html
Re: What did you and your MKV do today?
« Reply #10781 on: October 08, 2017, 12:18:49 am »
Wheel refurb and new genuine centre caps and new AD08R on the front


« Last Edit: October 08, 2017, 12:24:12 am by rich83 »

Offline AJP

  • Global Moderator
  • Just look at my post count
  • *
  • Thank You
  • -Given: 392
  • -Receive: 316
  • Posts: 3212
Re: What did you and your MKV do today?
« Reply #10782 on: October 08, 2017, 05:46:24 pm »
Wheel refurb and new genuine centre caps and new AD08R on the front


What are those calipers? I Had it in my head you had TTRS. I might be wrong, or I might have missed an update. Both are entirely likely

EDIT: They are TTRS aren't they. I'd like to say it's the camera angle and build up of brake dust making them look like something else, but in reality it's my old tired brain creating illusions. As you were.
« Last Edit: October 08, 2017, 06:01:20 pm by AJP »

Offline rich83

  • Just look at my post count
  • ******
  • Thank You
  • -Given: 165
  • -Receive: 802
  • Posts: 13444
    • MK5 Golf GTI
  • My Ride: https://www.mk5golfgti.co.uk/forum/index.php?PHPSESSID=5fumcbqd631pkmse9uvpuj4qea&/topic,19740.0.html
Re: What did you and your MKV do today?
« Reply #10783 on: October 08, 2017, 06:00:39 pm »
TTRS... well they are actually Aston Martin DB9 items but they are the same essentially.

Offline AJP

  • Global Moderator
  • Just look at my post count
  • *
  • Thank You
  • -Given: 392
  • -Receive: 316
  • Posts: 3212
Re: What did you and your MKV do today?
« Reply #10784 on: October 08, 2017, 06:03:20 pm »
TTRS... well they are actually Aston Martin DB9 items but they are the same essentially.
Yeah apologies. Thought for a minute you'd changed them but I obviously need some sleep or something...