Heated Seats RetroFit (Using Kufatec Wiring Loom)The instructions provided by kufatec are translated from German and are not too good, so hopefully this guide will help.
It is based on my own findings, together with information obtained on the forum and help from forum members, I could not have installed my heated seats without their help, it's about time I give something back!
I have checked to make sure the details are correct, but if anything is wrong, or there is a better way of doing things, shout up and I will update the guide!
Ordering the correct loom

https://www.kufatec.co.uk/shop/en/seat-heating-harness-vw-golf-5-eos
When ordering a loom from Kufatec there are several options to choose from:
Year:
Options:- With seat adjustment (electric lumbar support adjustment)
- With seat adjustment / memory (electric lumbar support adjustment + memory seat function)
- Climatronic (dual zone / digital climate control)
- Climatic (non digital climate control)
- Non AC (non digital, manual heating without air con)
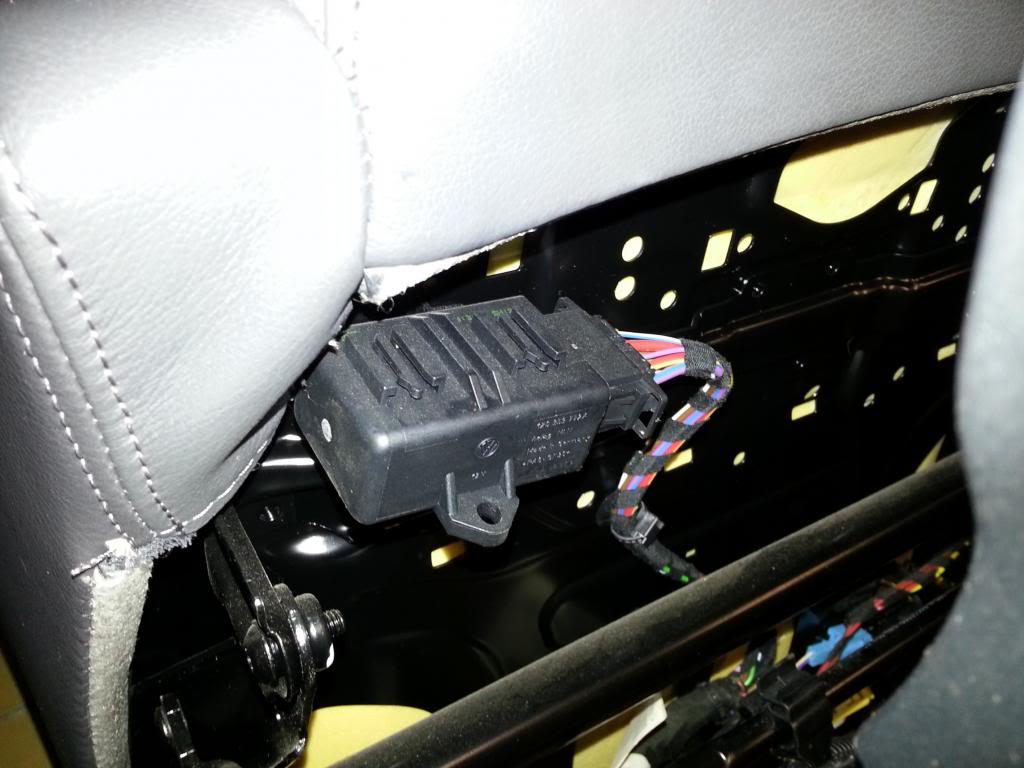
NOTE:The year is based on the year of the seats you are wiring up not the year of your car. This is normally labelled on the underside of the seats. However, an easy way to tell, is to look under both seats for a control module.
If you have a control module under both seats, you need the 'upto 2006' loom.
If you have a control module under only the passenger seat, you need the '2007 onwards' loom.
The wiring is different, so ensure you get the correct loom, and check before ordering.
If your seats have electric lumbar support (there will be a round 4 way switch on the side of the drivers seat), choose the 'with seat adjustment' option also.
Only one loom is required to wire up a pair of front heated seats.
DurationThis took me a full day, around 12 hours!, taking my time to ensure I didnt mess anything up, and it worked first time!
Tools you will need:- Mk5 Golf heated seats
- Heater control panel with heated seat buttons / dials.
- Kufatec wiring loom
- T20 torx bit
- M10 Spline bit
- Phillips screw driver
- Flat blade screw driver
- Trim removal tools
(If extending the wiring loom):- Wire cutters
- Wire strippers
- Soldering iron
- Insulation take / heat shrink
- Wire (same guage as existing wiring)
BEFORE STARTING, TAKE A VCDS SCAN OF YOUR CAR IF POSSIBLE, IT WILL BE USEFULL AS A REFERENCE LATER IF TROUBLESHOOTING IS REQUIREDPreparationLooms supplied by kufatec are made for left hand drive vehicles, where the fuse box, heated seat control module and CECM would be on the left hand side of the car.
Upto 2006The drivers / passengers plugs may be on the wrong side. Think this can be overcome by swapping the wires at the heater control panel, rather than having to swap the wires on the seats.
2007 onwardsTo enable the loom to fit a right hand drive car there are two options:
Extend the passenger seat connector (requires soldering and extenstion of wiring)You will see the loom to the drivers seat has more wires than the plug on the seat itself. This plug needs extending to go to the passenger seat where the control module is.
You can shorten the drivers side plug and use the wiring removed to extend the other side.
You will be left with 3 extra wires to extend, for which you will need to obtain some wire to extend them.
Swap the seat looms over (you will lose the use of the seat occupancy sensor unless you swap that also)Eddie-NL does it this way. By doing this you will lose the seat occupancy sensor, unless you swap that too which involves stripping the seat down further, although the occupancy warning can be coded out in VCDS so you dont need to worry about it.
You need to take one of the above options before installing the heated seat loom.
Stripping InteriorThere are three areas the wiring needs to goto:
- Drivers / Passenger Seats
- Fuse Box / CECM
- Heater control panel on dash
Ensure the ignition is off and key removed. You may wish to disconnect the battery,
although I didnt do this.
Drivers / Passenger Seats
Firstly, remove the two front seats, Theyre each held in by 4 spline head bolts:
Adjust the front seats fully to the rear.
Remove the plastic covers to reveal the loom connectors seated in a plastic holder.
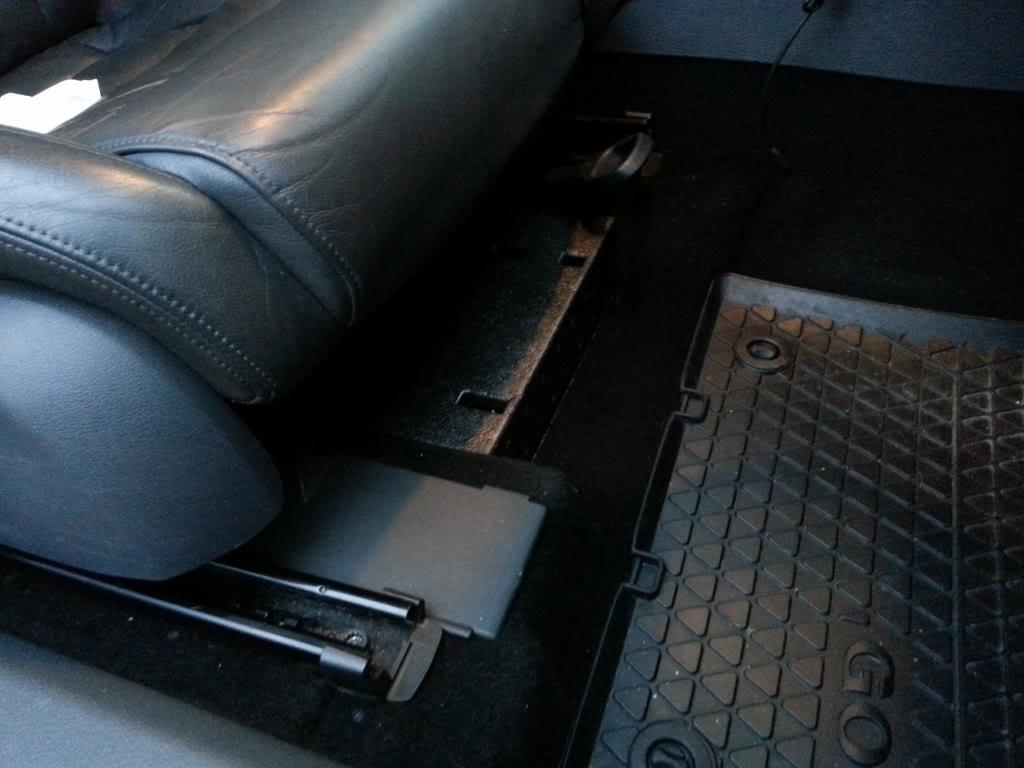
Unplug the air bag (yellow) and seat occupancy (black) connector plugs.
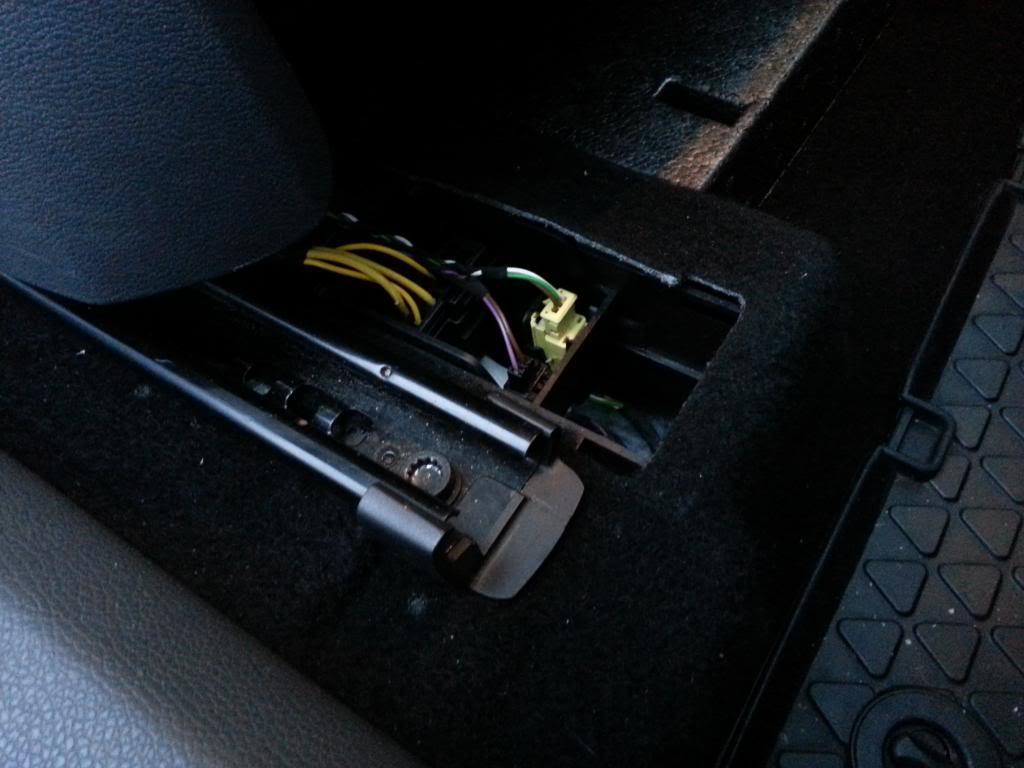
Undo the 2 front bolts using an M10 Spline bit.
Adjust the seat fully to the front and undo the 2 rear bolts.
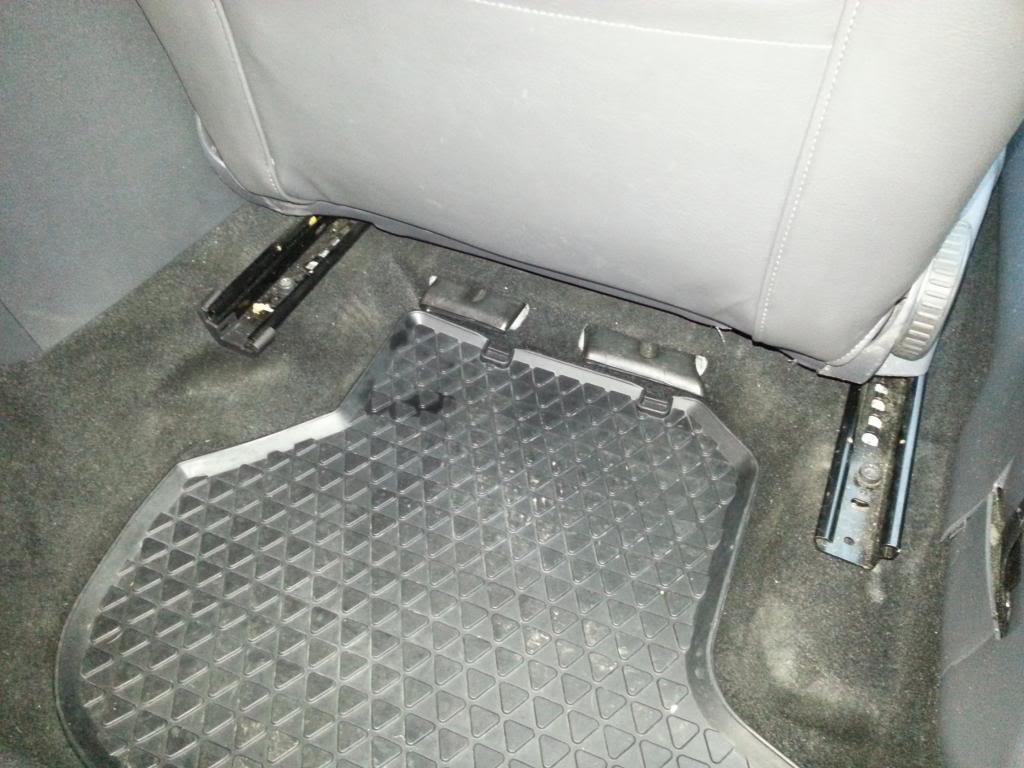
Do this for each seat, and remove both from the car.

Place both seats out of the way, I placed mine on some cardboard to prevent marking them.
Be carefull not to scratch your car with the seat rails while removing the seats, especially the steering wheel as it kinda gets in the way!
Fuse Box / CECMThe following involve working in and around the drivers footwell.
Using trim removal tools, prise off the fuse box cover on the end of the drivers side dash board.

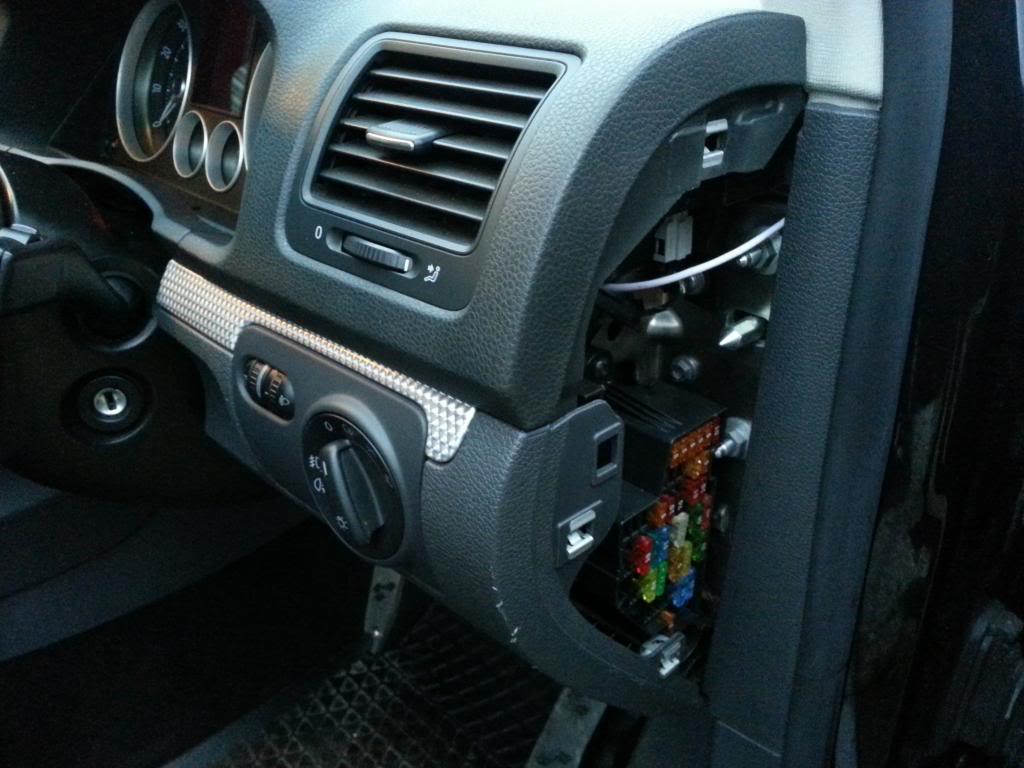
Remove the coin tray / cubby hole from the lower dash, below head light switch.


Remove 2 torx screws from behind the cubby hole.
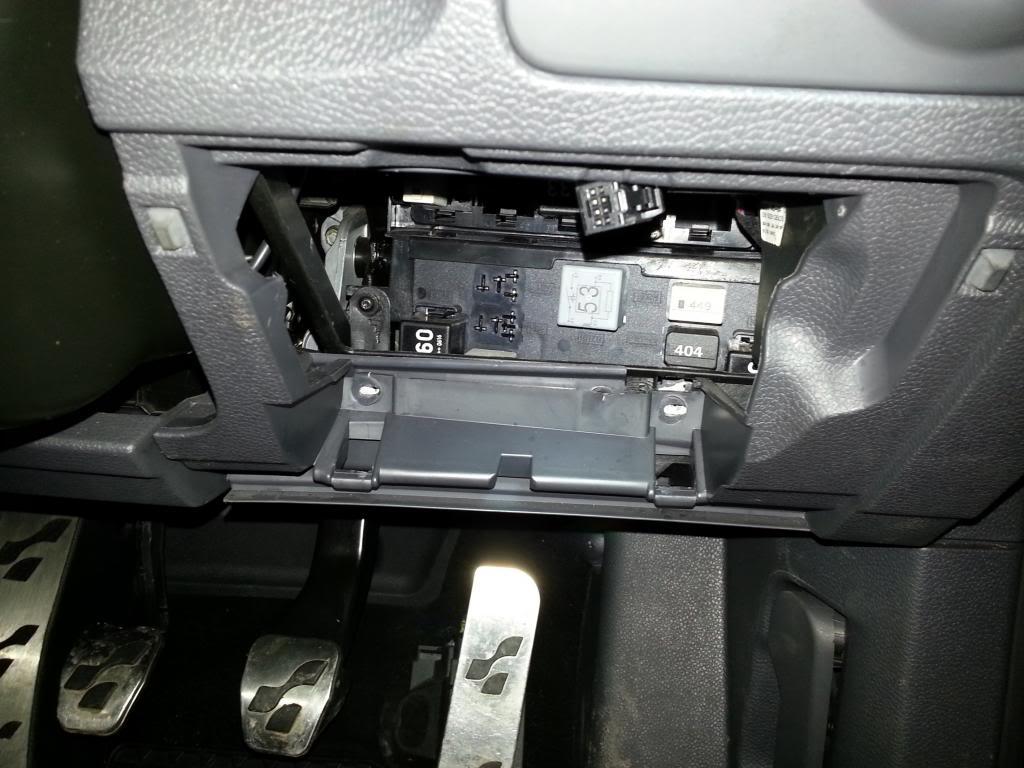
Remove the head light switch: From the off position, push in on the switch and turn the swith to the right while pulling back to withdraw the switch unit.
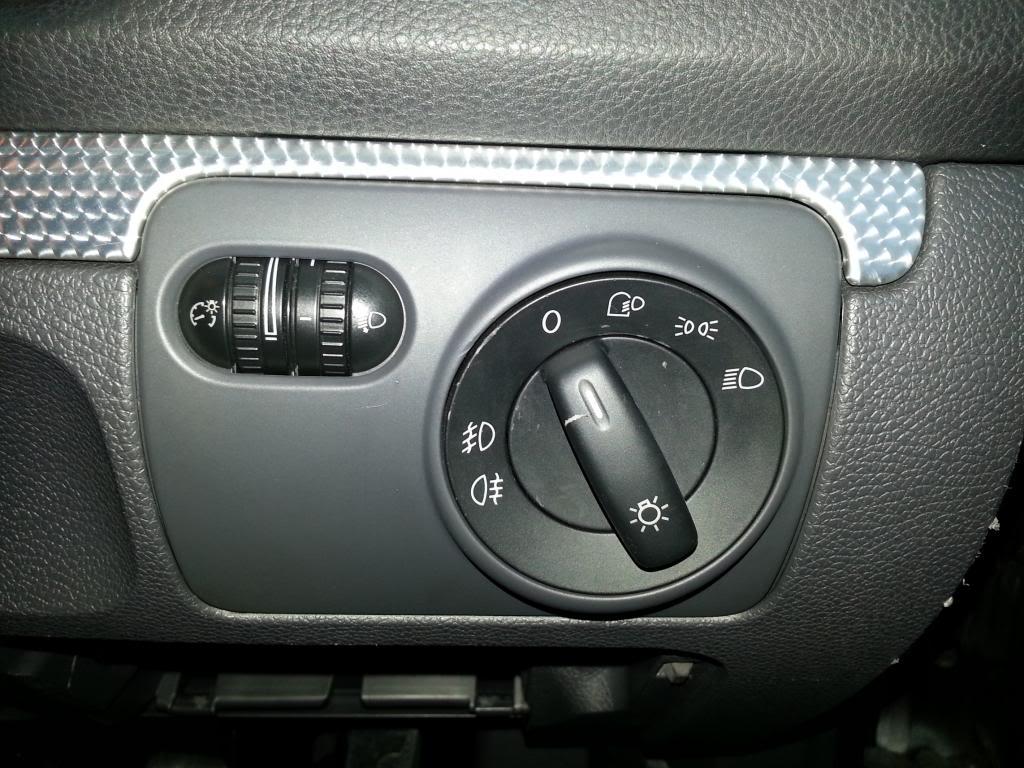

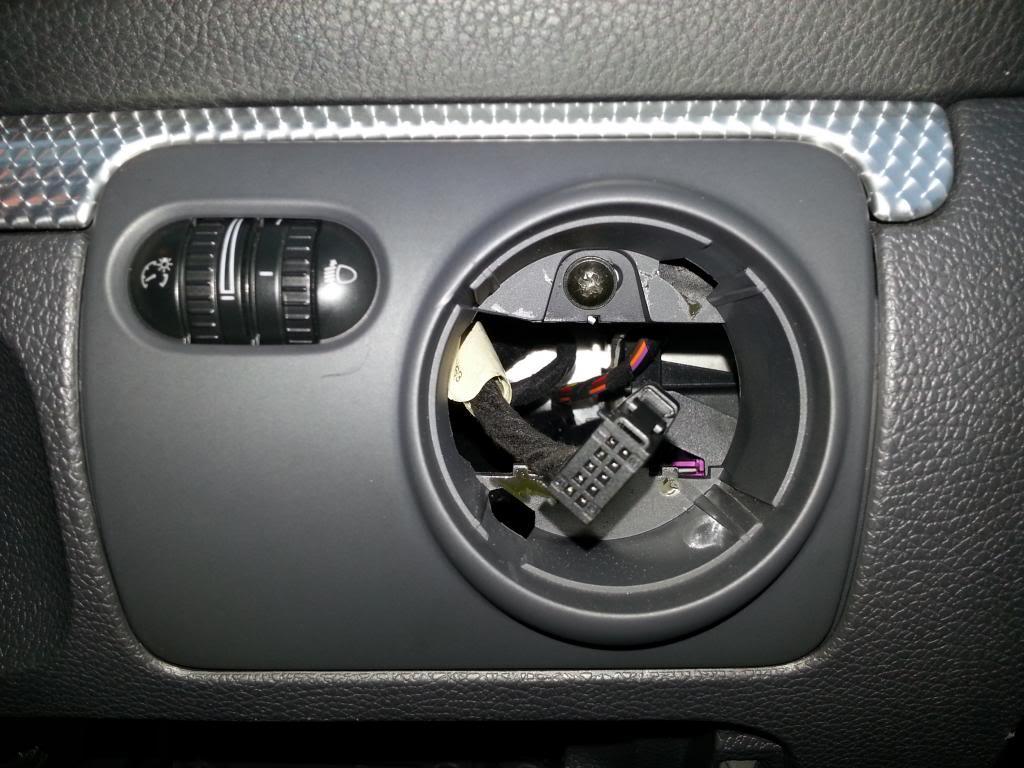
Remove phillips screw behind head light switch.
Pull trim from top of steering wheel cowel to reveal 2 torx screws below instrument cluster.
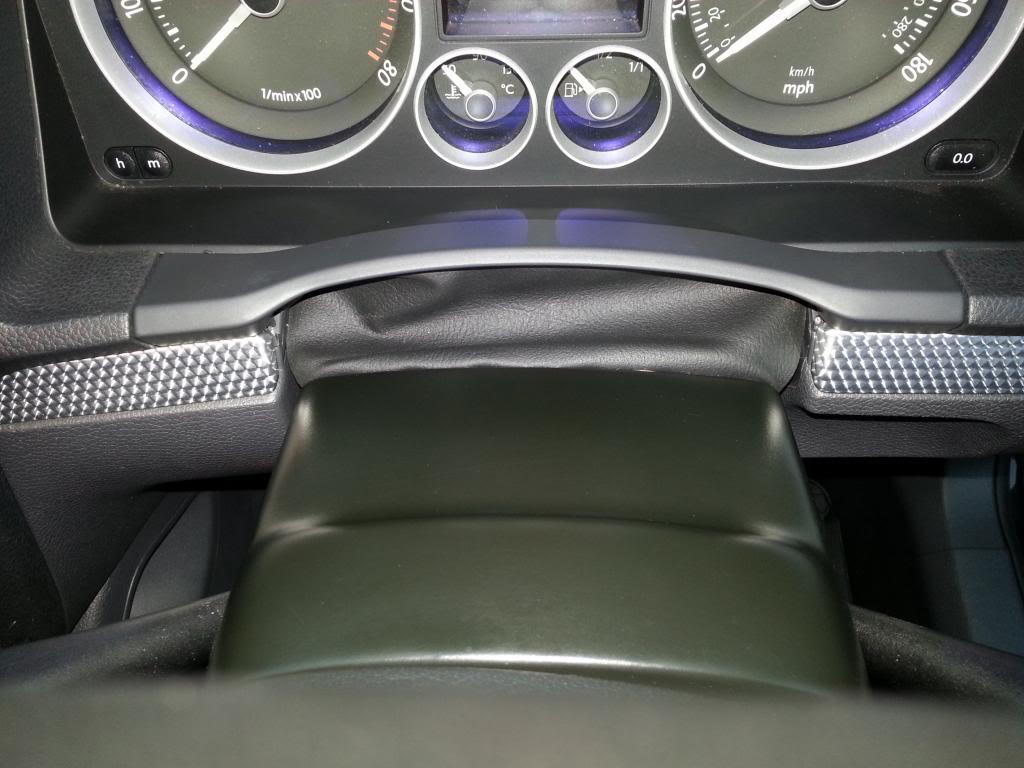

Remove torx screw from right hand side.

Remove plastic cover panel above pedals. (3 torx screws).

Once the panel is lowered, you will need to remove the courtesy light connector and the diagnostic port connector (press on 3 tabs with flat screw driver).
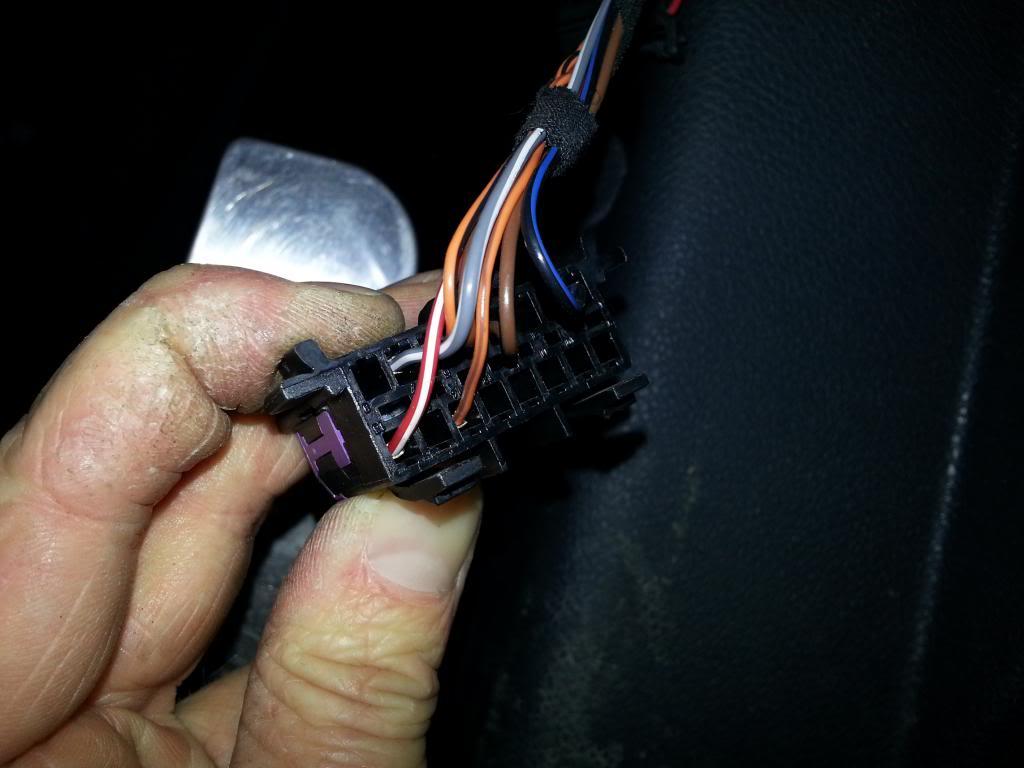
Withdraw plastic cover panel.
You should now be able to prise off the lower dash panel that holds the head light switch.
Starting from near the fuse box, prise the panel out and withdraw from the car, working towards the steering wheel.

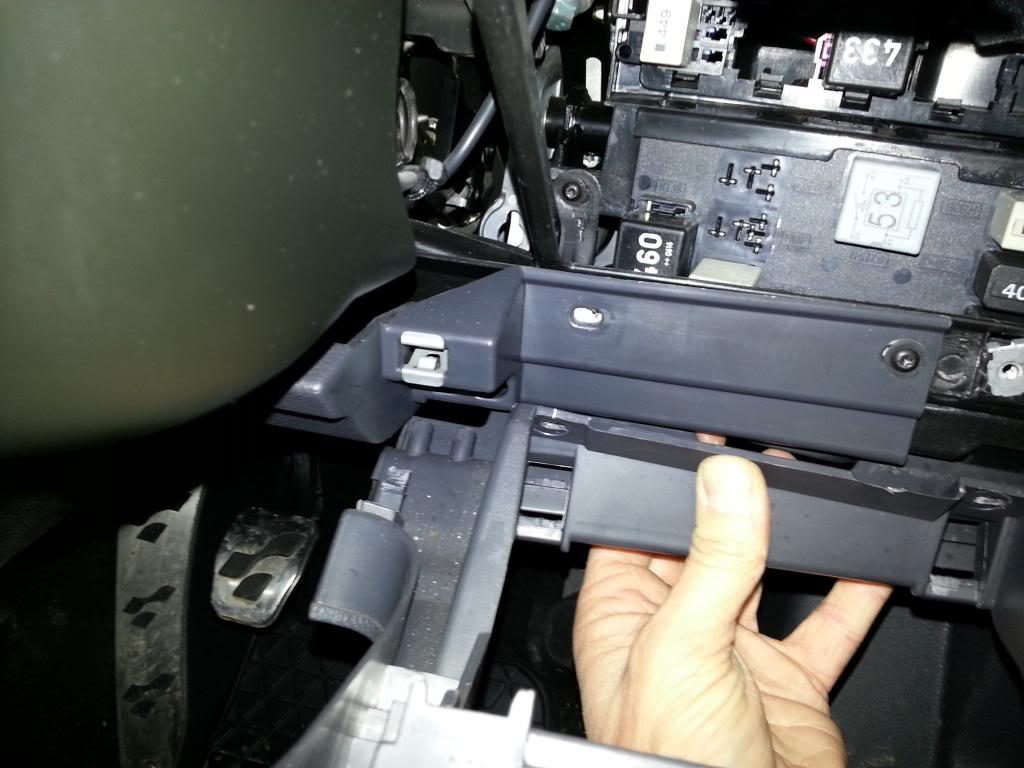
At the top and bottom of the fuse box there are 2 torx screws.
Remove these to loosen the fuse box, to give you better access to the rear of the fuse box.
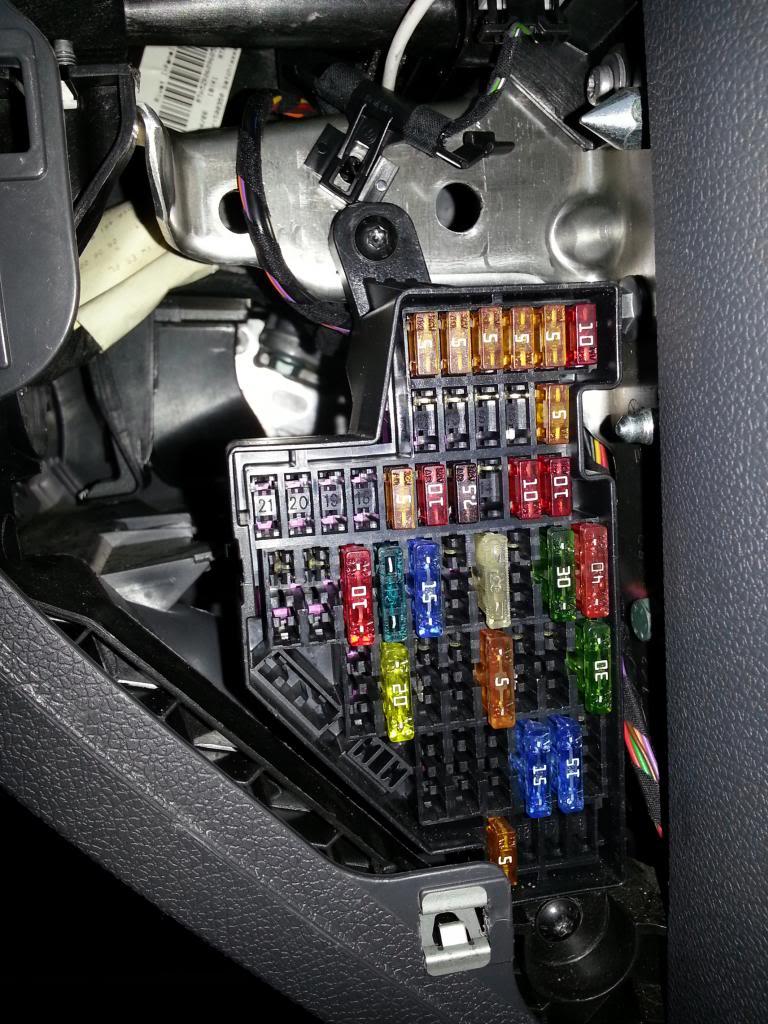
Around the side of the fuse box are little tabs that need to be lifted in order to prise the plastic cover off the rear of the fuse box, exposing the wiring and fuse circuits.
Next, lift up the drivers sill cover working for the end nearest the fue box, it will unclip, revealing the carpet underneath.
Now to remove the trim around the bonnet release lever.
First, unscrew the plastic retaining screw using a flat bladed screw driver to un screw it.
Then remove the bonnet release lever. Do this by pulling the lever as if to open the bonnet.
On the top side of the leave you will see a plastic tab that is a C shapped retaining clip. Prise that out, the bonnet lever can then be removed.
Undo the plastic screw from behind the lever.

You can then remove the plastic panel, revealing the wiring running upto the fuse box.
 Heater control panel on dash
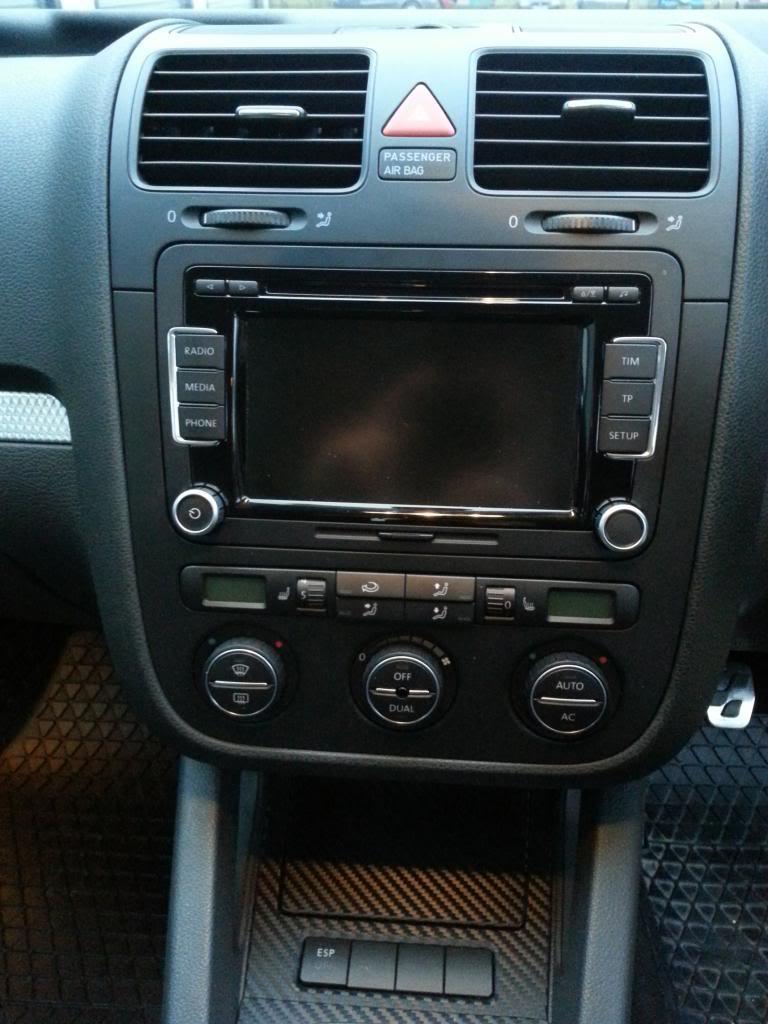
Remove the trim as if you were going to remove the head unit to reveal the heater control panel.
The control panel is held is with 4 torx screws wich you can now remove.
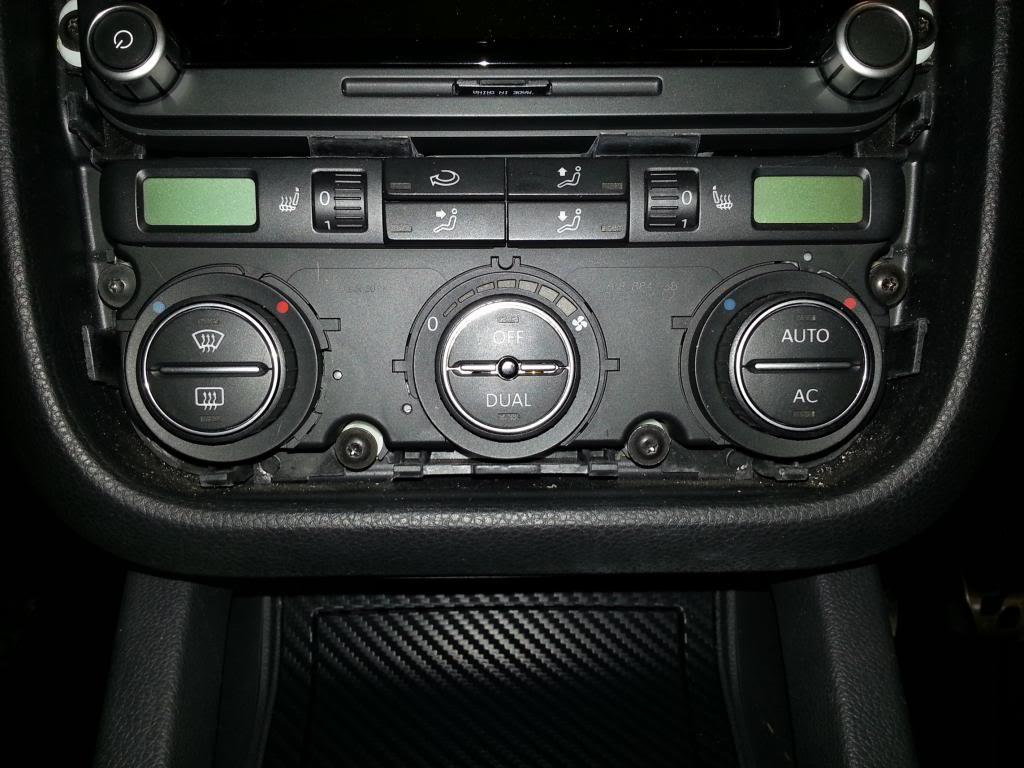
Withdraw the panel to reveal 3 connector plugs on the back.
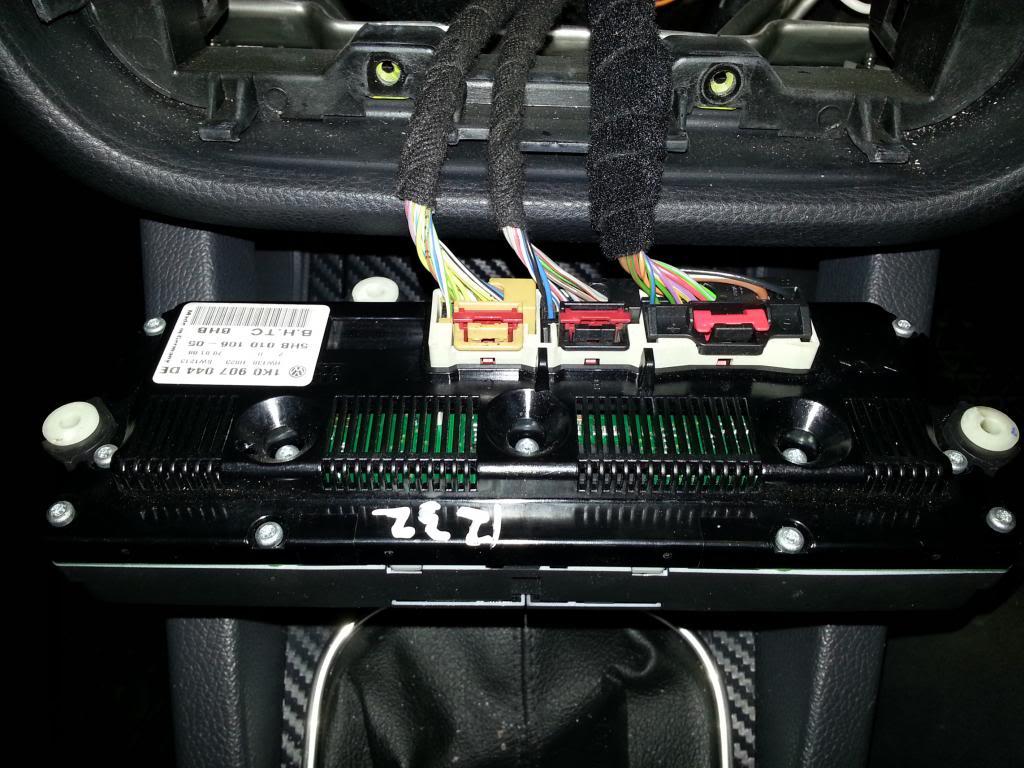
Take note of which connector goes where, they are colour coded to help.
Prise back the red tab on each connector.
Press the locking tab to release each connector and remove the panel from the car.
You will also need to remove the side panels from the centre console. This is where the cable will be routed both over to the passenger seat and upto the heater panel.

Remove pastic oval cover using trim tool.
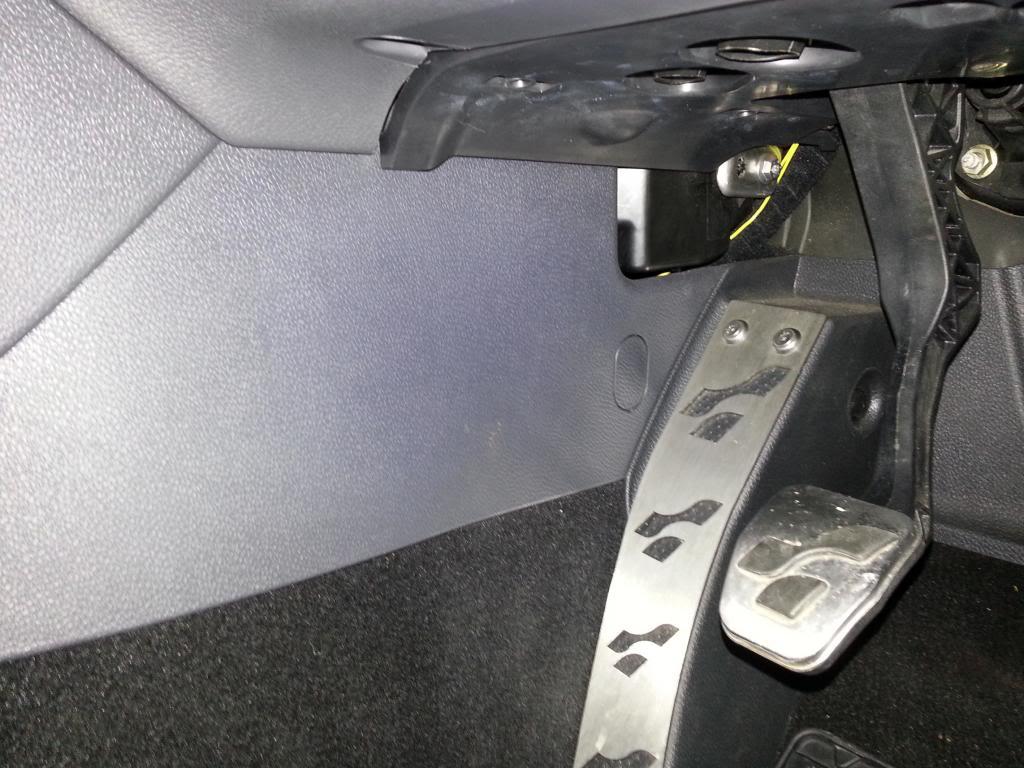
Remove torx screw behind cover. Pull down on pastic panel to unclip from position and withdraw from the car.
Installing LoomThe route of the loom will be the same for both looms (pre / post 2006), however the wiring colours / number of wires may be different.
See the tables below.
Upto 2006| Wire | Location (Climatronic) | Location (Climatic) | Location (No AC) | Purpose |
| Earth Wires | | | | |
| Brown wires (with ring connectors) | Earth point by bonnet release handle | Earth / Ground |
| Climate control panel | | | | |
| blue/yellow | Climate control panel (pin 10) | Climate control panel (pin 13) | Climate control panel (pin 11) | Passenger side heated seat switch |
| blue/red | Climate control panel (pin 11) | Climate control panel (pin 12) | Climate control panel (pin 15) | Drivers side heated seat switch |
| grey | Climate control panel (pin 12) | Climate control panel (pin 15) | Climate control panel (pin 16) | Feed to climate control panel, from CECM |
| Fuse Box | | | | |
| Red / white (thick wire) | fuse box, 37, 30A | - | - | Power for heated seats |
| Grey(thick wire) | fuse box, 34, 20A | - | - | Power for lumbar support |
| Grey (thin wire) | fuse box, 8, 5A. (If 4 and 7 are already in use) | - | - | Ignition live for heated seats |
| Black (double crimp) | fuse box, ??, ??. | - | - | Can someone confirm this one for me?? |
| CECM | | | | |
| White (double crimp) | CECM, Connector C, Pin 1 | - | - | Feed to central electrics |
 2007 Onwards
| Wire | Location (Climatronic) | Location (Climatic) | Location (No AC) | Purpose |
| Earth Wires | | | | |
| Brown wires (with ring connectors) | Earth point by bonnet release handle | Earth / Ground |
| Climate control panel | | | | |
| blue | Climate control panel (pin 10) | Climate control panel (pin 13) | Climate control panel (pin 11) | Passenger side heated seat switch |
| blue/red | Climate control panel (pin 11) | Climate control panel (pin 12) | Climate control panel (pin 15) | Drivers side heated seat switch |
| grey | Climate control panel (pin 12) | Climate control panel (pin 15) | Climate control panel (pin 16) | Feed to climate control panel, from CECM |
| Fuse Box | | | | |
| Red / white (thick wire) | fuse box, 37, 30A | - | - | Power for heated seats |
| Grey(thick wire) | fuse box, 34, 20A | - | - | Power for lumbar support |
| Grey (thin wire) | fuse box, 8, 5A. (If 4 and 7 are already in use) | - | - | Ignition live for heated seats |
| CECM | | | | |
| White (thin wire) | CECM, Connector C, Pin 1 | - | - | Feed to central electrics |
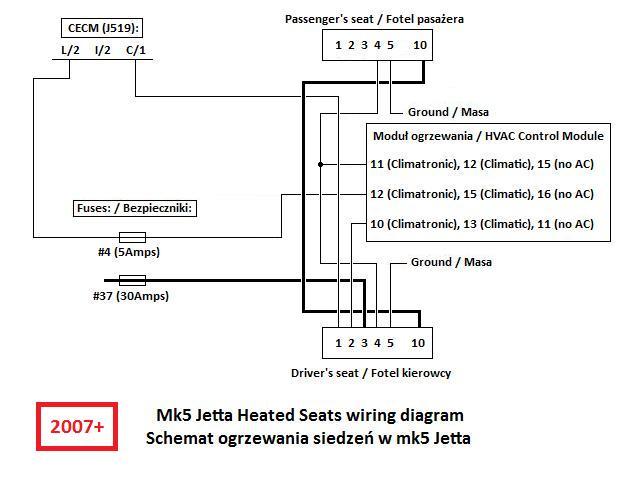
Wiring diagrams borrowed from this helpful blog:
http://furmanka.blogspot.co.uk/2009/01/mk5-podgrzewane-siedzienia-heated-seats.htmlNOTE: Do not connect any wires at this stage, just run them to the approximate location, checking the length of the loom allows the cables to reach their locations.Drivers SeatStarting on the drivers side near the base of the A pillar, lift of the carpet.
Feed the loom under the carpet with the plug going to to the drivers seat area.
You're aiming to get the female plug from the kufatec loom into position in the plastic holder.
HS28
Fuse Box / CECMNext route the wires towards the fuse box and CECM.

Run the wires along the base of the sill. You will see the route the factory loom takes upto the fuse box, try and follow this route.
There should be 2 or 3 wires to the fuse box.
One remaining wire should be routed upto the CECM just above the fuse box.
Heater control panel on dashAnother batch of 3 wires now needs to be run upto the climate control panel.
To make this easier, I kep the wires together by taping them with insulation tape.
Feed the wires under the carper, across the drivers side, to the base of the centre console.
Then run right, along the centre console towards the front of the car, until you hit the base of the main dashboard.

You should now be able to reach down the gap where the climate control panel goes, and reach up with your other hand through the gap at the bottom. Pull the wires up, through the gap, and run along the existing loom.
 Passenger Seat
Finally, the connector plug to the passenger seat.
Run the connector along a similar route to the centre console, at the base of the dashboard.
There is a gap under the centre console that you should be able to get your hand in and lift the carpet.
Feed the plug through as far as you can.
Go round to the passenger side and lift the car and pull the plug through.
You can then route the cable over to the passenger seat area. You're aiming to get the female plug from the kufatec loom into position in the plastic holder on the passenger side.
That should be all wires in their approximate locations.
I recommend going for a brew at this point... next up you'll be connecting wires to add the heated seats circuit to the car.Connecting LoomDrivers / Passenger SeatsSimply plug the connector each seat into the connector that will now be seated in the plastic housing, underneath each seat.

Once connected, you can refit the plastic cover.(You may want to leave this off for now in case you need to test your circuits)
Fuse Box / CECMUsing a flat bladed screw driver, prise back the lug allowing you to slide down the pink section of the fuse box. It only moves approx 5mm. Once this is done you will be able to insert terminal into the required locations on the fuse box.

Before inserting the terminals, check with a multimeter that they are live.

Once all terminals are in place, slide the pink section back up to lock terminals in place and re fit the fuse box using the screws.
Replace the plastic cover on rear of fuse box. (You may want to leave this off for now in case you need to test your circuits)
Heater control panel on dashIn order to add the new wires, the 20 pin connector block that plugs into the rear of the heater control panel needs to be separated.
Push down on the small tab and prise out the inner connector block.
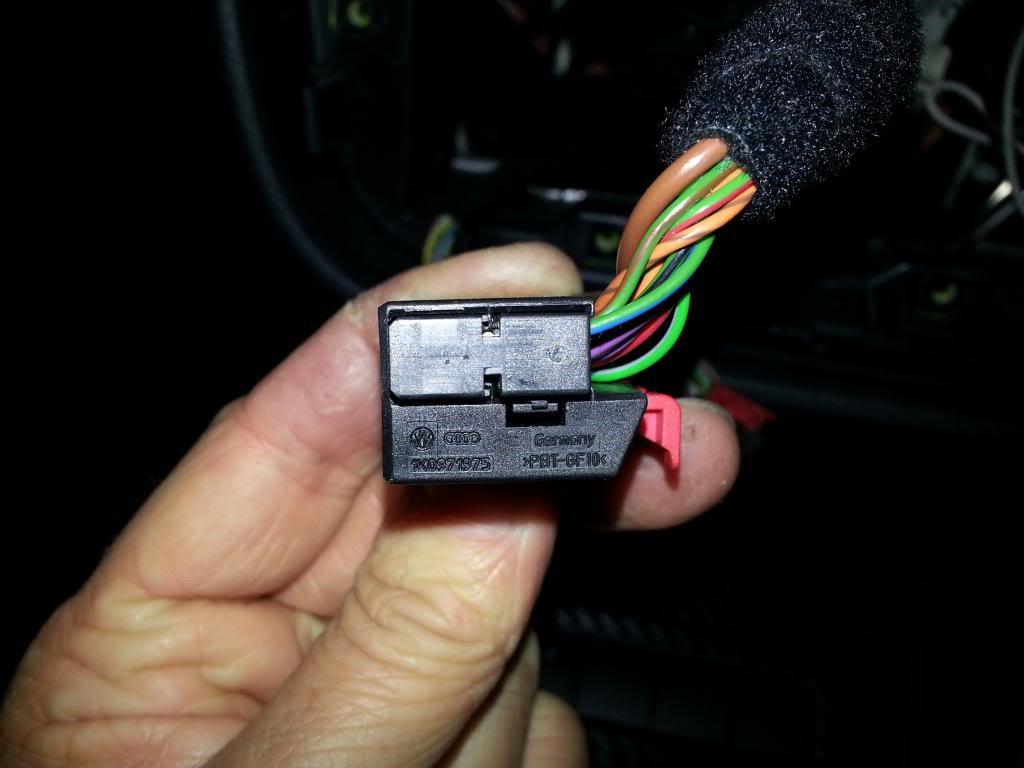

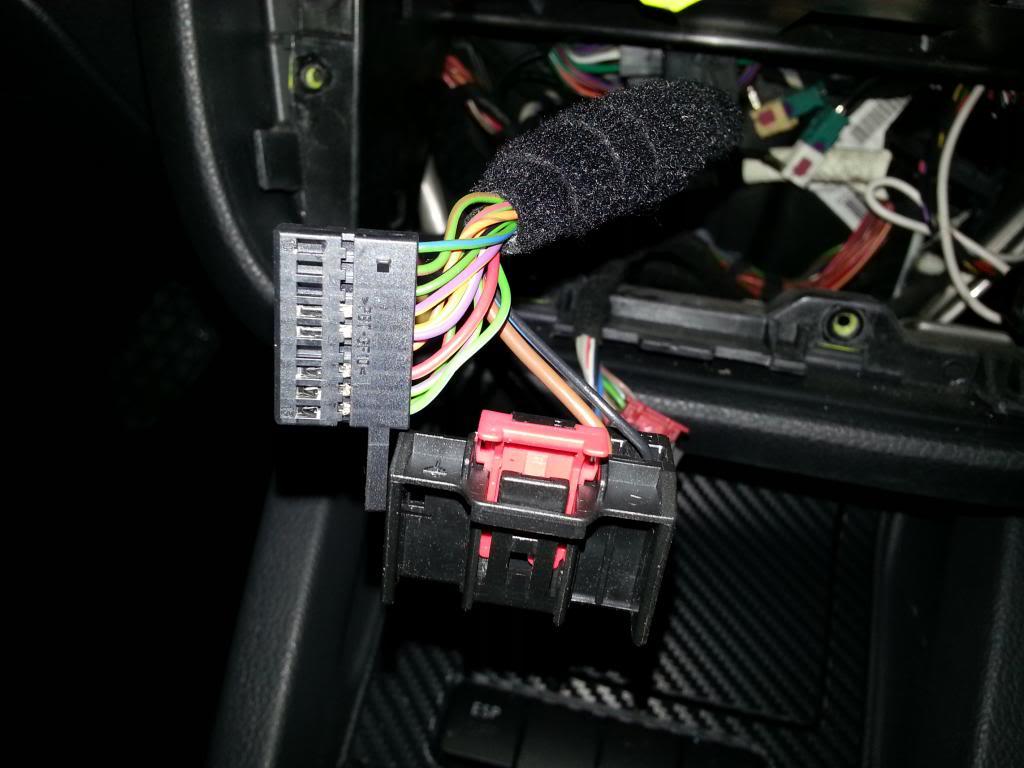

Fit your new wires into the relevant terminals.

Reassemble the connector
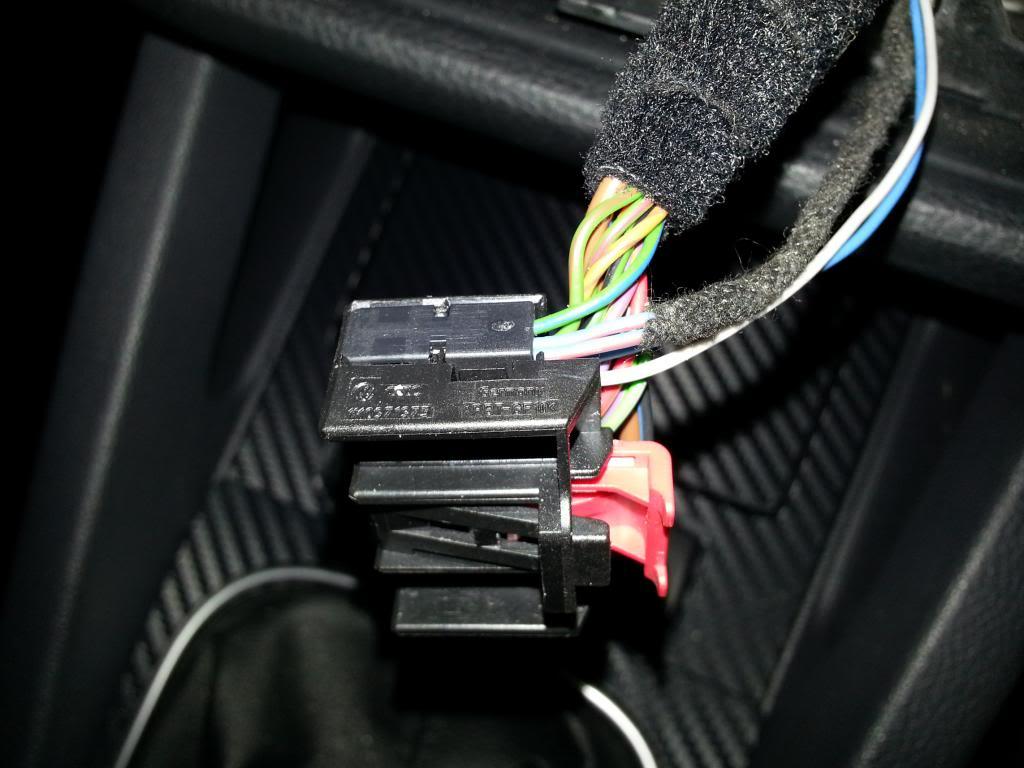
Now all wires are in place, fit the relevant fuses into the new terminals created on the fuse box.

Final step is to activate heated seats in VCDS.
Goto to module 9 - Central Electrics.
Tick Byte 2, Bit 7 (Seat Heating Installed) and apply coding.
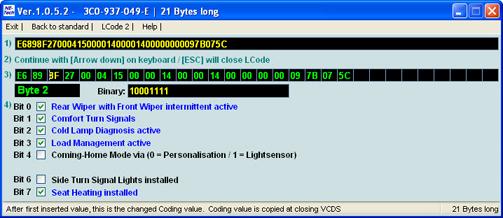
Check / clear any fault codes.
Test Operation of Heated SeatsPoints to note:
Heated seats will only operate if you are sat in the seat (I think... can someone confirm?).
The seats should heat up on the base and at the lower part of the back rest.

You can also confirm the seats are working using the measuring blocks in VCDS.
Goto module 09 - Cen. Elect.
Measuring Blocks
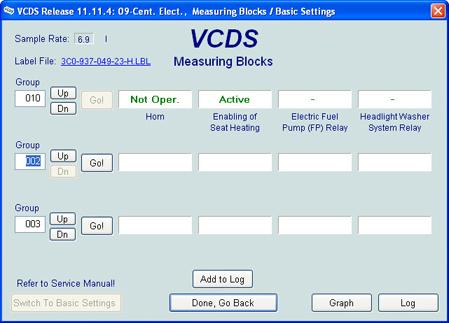
Block 10 should show 'Active' when the heated seats are turned on at the climate control panel.
If you have lumbar adjustment this should also function, using the 4 way switch on the side of the drivers seat.
Once all confirmed working, put everything back together!
Thanks for reading and good luck!
