So I'm a Mk2 man true and true. I've had 22 of them. I have three now and I don't fancy getting anymore as I need to focus on this project.
Here are the details on what has been done so far.
Any questions just ask and I will answer them as best I can.

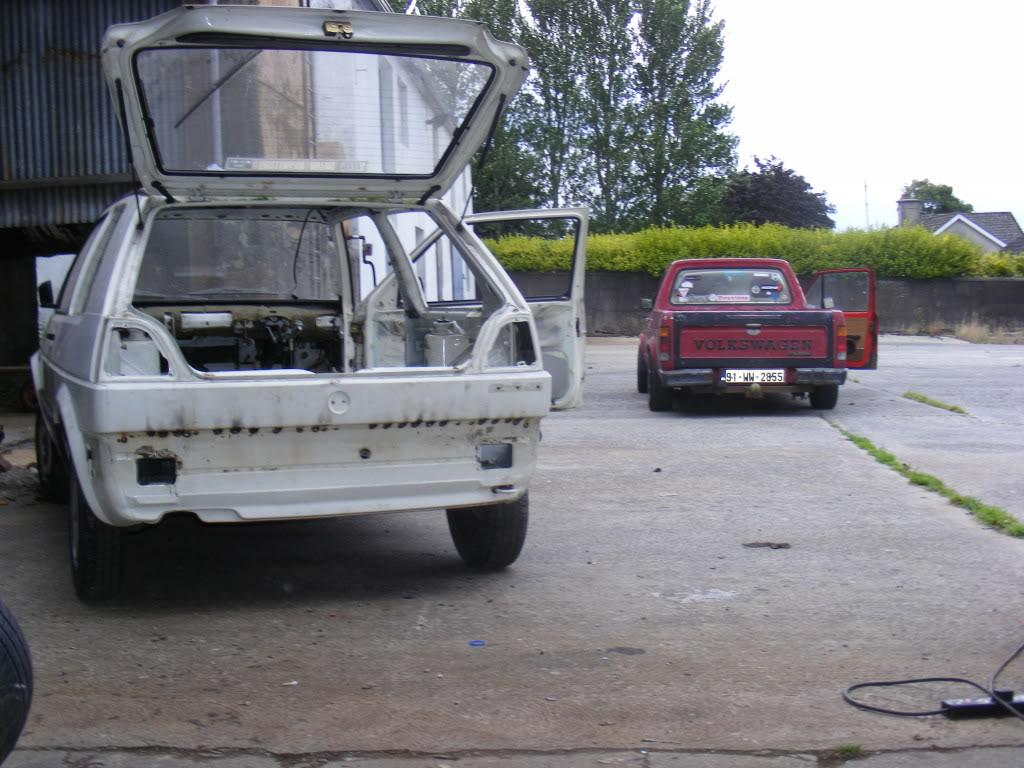
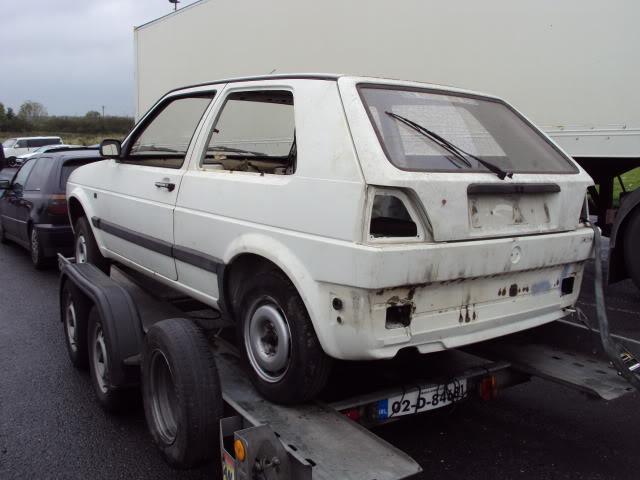
There is the car.
Here is whats I have bought so far for it:
-20 valve turbo bottom end with agu block this engine hasnt even been started
-forged crank
-new bearings
-pumps
-1900 custom JE pistons
-pauter rods
-lowered compression
-all rotating parts balanced
-vr6 flywheel
-spec stage 4 competition clutch
-S3 rear beam
-agu loom ecu and wiring
-Rear beam conversion kit
-powerflex bushes all round
-green stuff filter
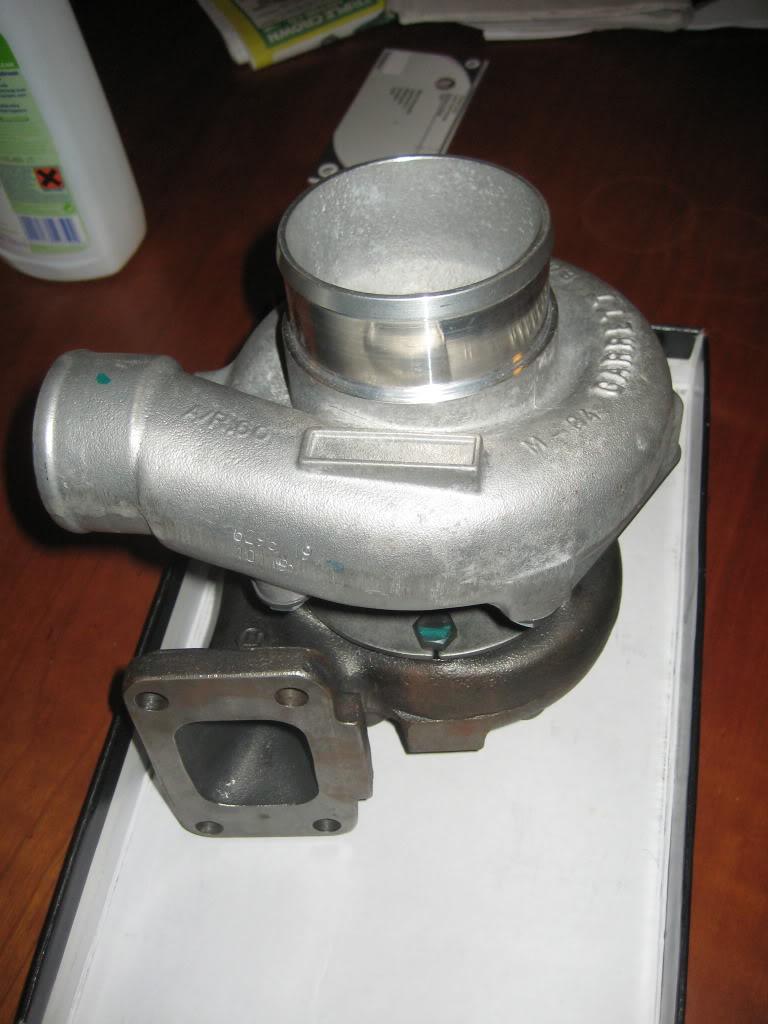
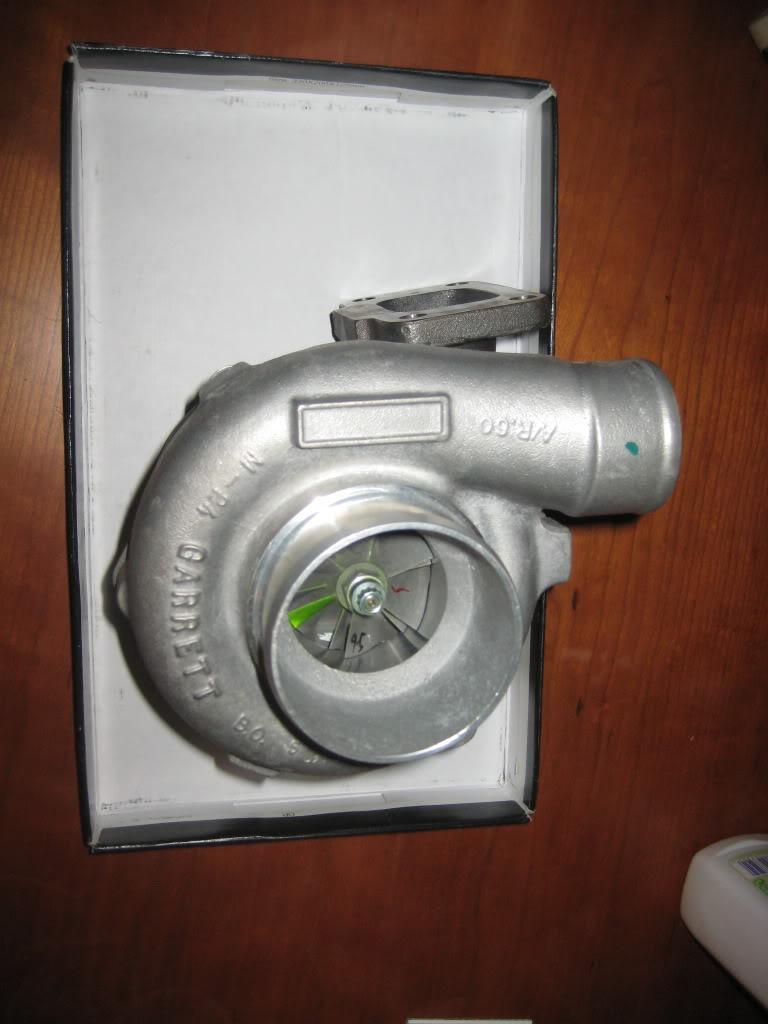
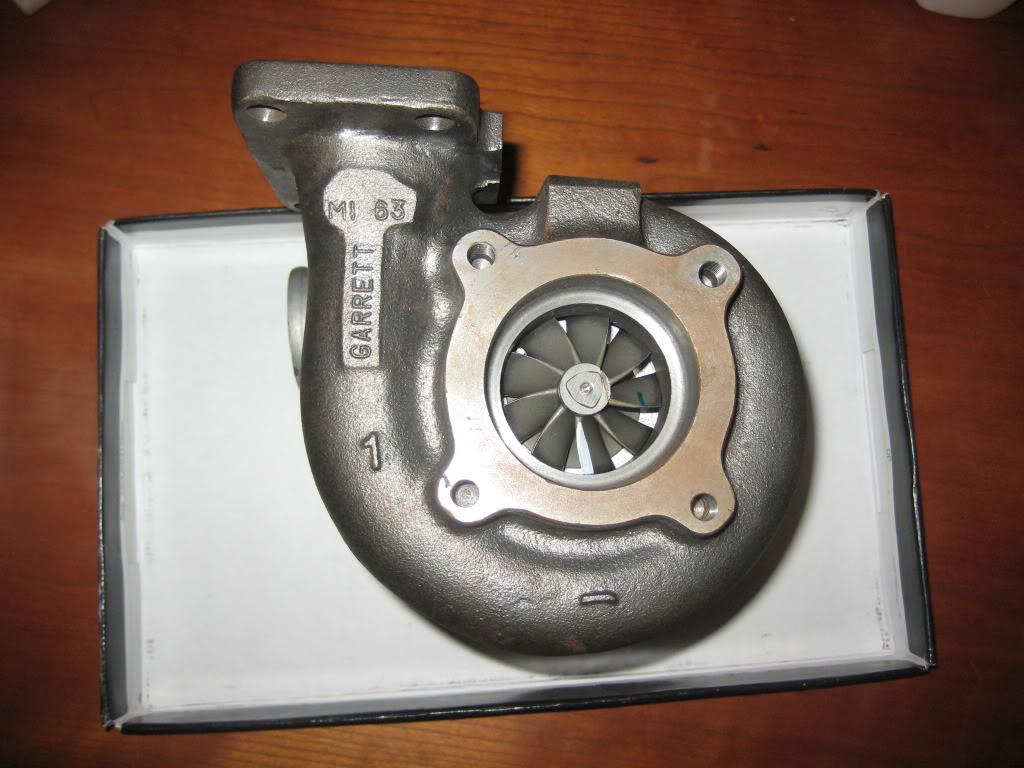
-Garrett Gt2871r
More bits to add later when I can remember.
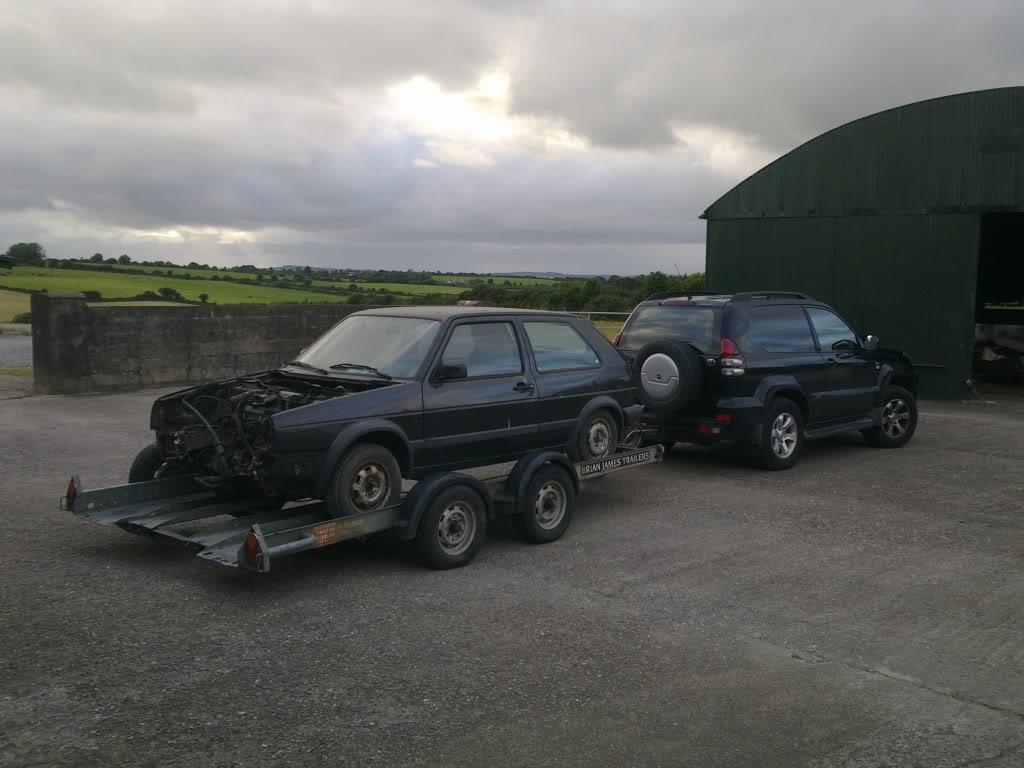
Going working on the Syncro tomorrow so pulled her out of the lock up this evening with help from Greg, thanks.
One pick of her on the trailer:
Ya using Dutchdubs rear beam conversion kit. Might borrow it alright when the time comes thanks.
Want a 3" bore for it havent decided yet nor have I got advice on it. I know it will be tight though. What sort did you use on yours?
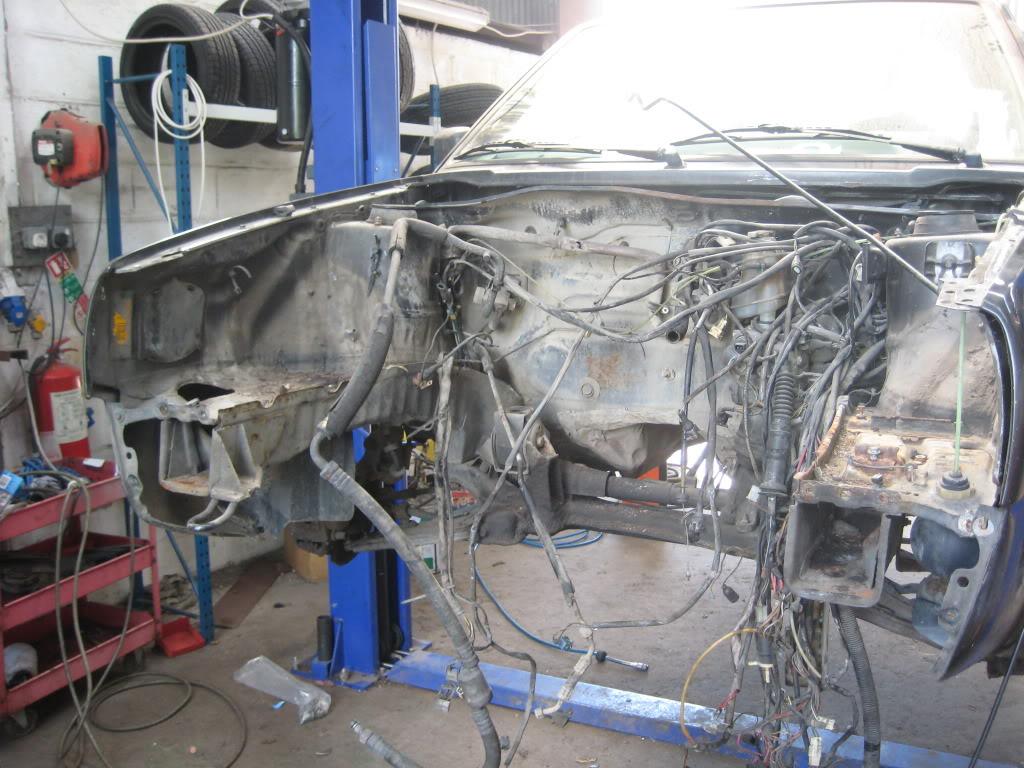
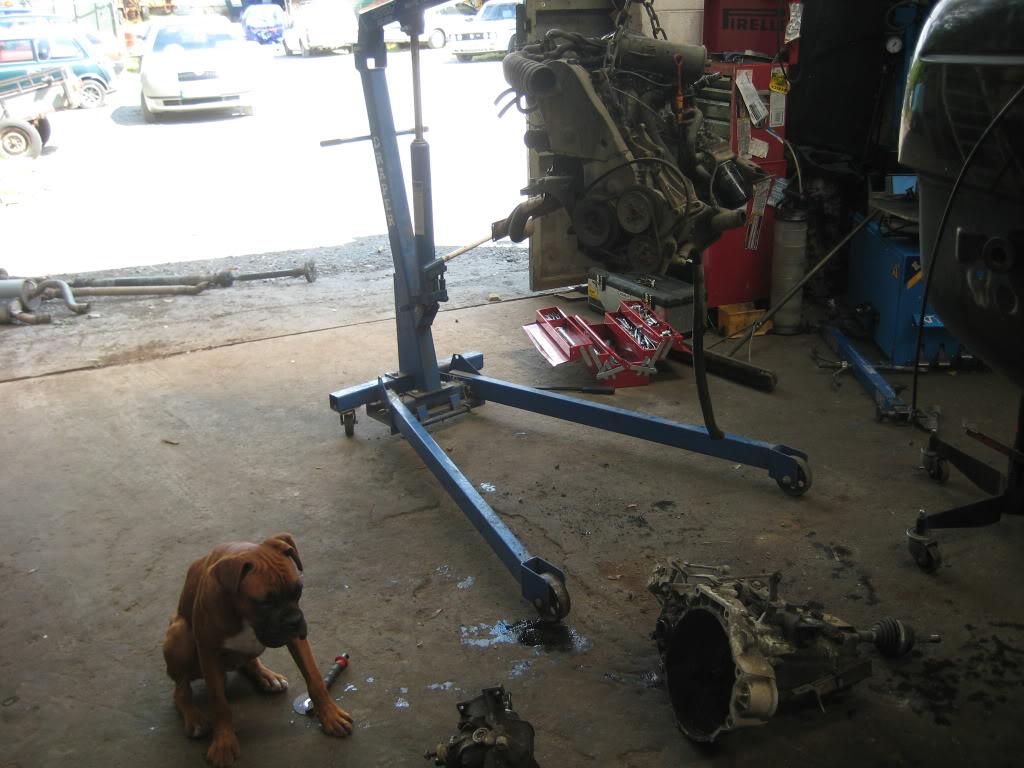
Todays work:
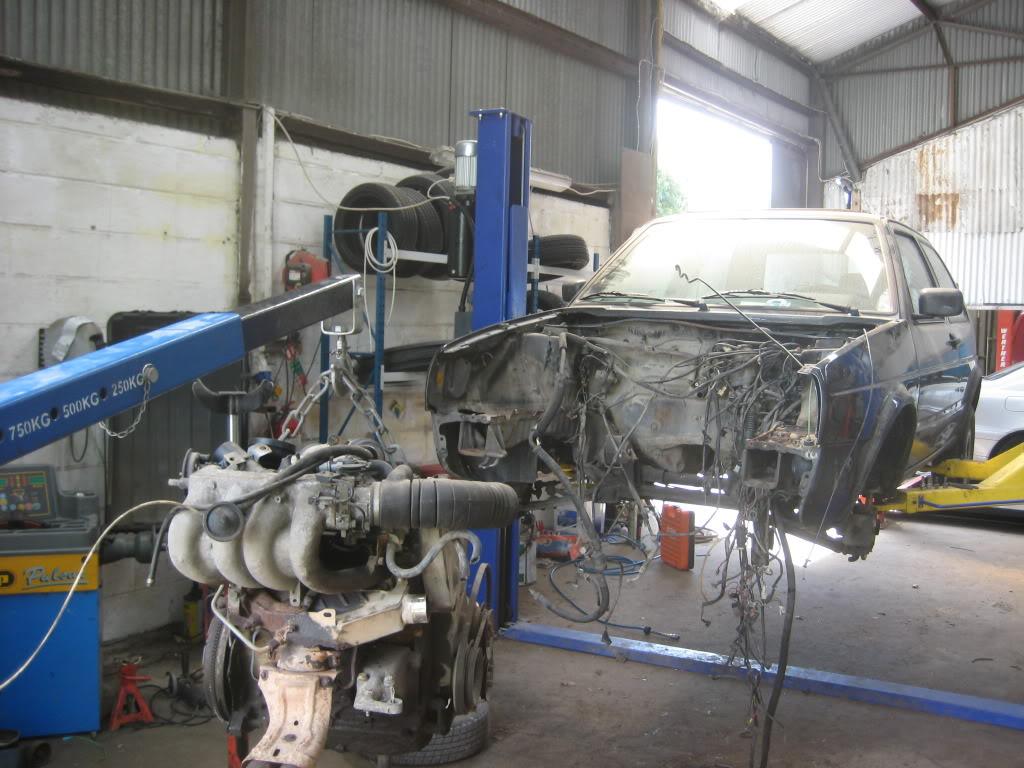
The old 8v lump in good condition in fairness.
Thanks Walter been collecting for a while alright.
Thanks Dav Kav got it from Badger5 in the Uk. Very straight to deal with.
Only updates on this at the moment lads is that I was getting pricing on the body work and spraying to be done.
Hopefully it will be going to the body work done soon enough.
I did buy a trailer for towing it around though which Im delighted with!
Thanks lads. Pics to follow as to what we were at over the weekend.
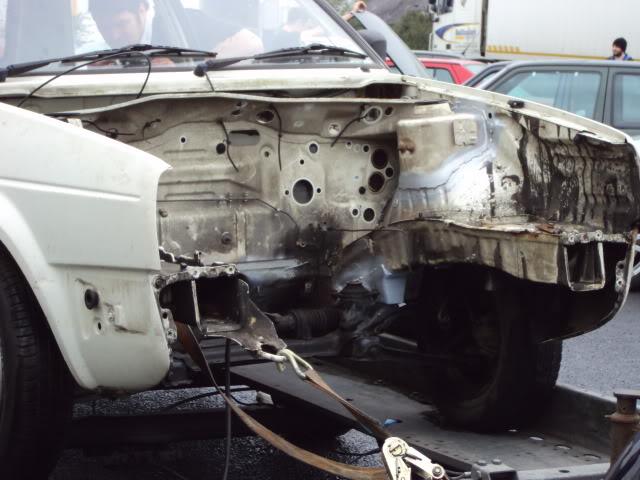
Stripped the car of all the dash and interior bits n pieces.
Bought another Agu engine as the one I had was missing one or two small bits.
Finally I feel like Im getting my a55 in gear now with regards to it!!!!
Well lads this is gone to get the body fixed up and then when its done its getting glass blasted.
Was karting it around the country today!!! Glad its going in the right direction and now while its away I hope to get the head done as well on the block.
Update time:
The Syncro shell is rotten!! I knew it needed work but the work it needs is too bad to fix up and put power through.
So I went off and found a nice straight shell with only 70 odd thousand miles on it. Got that stripped pretty much straight away to see how this one was and yes it is probably the best I've seen.
So the Syncro is now being cut up like a rag doll by Mr Blzeedub. He is going to weld in the floor pan into the new shell and well I'll take it from there.
There was no point in me not coming out and explaining this on here as the Vw community is TINY!!!
Thanks to the following people who have been kicking my a55 about getting back to it as I was pretty upset when I found out.
Greg, Kevin, Tadhg, Aaron, Happy, Hickey, Ronan etc etc
Pictures to follow when I bring the camera with me the next time.
To be honest I was lucky the floor pan was in good condition so thats what he will be swapping over. So the tunnel is higher and the boot is as well to take the rear beam.
I'm moving in the right way now Sam! And yes I'm lucky Kevin is taking this on I wouldn't trust many people with this but he is gifted!
It will get some use and ye know it only too well :)
The shell is one of the best I have seen around if not ever. It will be well able for the power.
Thanks for the comments lads. I've been at it and talking about it since Nov 09 so I couldn't give up now!!!
Right so this took another set forwards today.
I dropped off the fresh clean shell to Kevin. He is going working his magic now and believe me I'm delighted what he has done so far.
As soon as my E30 sells that money is going into parts for it. So hopefully things will kick on now soon enough.
[quote name='BLZEEDUB' date='Jul 12 2011, 08:25 PM' post='655244']
...an update on the progress on marks Syncro project;
had some of these pics in the internal memory of the camera so had 'difficulty' extracting them; i'll not clog up this thread with my usual ramblings; just the explanation of the pics and progress so far...
Much of what was done previously, wasnt that 'photo-worthy'; basically carefully drilling out 'a lot of' (and i mean a lot!!) of factory spotwelds on the rusty german syncro to extract the 'syncro only', raised boot floor, rear X-member and associated reinforcement panels; much of the syncros shell was 'cut around' these panels to ensure they came out with as little damage as possible; I also cut its rear chassis legs off/out - these were kept as 'patterns' to use in the modification of the 'good' Irish shells rear chassis legs...
Once all the panels were extracted the longwinded task of removing all the factory underseal and wax was undertaken by myself, since i work 'on my own' - very messey, timeconsuming and dirty work, but once this was completed the panels were 'made good' and repaired where necessary (wheel well area needed some tiny rust repair patching)... that done, each panel was etch primed, to ensure they didnt rust; weld through primer applied where necessary;
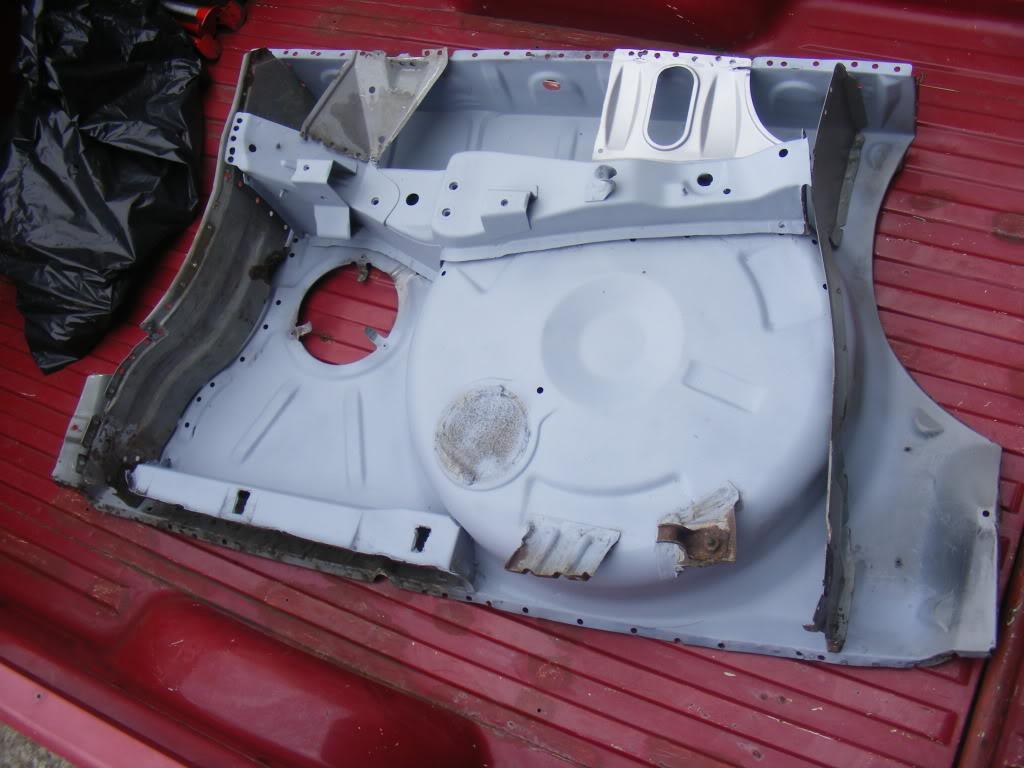
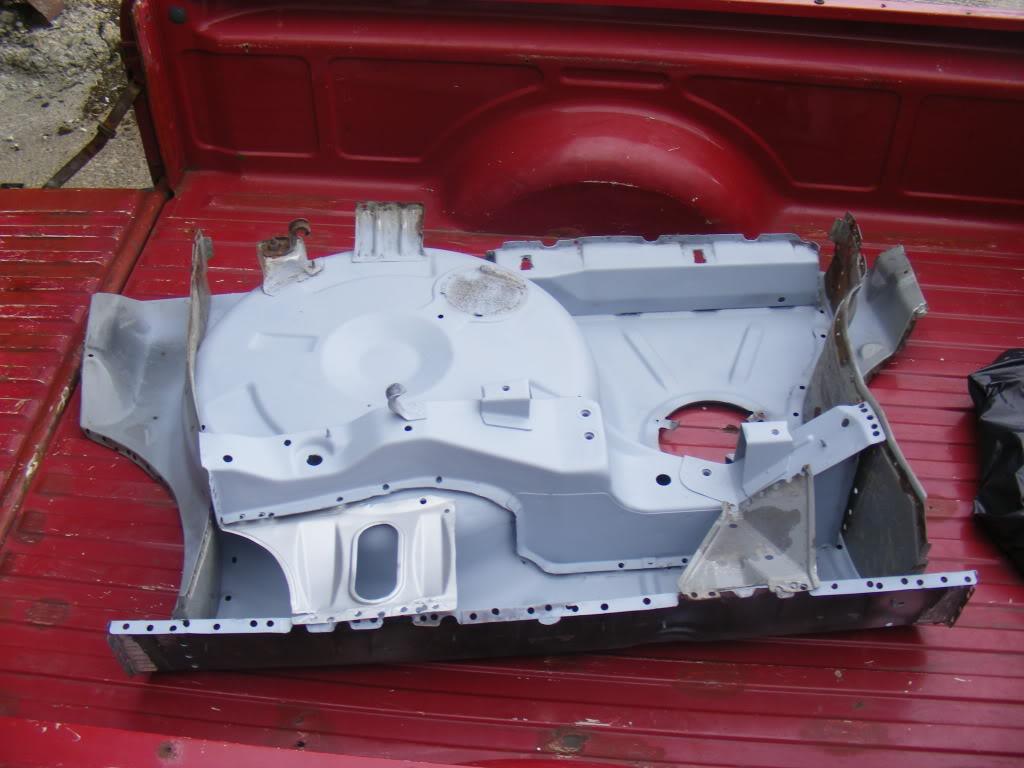
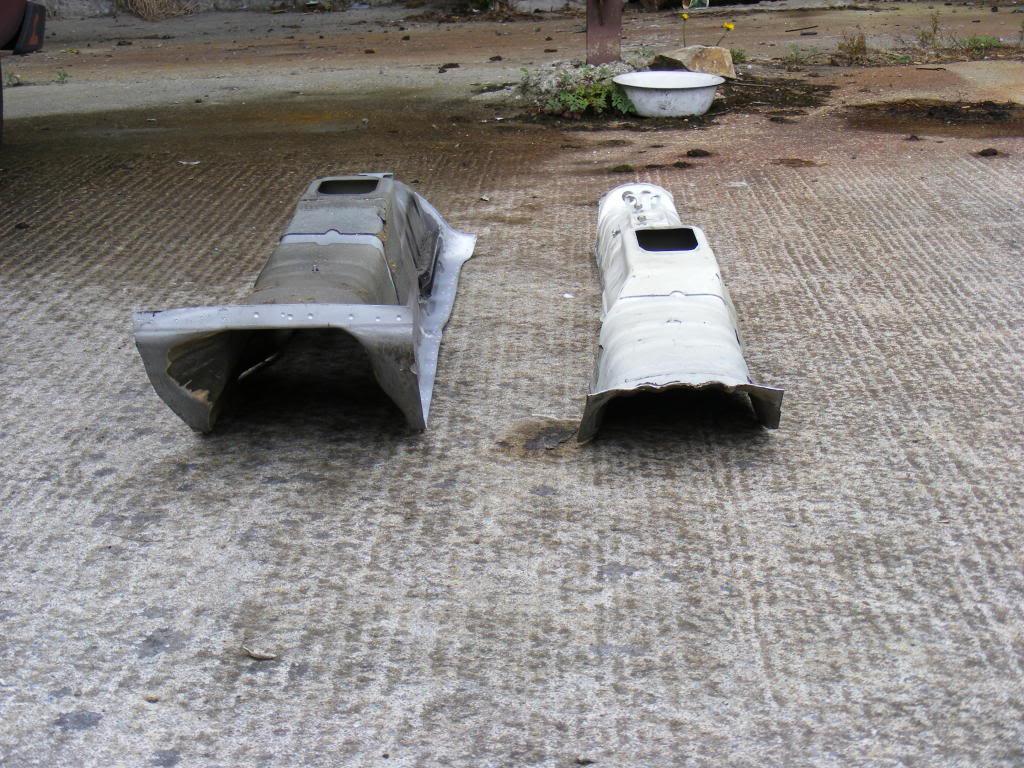
Some of the smaller 'reinforcement' panels and rear X-member pictured here;
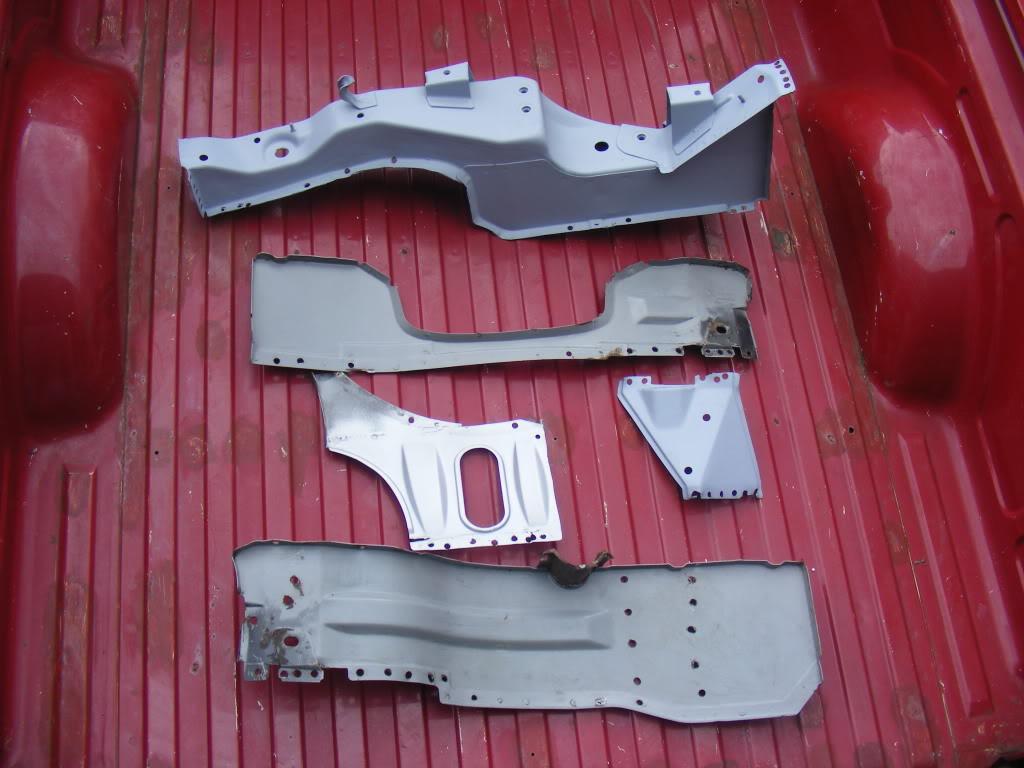
Quick mock up of how the panels fit together, with the boot floor panel- as they were in the syncro (upside down, obviously in these pics);
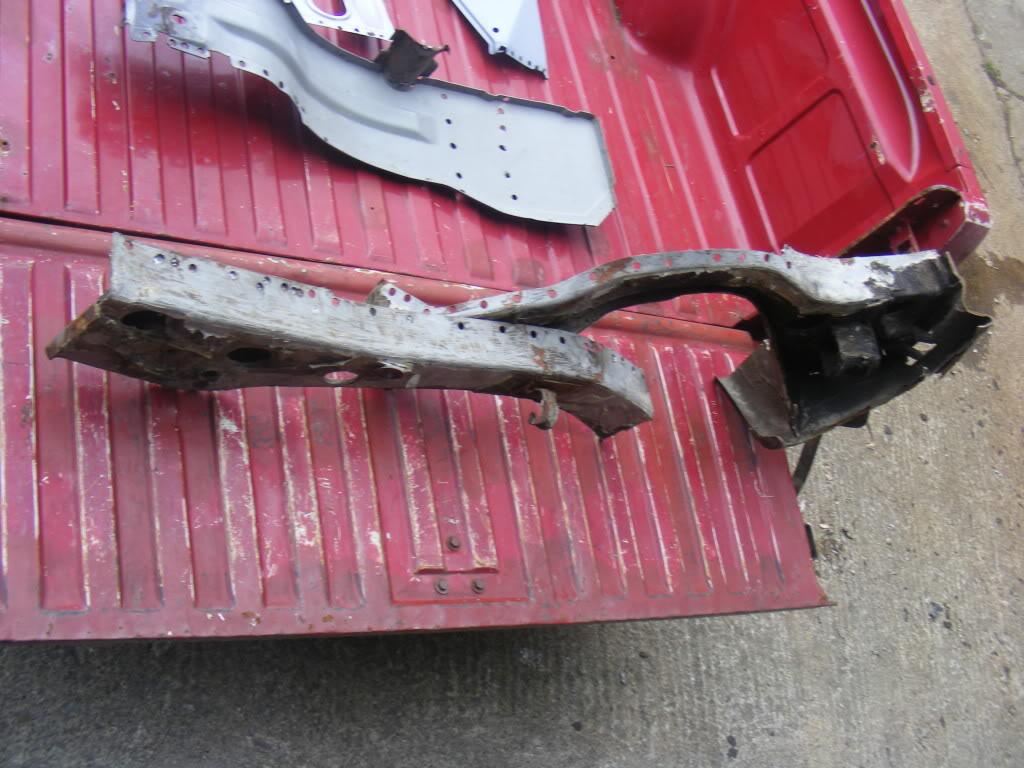
Rear chassis section from the donor german syncro (will be used as refrence/patterns as discribed above)
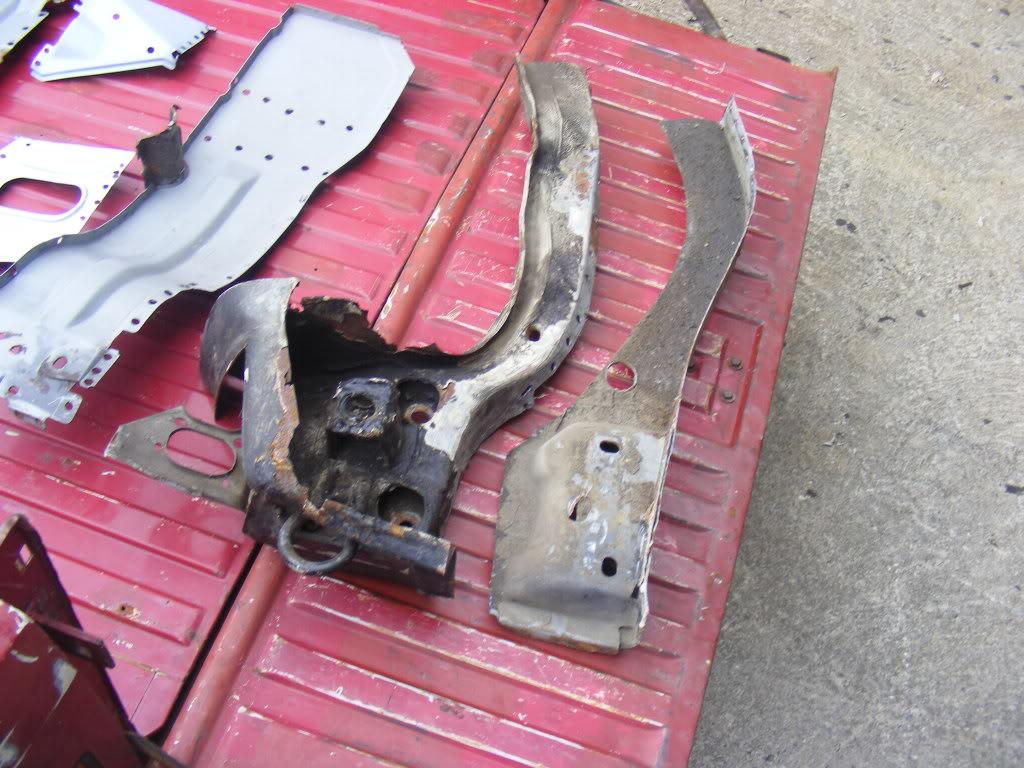
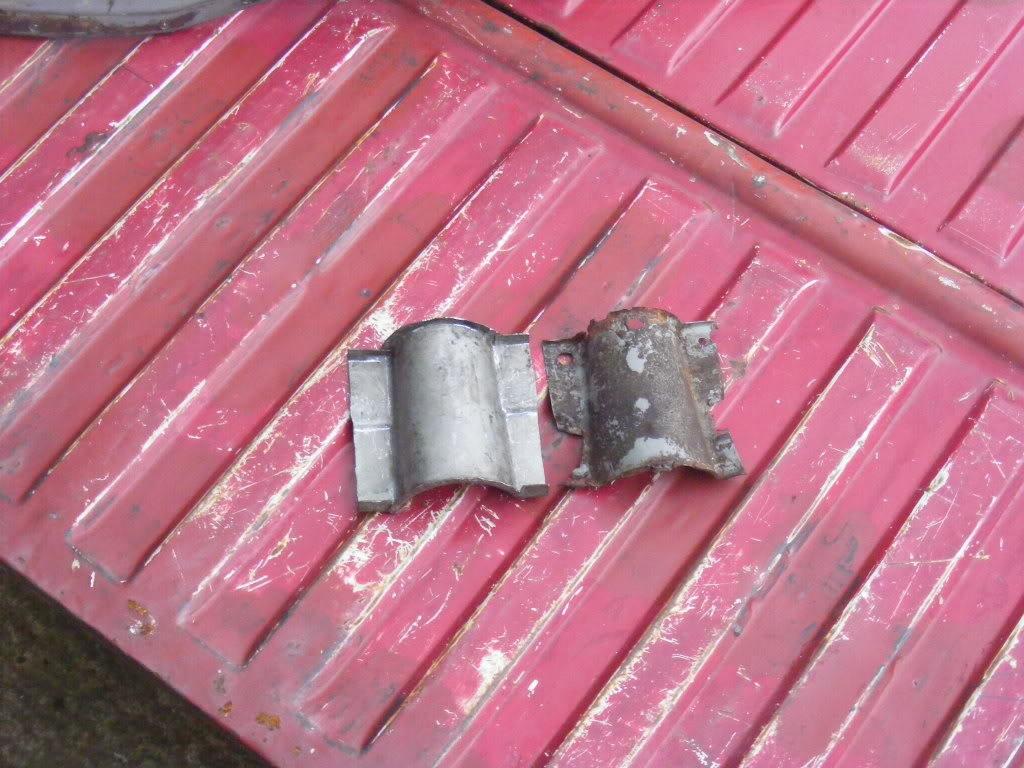
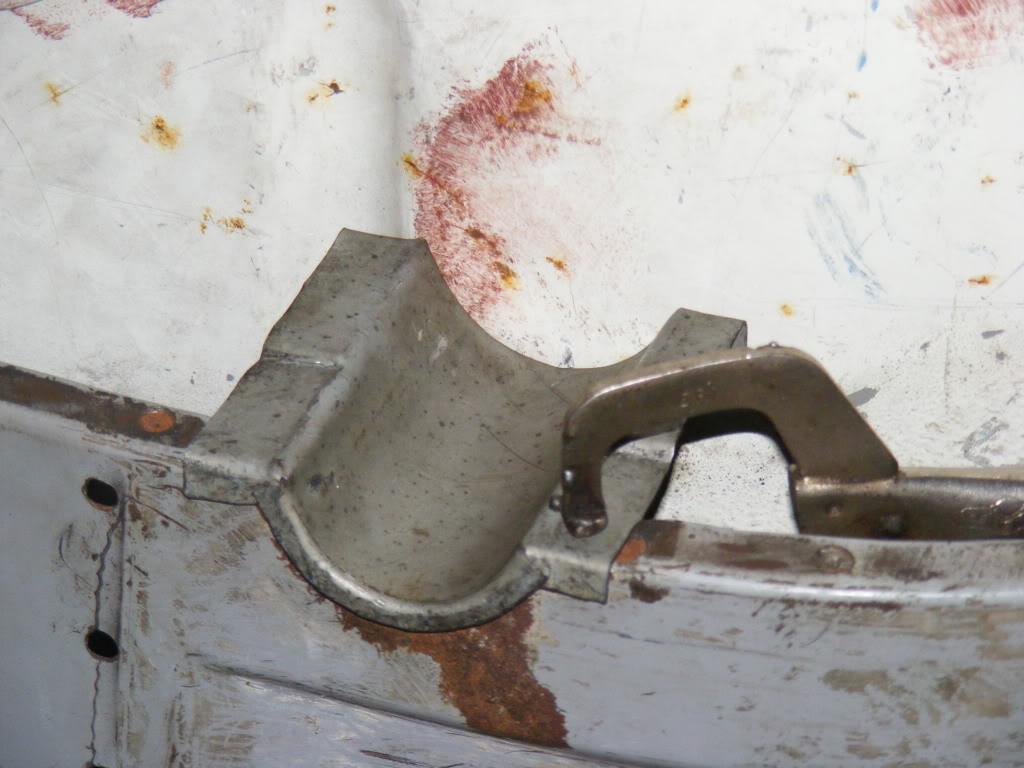
One small 'syncro only' panel had succumbed to the rust (this ties in the 'chassis leg filler/raising panels to the rear inner wing and also attaches to to the boot floor)
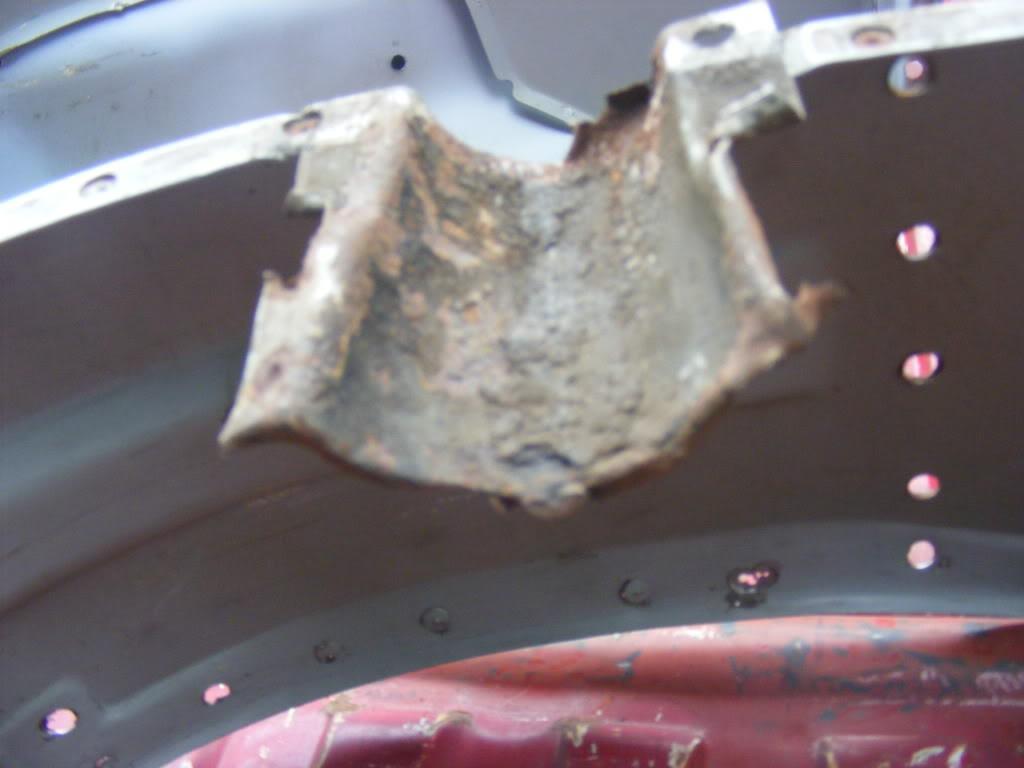
Its too frilly n thin with rust to reuse so I will just make/beat another 'replica' up... considering how advanced the rust was in the german syncro, its fortunate that this small panel is the only one that is 'rusty beyond repair'/reuse.
Irish shell's rear boot floor roughly cut - its a matter of cutting it bit by bit to get down to the chassis legs and rear inner wings, with all remnants of the original floor attaching 'flanges' being removed;
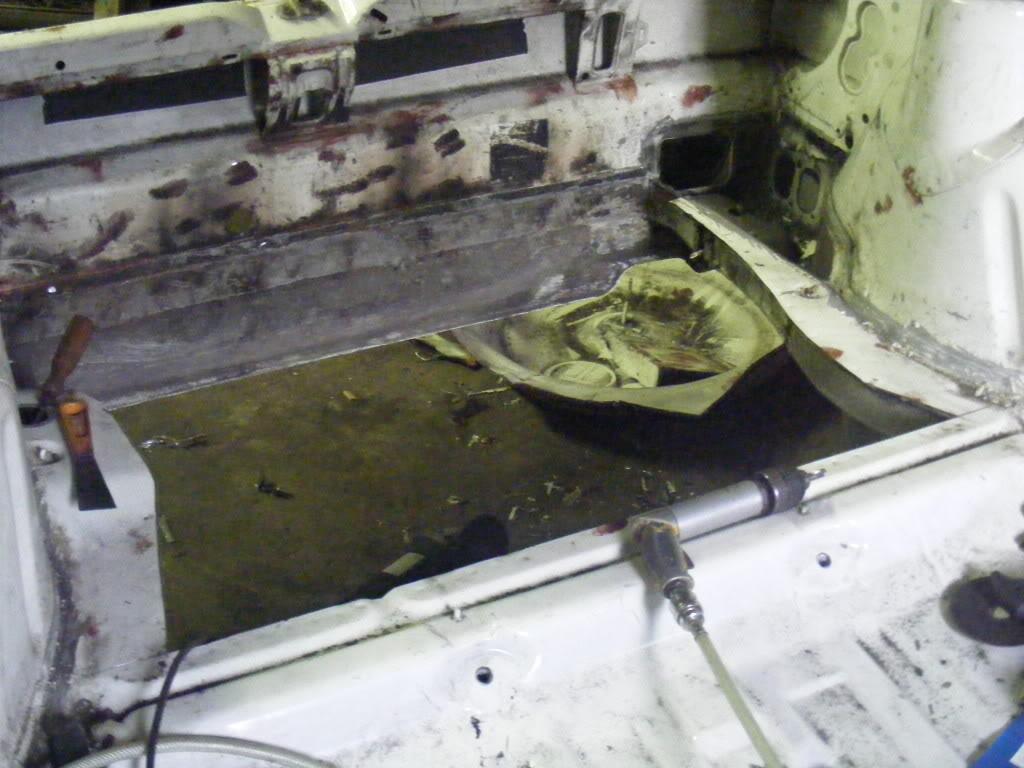
remains of the irish shells boot floor/wheel well.

this shell is in excellent rust free condition, and once the syncro panels are fitted, it should provide a much better basis for the big power mark intends to get from this car...
Im a bit further on that the pics above, but will update with more pics again soon...
[/quote]
[quote name='BLZEEDUB' date='Jul 14 2011, 12:29 PM' post='655834']
Some more recent pics; this time showing the modification of the 'non-syncro', 'new' shells rear chassis -theres very little info on 'this process'on the net so I though as the pics are on the camera (and I have fed same with more new batteries); I may throw them up on here as it may well provide somewhat of a 'rough guide' to anyone attempting this 'conversion....
As mentioned above I cut out and kept the syncros rear chassis legs to act as a pattern or guide to mod the 'irish shell's' rear chassis; the outer skin of the syncro's chassis legs cut needed 'unpicking' from the inner rear bumper iron-reinforcement panels, meaning more spot welds to be drilled out.... the Irish shells chassis legs were cleaned of underseal to ensure the 'syncro chassis leg' cuts/patterns 'snugged up'...

I scribed around the shape of the syncros chassis legs 'cut', onto the Irish shells chassis legs; i used a combination of drilled holes (for corner shapes' and 1mm disc on the grinder to cut them down to the scribe line...
Quick 'mock up' of the L/h "chassis leg filler/raising panel" to test for fit;
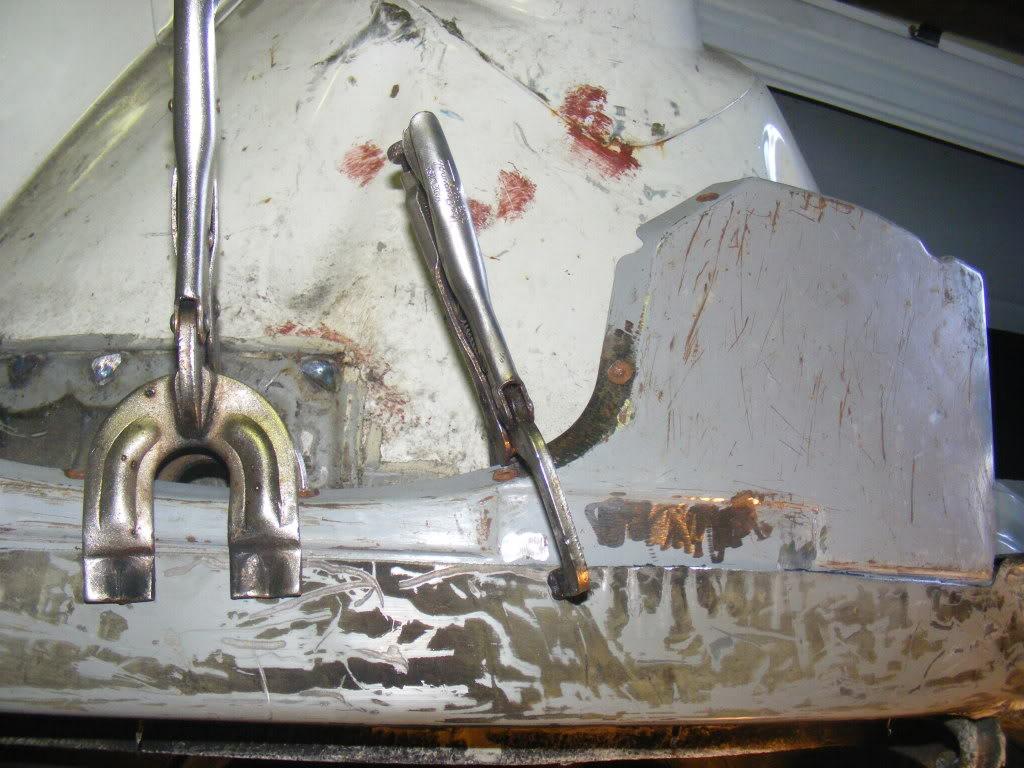
...worked out niceley; the cut chassis leg follows the pressins of the L/h "chassis leg filler/raising panel"
macro view;
Im mocking up/test fitting before finally welding up; all the panels, and chassis legs etc will be cleaned up before final welding.
Cheers- more again soon.
[/quote]
[quote name='BLZEEDUB' date='Jul 15 2011, 12:29 AM' post='656109']
cheers fellas...
....another update, which sort of brings things up to date (bar scraping off underseal and paint stripping/panel prep).
Left hand chassis leg was mofified using the same method as L/h rear chassis leg; syncros rear chassis legs to act as a pattern or guide to mod the 'irish shell's' rear chassis; the outer skin of the syncro's chassis legs cut needed 'unpicking' from the inner rear bumper iron-reinforcement panels, meaning more spot welds to be drilled out.... the Irish shells chassis legs were cleaned of underseal to ensure the 'syncro chassis leg' cuts/patterns 'snugged up'... R/H chassis leg is a bit more intracate, in terms of shape and profile, as is the 'cut needed;
.... clamped up a bit more after these pics it was then scribed, and the 'syncro shape' cut in using the drilled holes (for corners n angles) and a 1mm disc on the grinder;
I then reclamped up the syncro chassis leg to check how well the cut went... like the smart arse barber says "once its cut -thats it, no going back" but all worked out well;
pic of the cut chassis leg; pattern syncro chassis leg panel unclamped and off

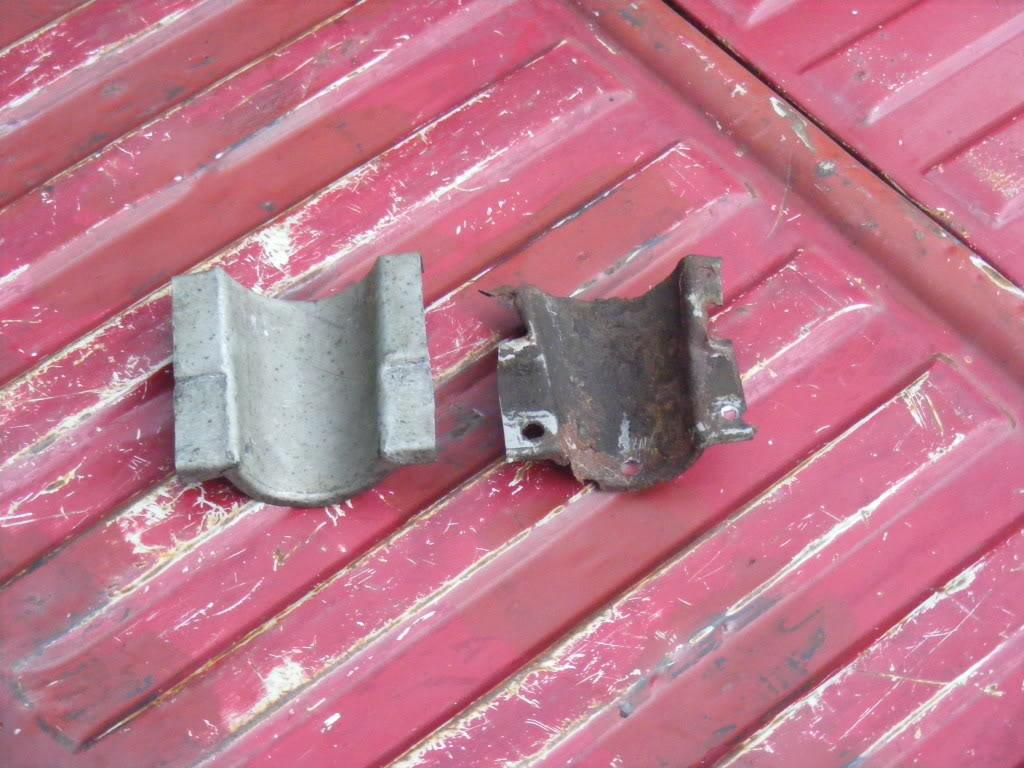
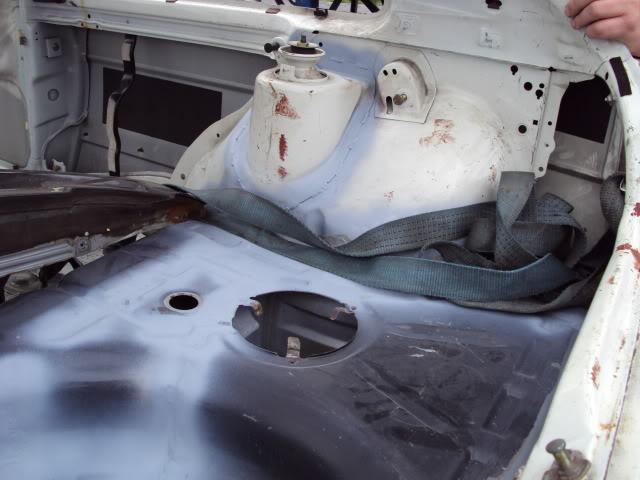
turned my attention to this 'fella' as pictured earlier;
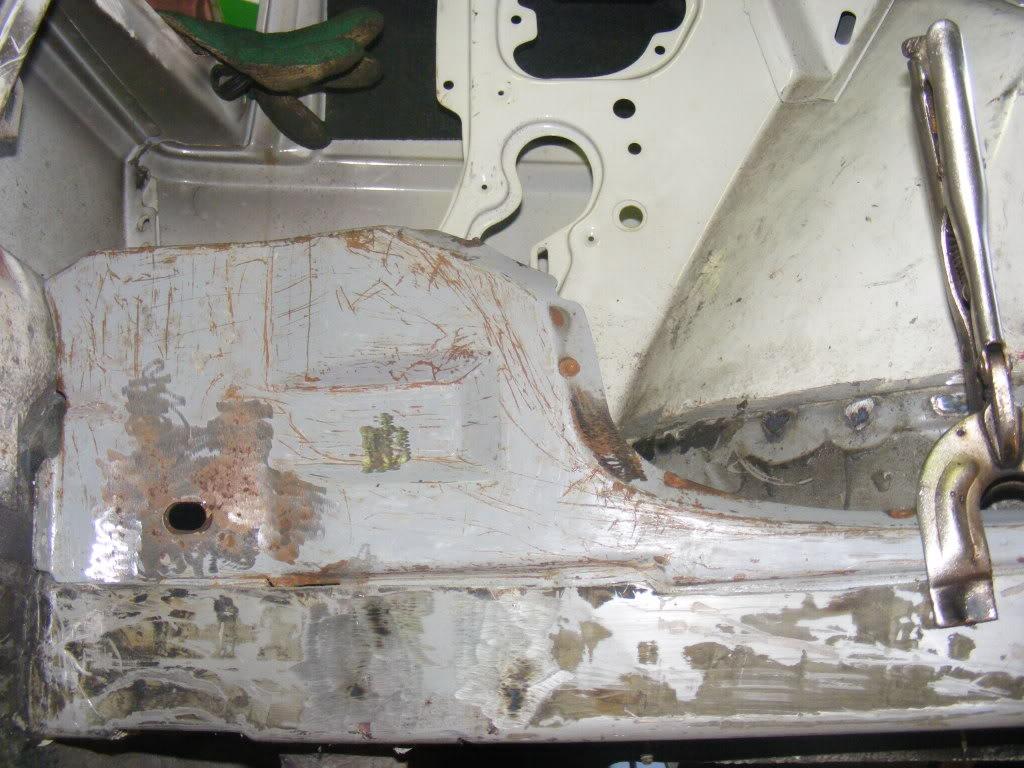
I dea was to make/panel beat this up myself.... turned into a bit of a 'time burner' made a cardboard template of it roughly, and cut out the metal needed from the sheet of zintec steel I have in the lock up- well did thid twice really; first attempt didnt work out that well - possibly due to motorhead playing on the stereo and the head not being in the right frame of mind; ie going at the process too quick... a change to 'the Pixies' on the stereo for attempt #2, some hammering, squeezing in the vice, hammer and dolly work proved a success and resulted in this;
here mocked n clamped up with its supporting chassis leg raising/filler panel ( also ties into the inner wing and supports part of the boot floor panel)
A perfect fit!
Thats all for now... will update with pics soonish; a nice bit of knot wheeling and cleaning up is next before welding these panels in/together; and that doesnt make for great pics.
[/quote]
[quote name='BLZEEDUB' date='Aug 5 2011, 12:02 AM' post='664732']
Update on Mark's syncro project; I did intend on taking some 'step by step' pics of the fitting of the rear syncro panels; unfortunateley I couldnt get any clear pics in my small lock-up/unit....
where I left it last, I had the side panels fitted- used the old german syncro chassis leg cuts as 'patterns' - used the same method to fit the X member that fits between these two 'chassis raising panels'; ie where the x-member was located on the chassis leg (using previously spot weld drilled out marks to do so; and drilling a 4mm hole through onto the good/irih sells chassis legs - the boot floor's drilled through spot welds, also as refrence... (there is some pics of the car in this state on a camera phone, I will endevour to extract and post up)....
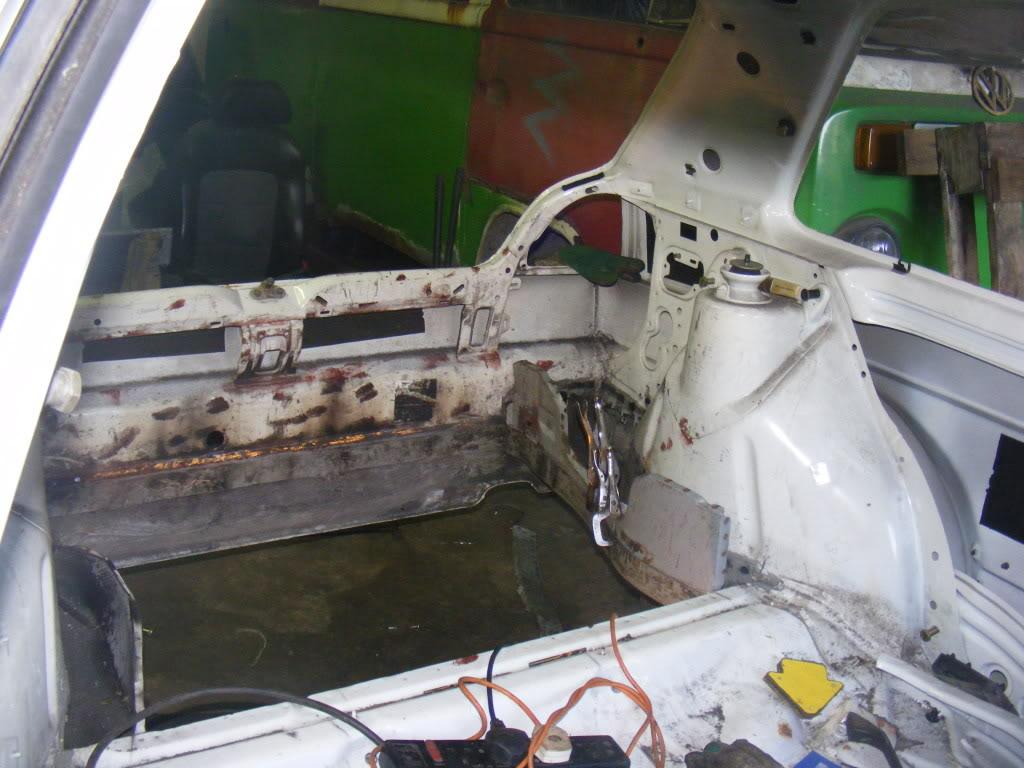
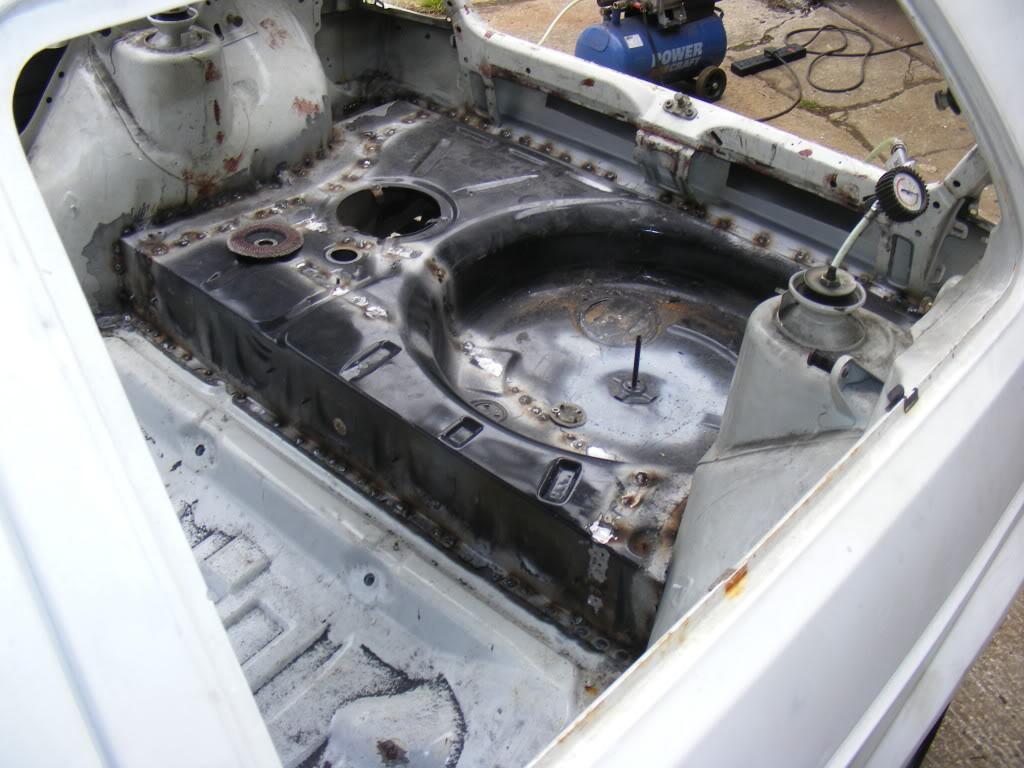
today I pushed it out of the lock up to blow off the dust and get some clear pics!!
....a lot of time was spent prepping the boot floor panel; a thin panel, which needed some rust repair and general fettling after its extraction from the german syncro - TBH I a bit was worried how this would 'fit' or be fit for welding/reuse; but the pics below will thell the story...

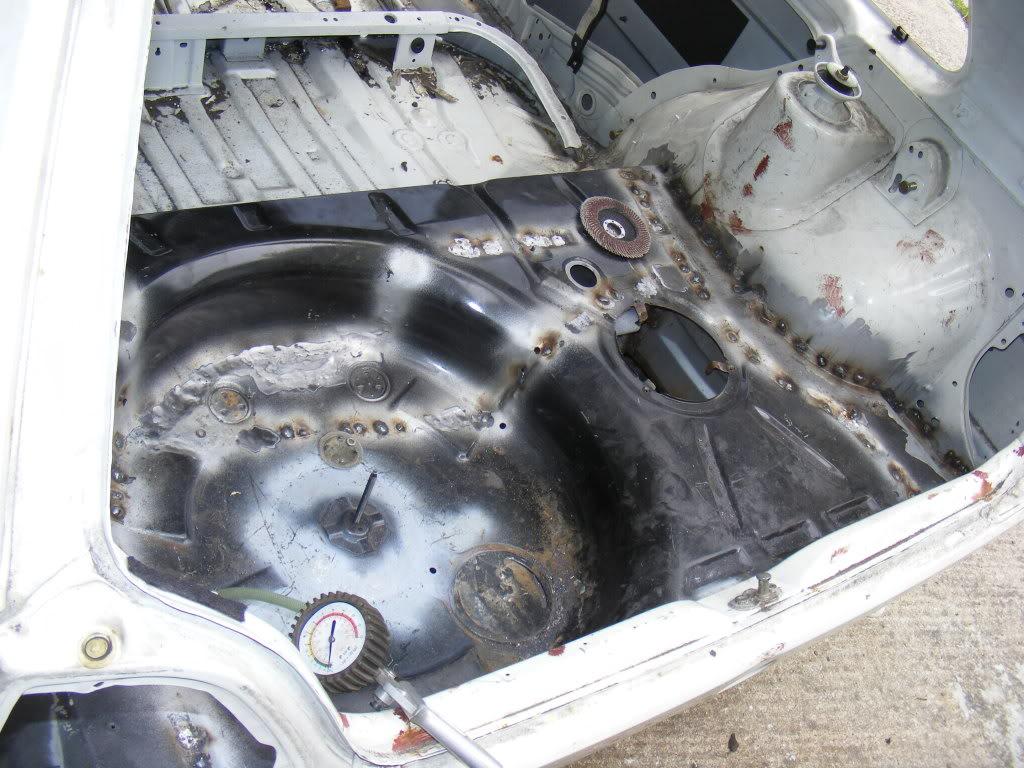
The welds are a bit 'snotty' as Ive endevoured to use 'weld through primer' -not a big fan of it as it can give splatterey 'un-neat' welds in appearence, but as 'retro fitting' these means these panels will not be assessible to paint later its 'necessary' if this car is not to rot like the german syncro...
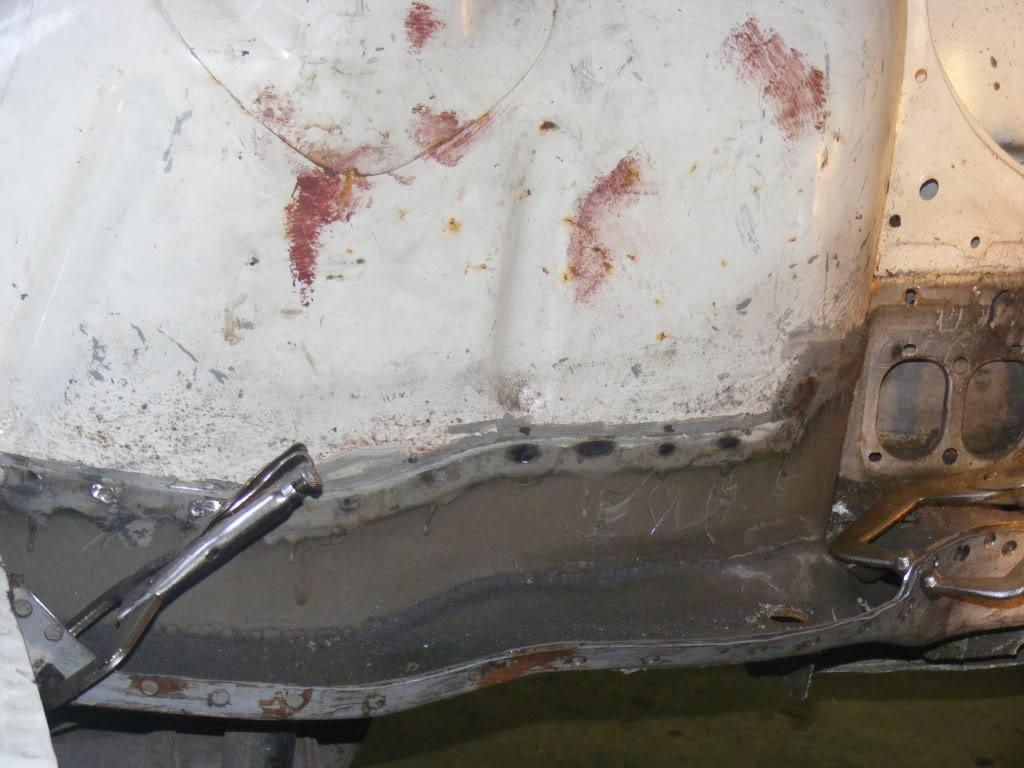
A quick pick from underneath; some light seam welding will be done under here...
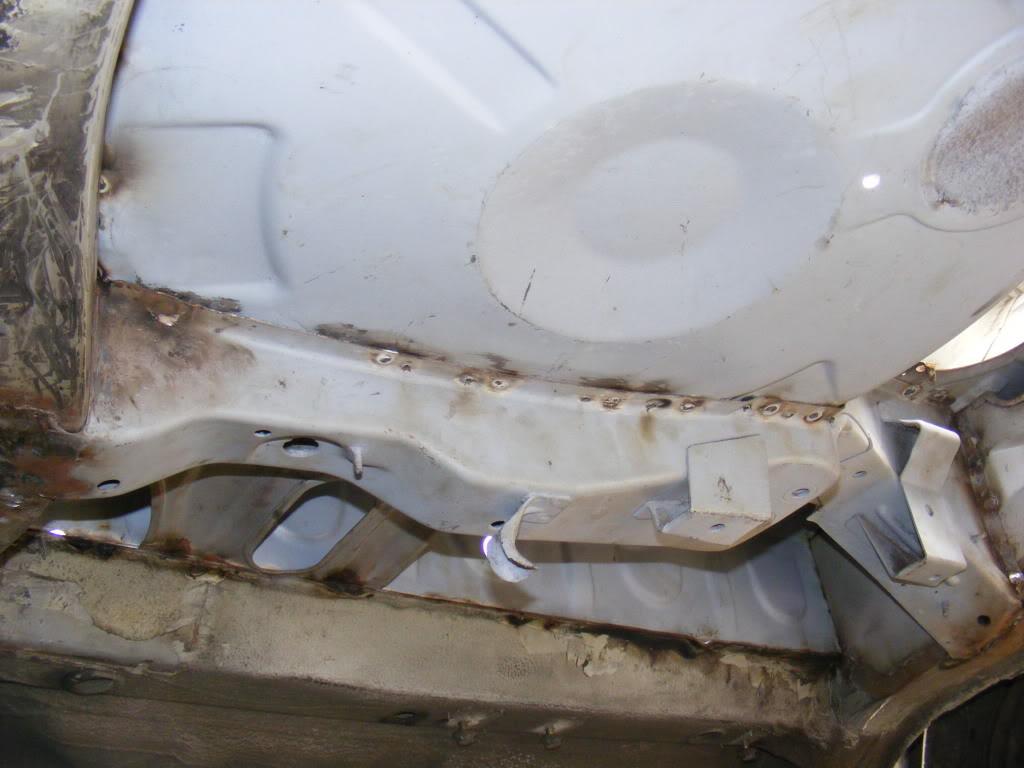
These pics were taken at lunchtime today - 99% of the boot floor area/rear chassis welding is done, so near wrapping up the rear end - bar some linishing of welds and making neat, seam sealing and reprimering tomorrow before I head off for the weekend... next week the 'tunnel conversion' awaits...
[/quote]
[quote name='BLZEEDUB' date='Sep 2 2011, 11:25 PM' post='677015']
Update on Mark Syncro project, and converting the Irish shell to Synco spec;
I dont take many pics of the process; eg. grinding down of the many welds/spotwelds doesnt make for 'interesting interweb viewing', nor does the drilling out of the many spotwelds (to seperate the tunnel - I 'overcut' this panel out from the syncro shell -ie cut around it!), but its all part of the process - time consuming and banal you could say...
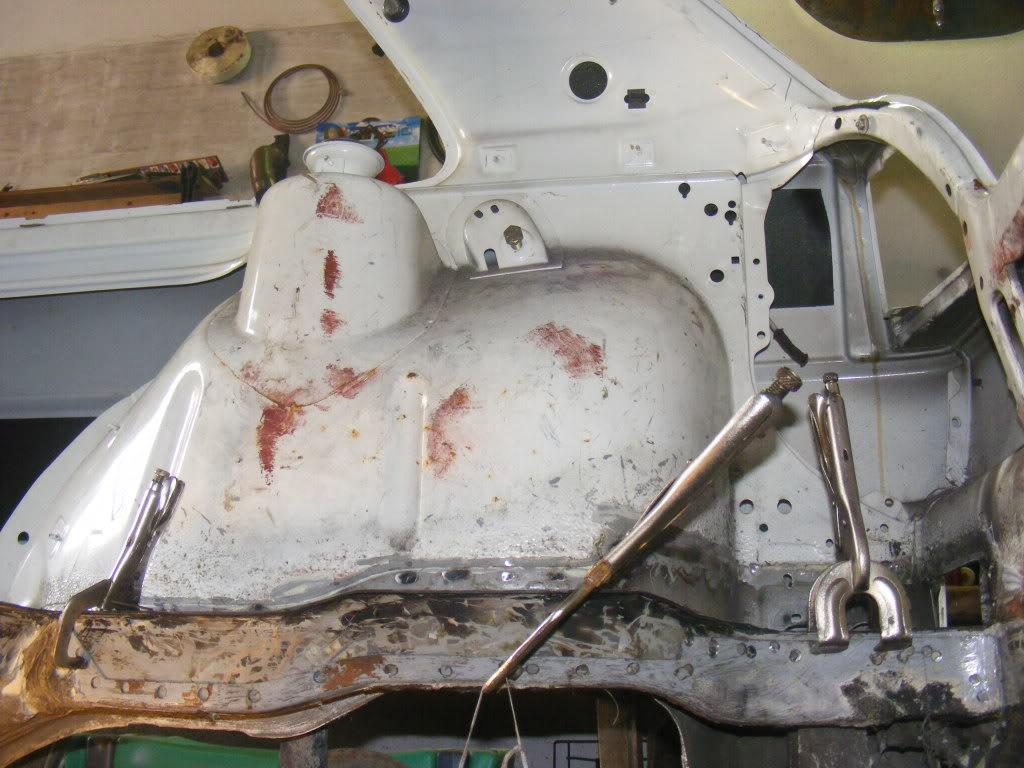
anyhow, progress - drilled out the many spot welds attaching the syncro tunnel from the remnants of the syncro floor, this revealed some fairley well pitted rust on the syncro tunnel where its flanges and floor overlap - thankfully its a thick panel so was able to clean it up to a decent standard and apply weld-thru primer...
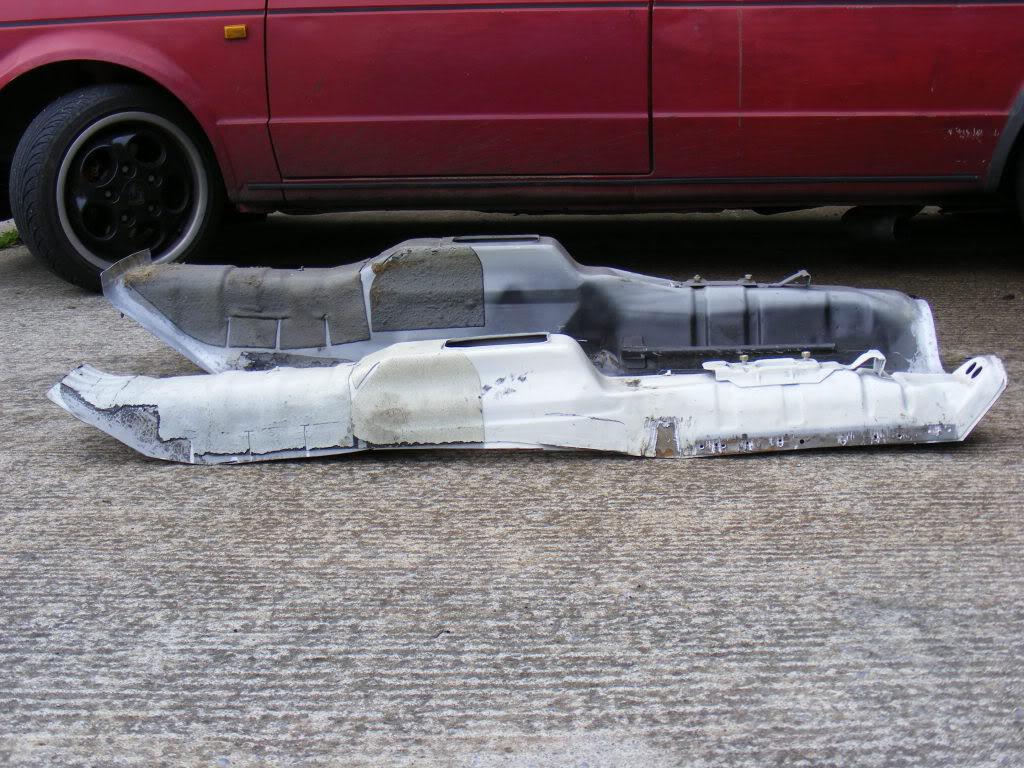
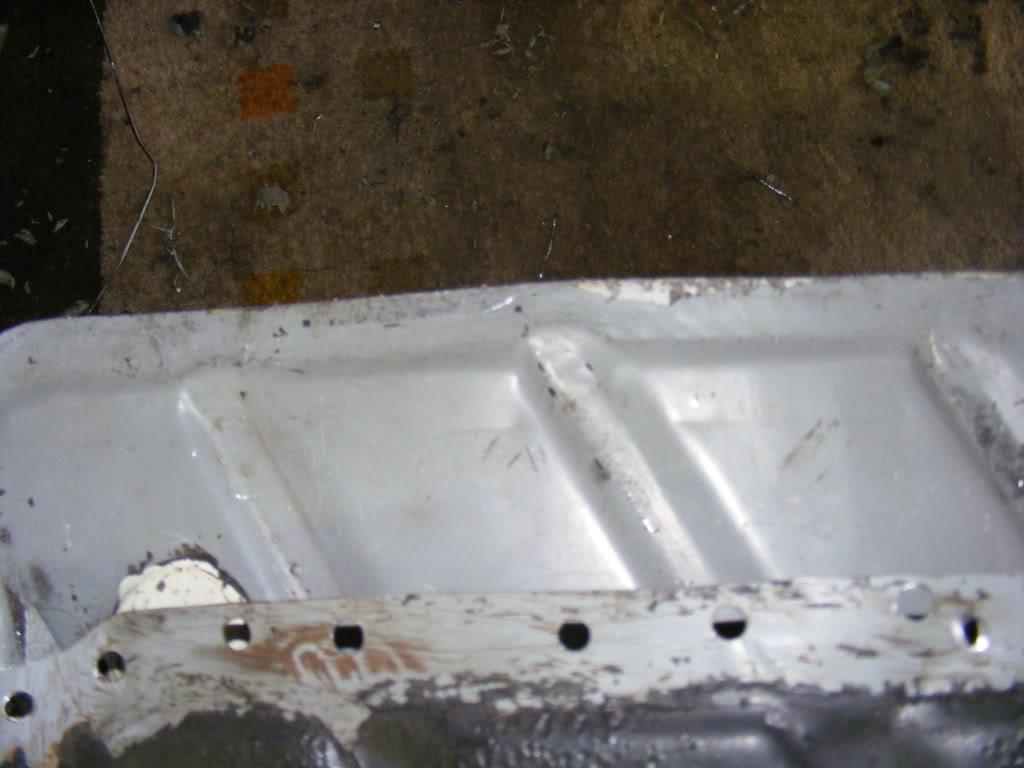
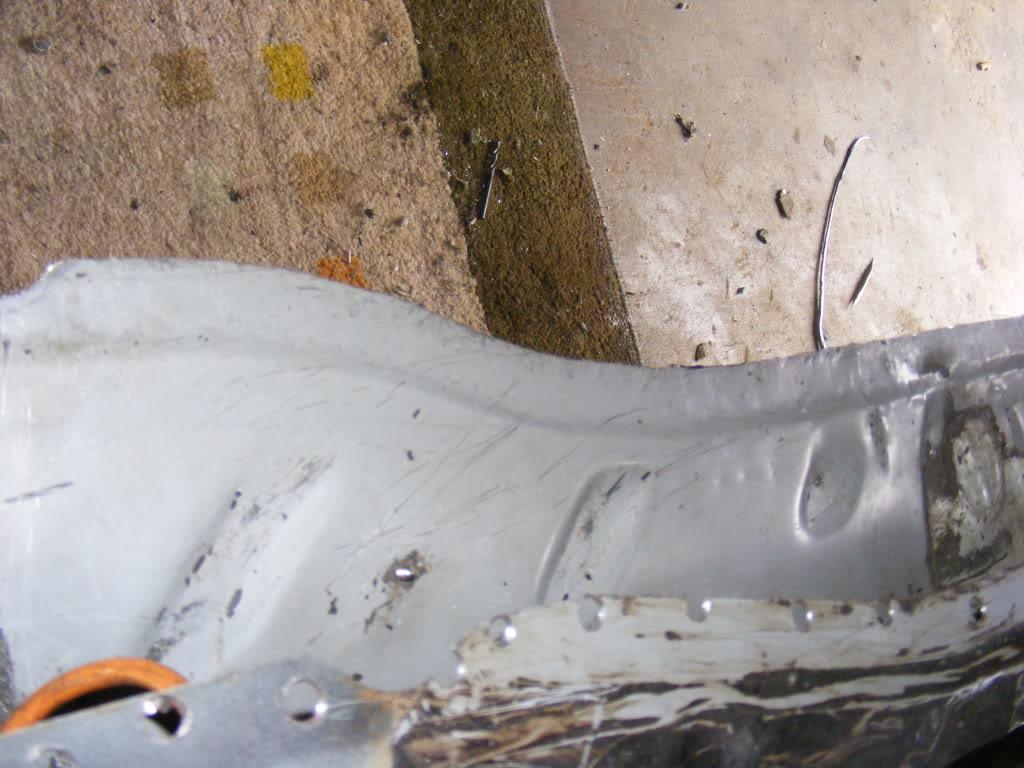
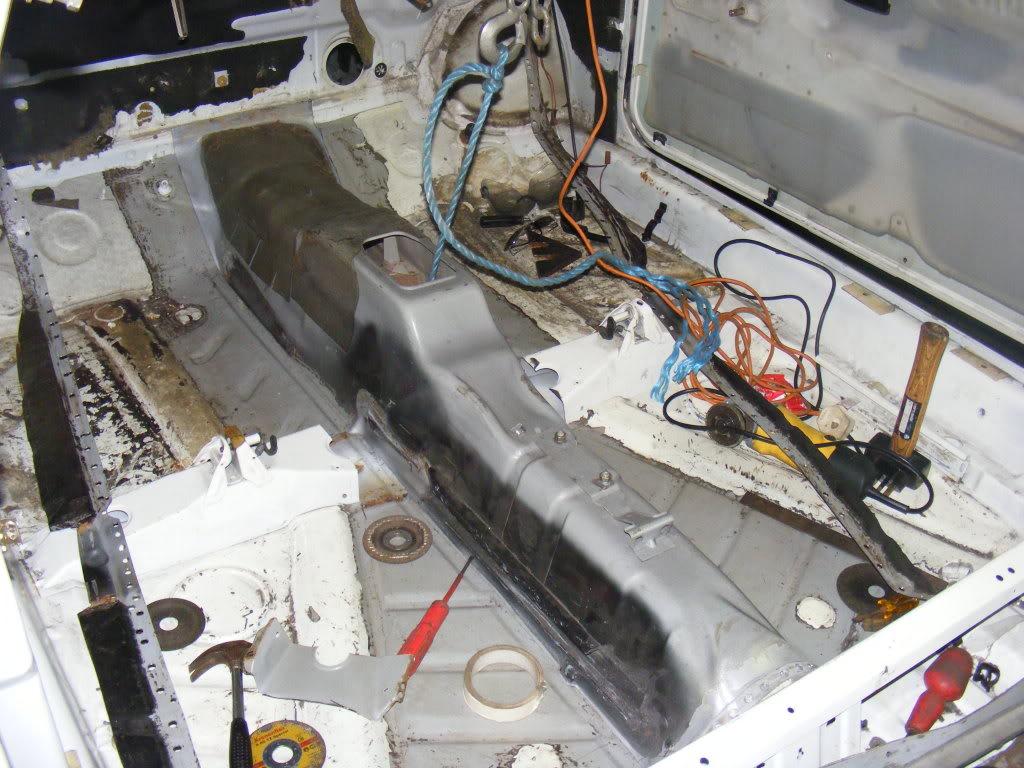
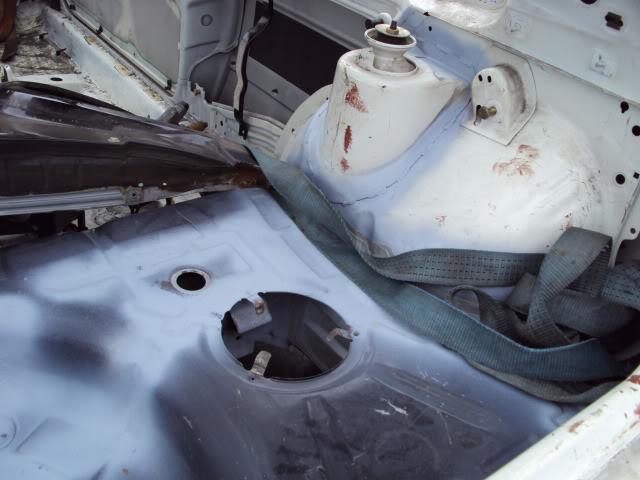
I then started the long process of cutting out the Irish shells shallow/narrow tunnel from the shell - anyone familiar with mk2 'non syncro shells' will be aware of how the tunnel is simply a 'cap' and the floor bends up to meet this 'cap' to form the tunnel - the syncro tunnel is a 'self contained affair' - the floor being 'flatish' with a step to meet the flanges of the tunnel...
comparsions here- 1300 tunnel in white, syncro tunnell in met grey)
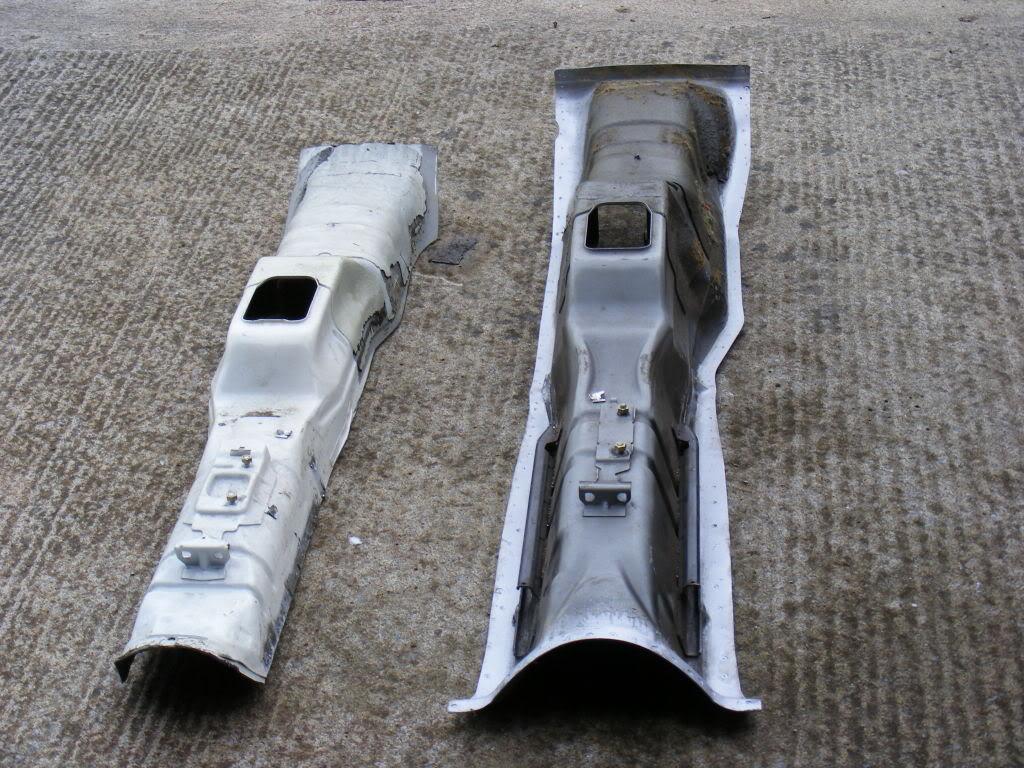
#In the last pic you can see some of the sribe and 1mm disc on the grinder marks on the syncro tunnel; these marks were scribed down from panel pressings on the bulkhead panel of the syncro before i seperated/unpicked its remainder/overcut from the syncro tunnel - since the bulkhead panel is 'common/the same' to both shells, these marks were replicated on the 1300 shell's bulkhead to ensure proper placement, fit and orientation, when it was fitted to the 'non-syncro'/1300 shell...
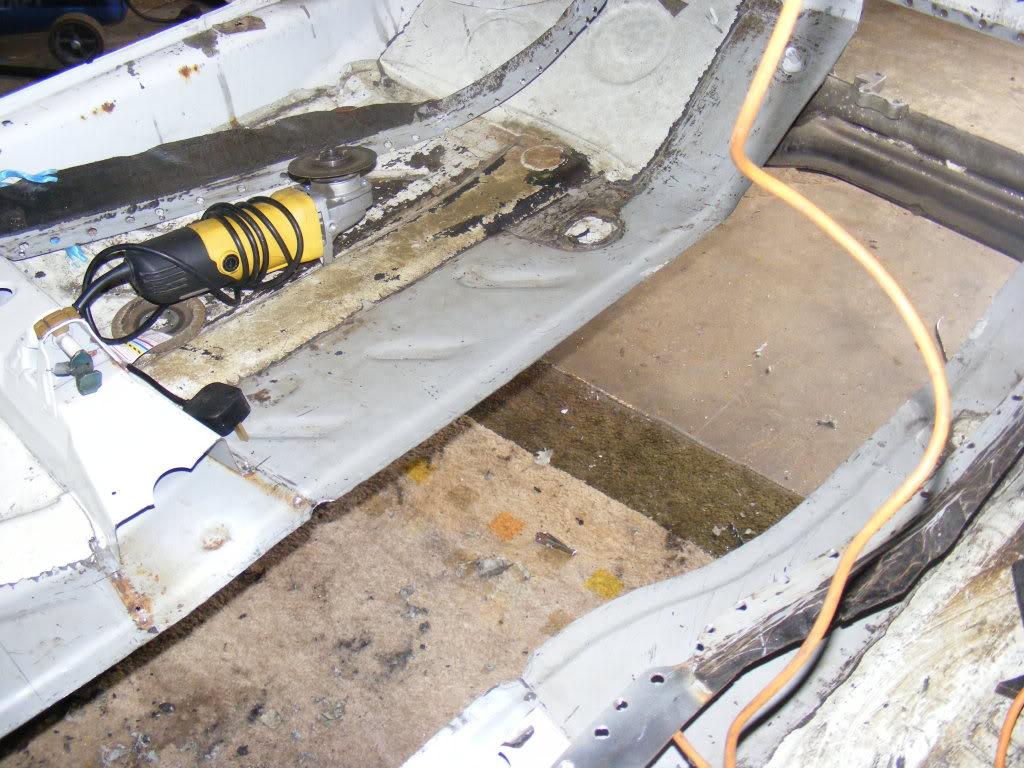
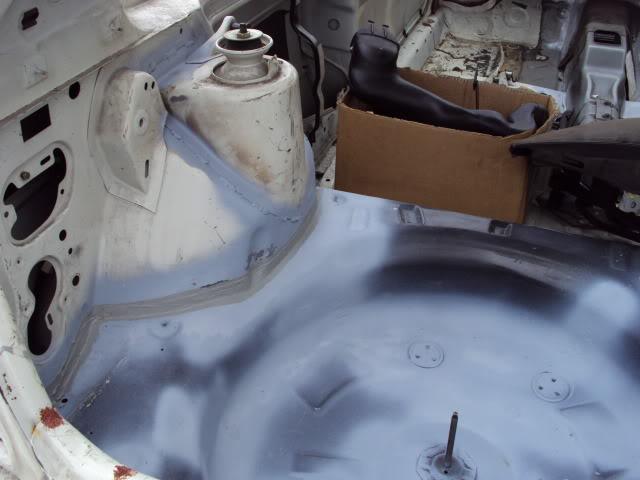
returning to the tunnel cut/floor modification;
...Cut out to a rough shape I was then left with the floor which had upward curvature, so the panel beating process of flattening out this began. having kept the synco floor edges/remenants, I had a rough guide as to what shape the floor needed to be cut, as syncro floors differ from the non-syncro's...
With this rough cut, many 'trial fits' of the syncro tunnel ensued - cutting down carefully as necessary.
The immediate problem arose of, with the floor panel beat flat, the floor gap to the tunnels flanges was 'large'... for awhile I was stumped TBH.... I had researced all of the 3 online forum documentaries of this type conversion -only one (on vw vortex -building/converting a 4 door golf to a 4x4 'Golf country' high rise creation) documented this process - it seems he 'overcame' this problem by filling the floor with house blocks n bricks till the floor did meet the syncro tunnel and welded the edges in a 'blaze of glory' - hardly ideal - my prefrence, and proberley Marks aswell is a more factory/original syncro finish...
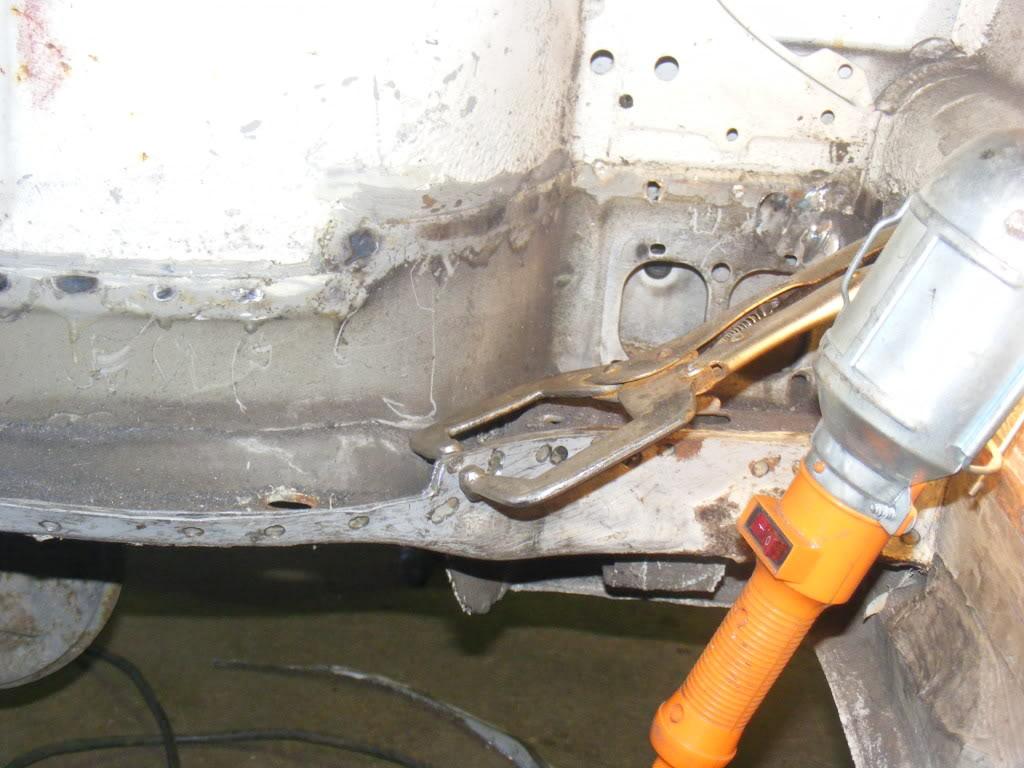
...Long story short I ended up with a solution of a welding up a 'joddler' type tool out of; a 'good' vise grips (sacrificed for the cause!) 6mm plate cuts welded together, 30mm 'wide' with 40mm throat;
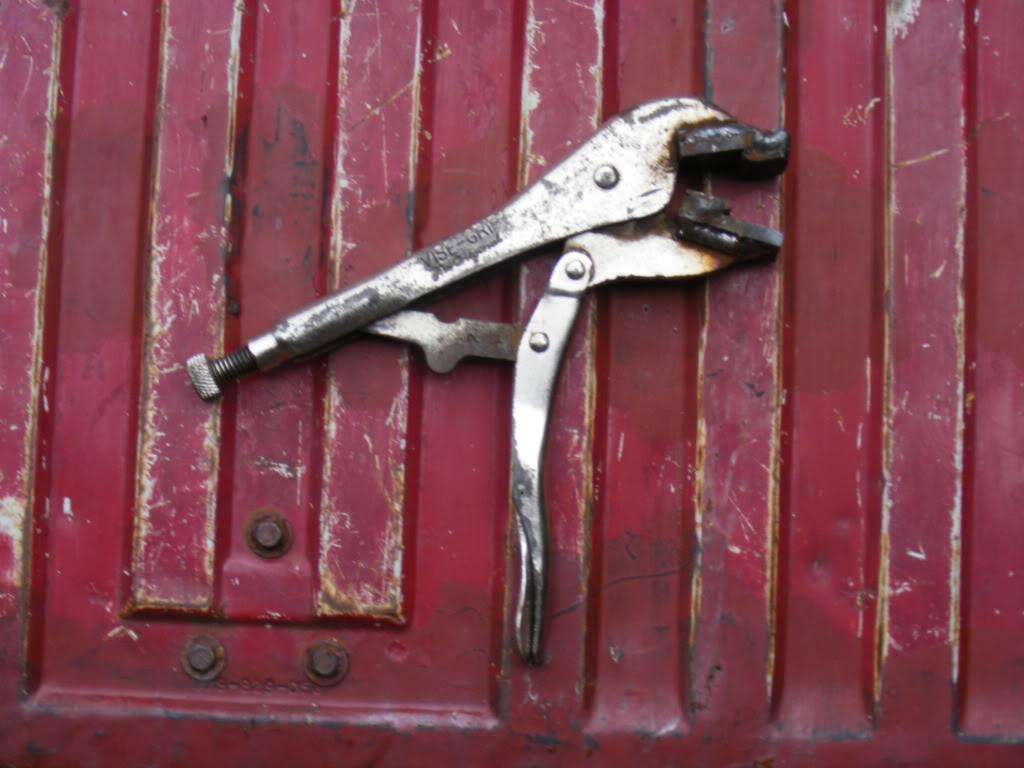
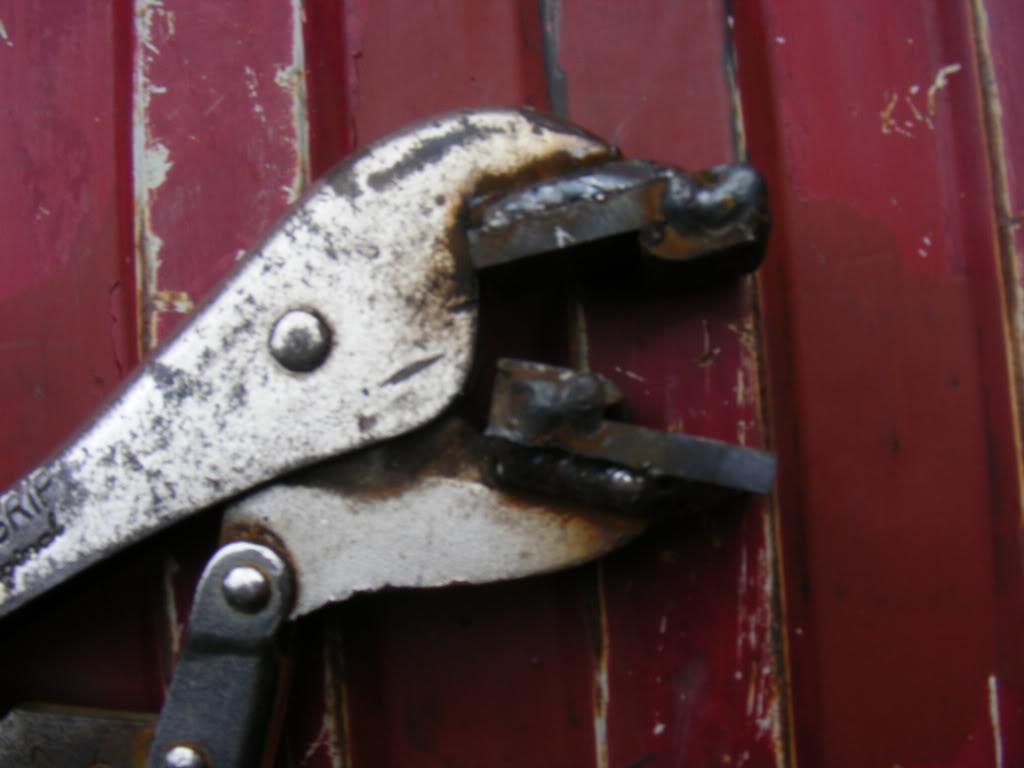
The steps were linished down to give a 'curved step' shape as per the factory syncro floor...
...it worked brilliantly, albeit very slowly, and leaving me with a 'stigmata' like hole in my right hand from clamping it down;
A trial fit (one of many, many trial fits) of the syncro tunnel after this process revealed a much better fit than with its prev flat profile...

aswell as 'stepping down' the floor' the necessary 6mm to meet the syncro tunnels flanges, the process has also served to stiffen up each side of the floor....
Im a lot further on than that - should have the tunnel finally welded in by the end of the weekend - better to be happy with the fit etc before the final welding...
[/quote]
[quote name='BLZEEDUB' date='Sep 2 2011, 11:48 PM' post='677023']
...aye I knew they available alright; had one years ago; it fell to bits - I made this one up outta 6mm plate to give the 6mm 'step' - the usual Joddler tools only give a 1mm step...
I have another vise grips that I made into a '1mm joddler' years back, but it sits about and has 'gone stiff' - if at all possible I prefer the 'butt welds', time consuming and 'warpage risking' that the are... overlapped seams are notorious for rust...
[/quote]
[quote name='BLZEEDUB' date='Sep 6 2011, 11:34 PM' post='678558']
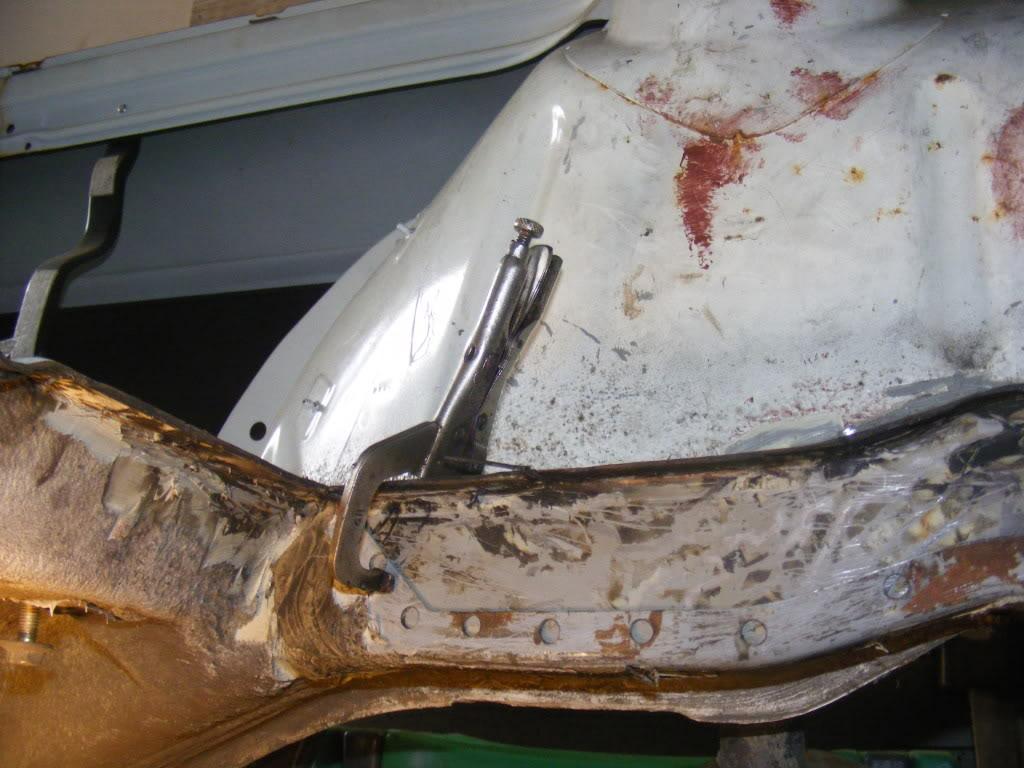
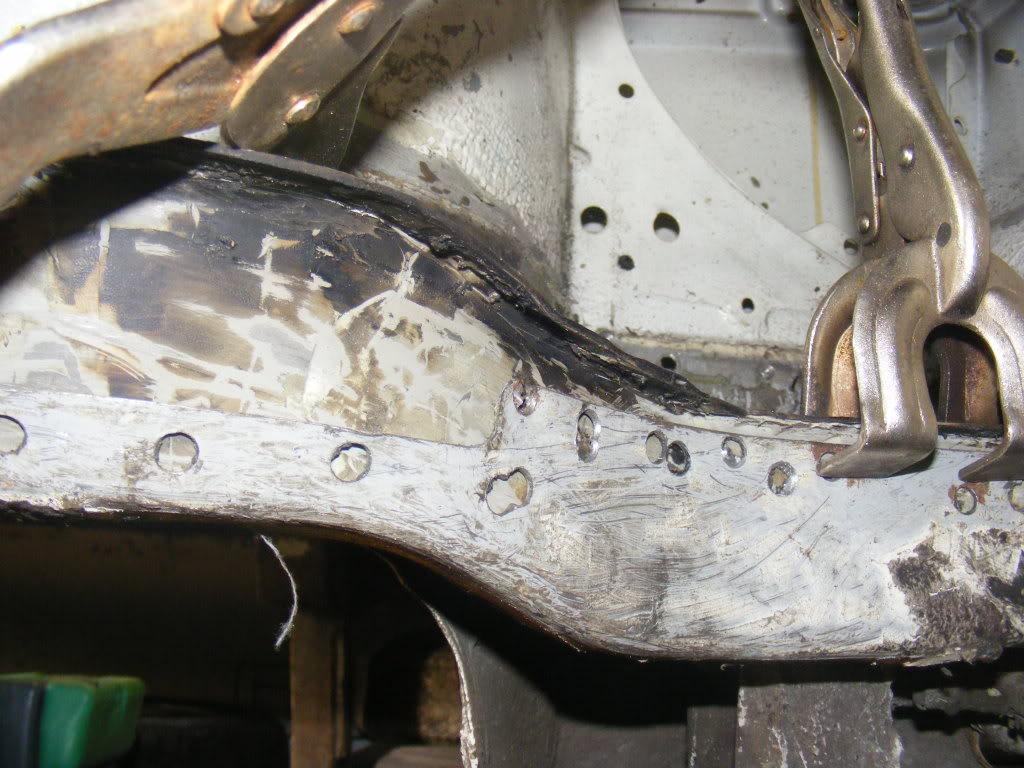
Have taken sets of pics both on the memory card of the camera, and in the internal memory of the camera so updated of some of the post above with 'pics', to explain what Im on about, and pics on this post of the tunnel finally welded in (excuse the mess!!);
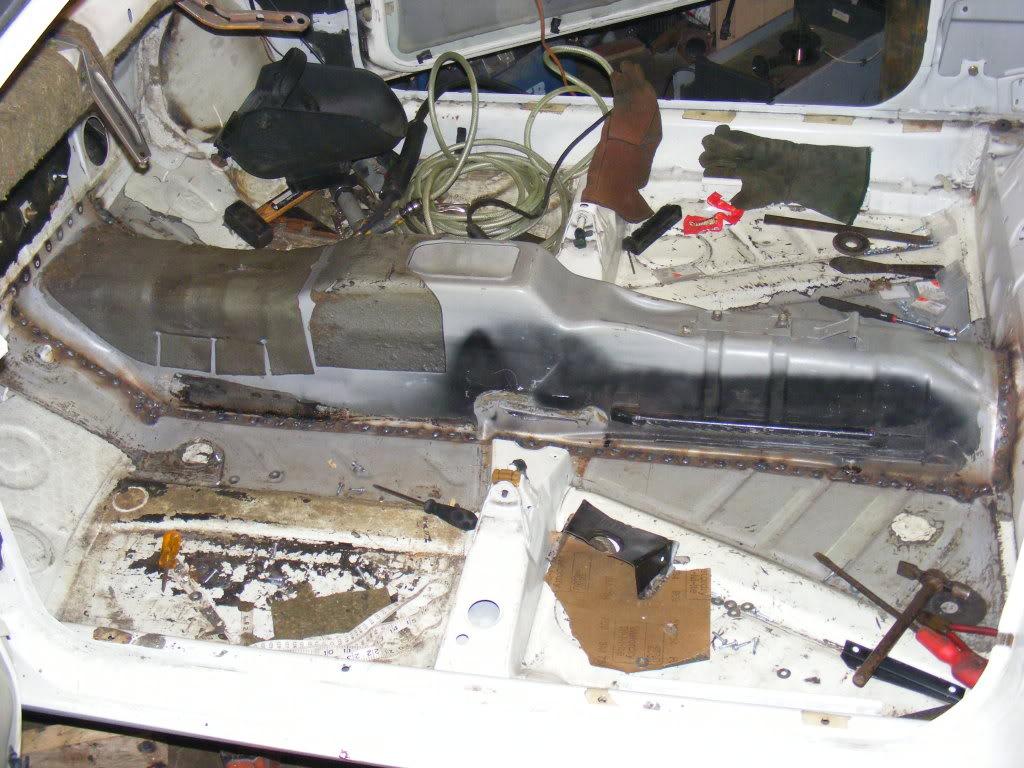
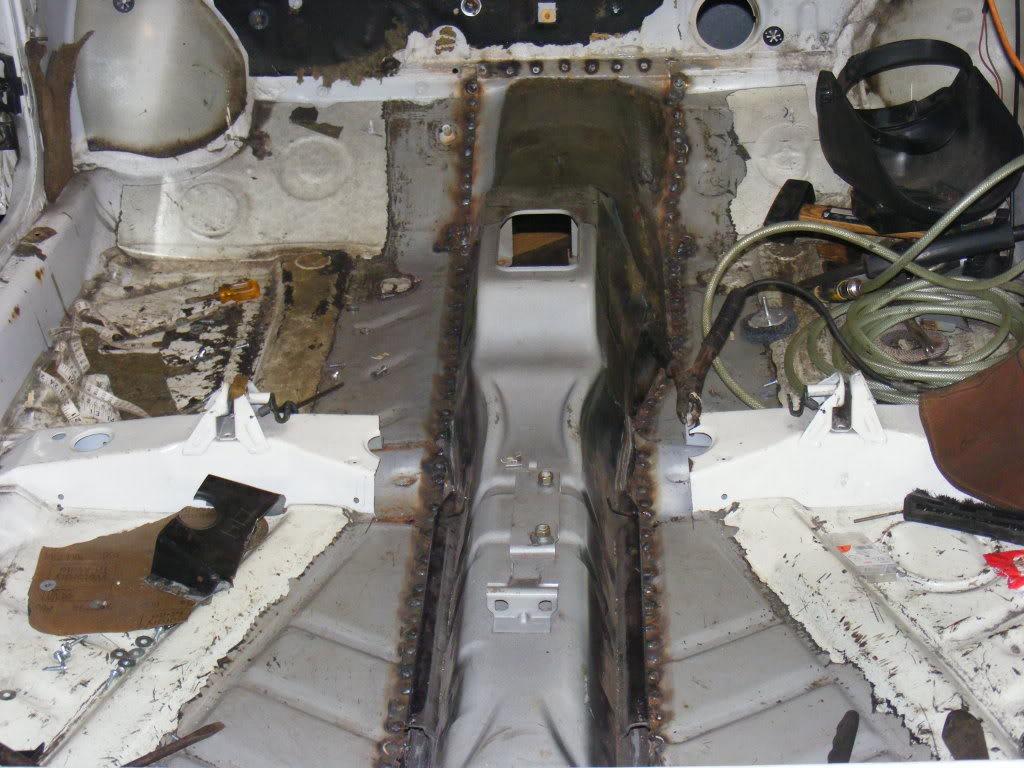
I used self tapping sheel metal screws to draw the floor down tight to meet the tunnels flange; drilled holes in the floors stepped edges for 'plug welding' and alternated back forth, side to side with the welding, to minimise dostortion, and while all rather time consuming it worked out well...
Just need to linish down these welds, and seamseal n prime... next up some seamwelding of shock towers, and subframe mounts, and apart from a bit of 'prettyin up' and making good here and there on the shell, that will complete my 'end' of this project, so this will proberley be one of last updates from me on Mark's syncro project... spoke to Mark yesterday, and were hoping to have it safely back in 'the rebel county' by earley next week for the next phase of this build...
[/quote]
[quote name='BLZEEDUB' date='Oct 5 2011, 12:00 AM' post='688718']
Complimentary words from a fellow 'welder weilder' - thanks trevor.
...while it was a bit of a 'marathon session', part of me did 'enoy' the challenge, in some sort of 'massocistic way'-I was aiming for a solid, neat and factory finish from the conversion - IMO nothing else would really have really been 'acceptable' in view of the expensive and high end performance parts Mark intends to fit to the car, and his vision of the overall quality of finish, and while I am really happy with how its turned out, Mark seems happy with the end result of my efforts, which is the most important thing since its his baby ....
...now like everyone else now, I'll be lookin forward to the future updates.
[/quote]
Using some S3 parts and some Syncro bits Shane. I will be fun once it gets going :)
I bought a Dutchdub conversion kit for the rear beam that will sort the rear out.
Ya in fairness I was in a bad mood for a day or so once I figured I'd have to bin the original shell but nobody could have know to look at that car.
It will be fun when its done!!! When my e30 sells I'm going putting all that money into it so roll that on!
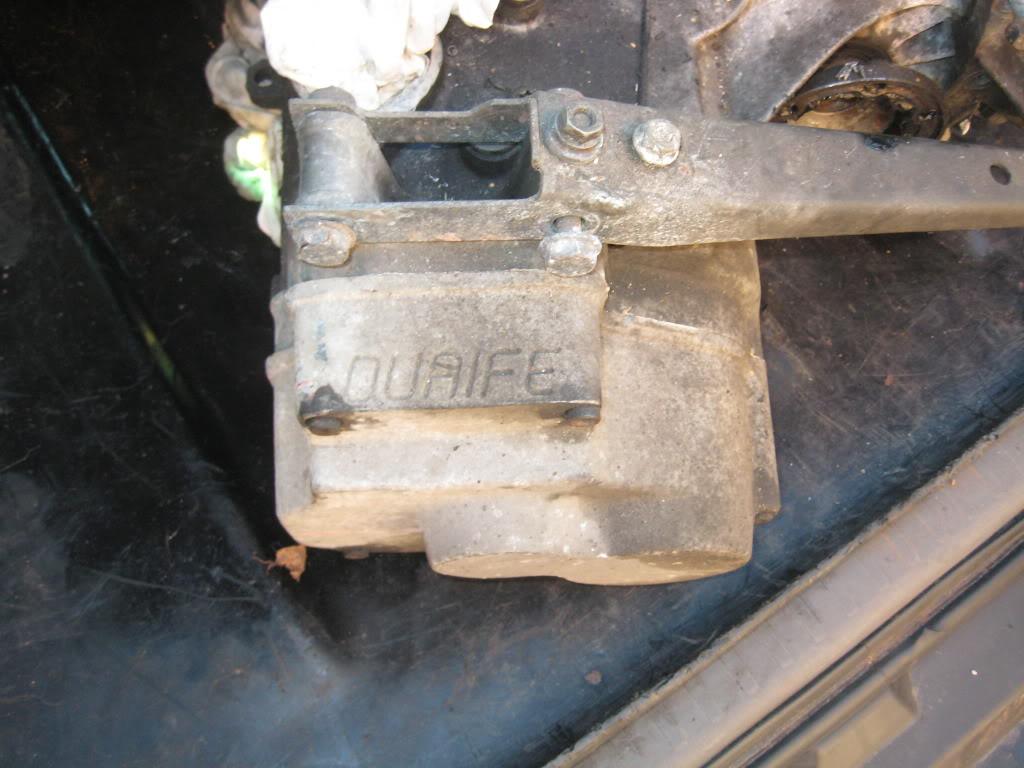
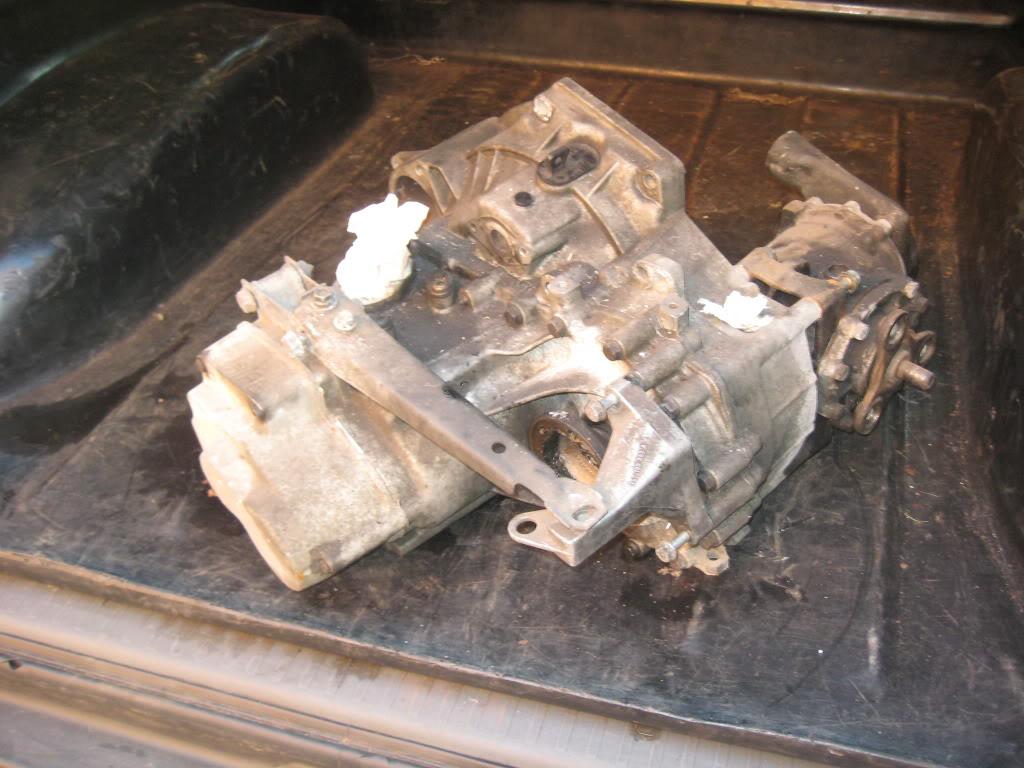
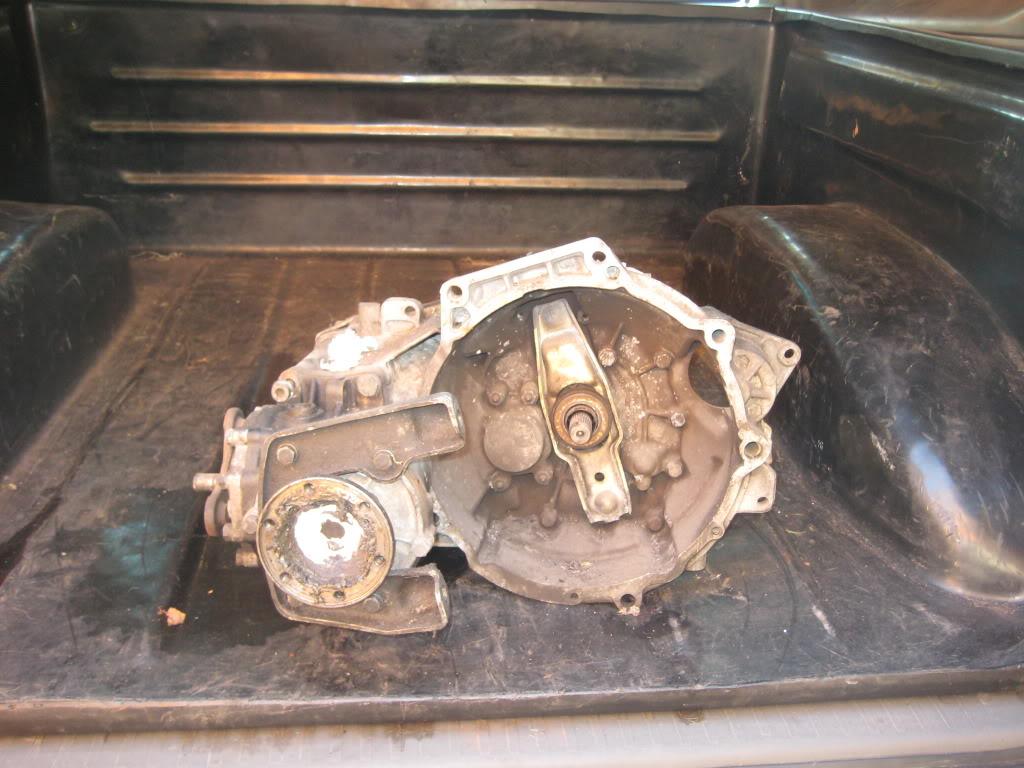
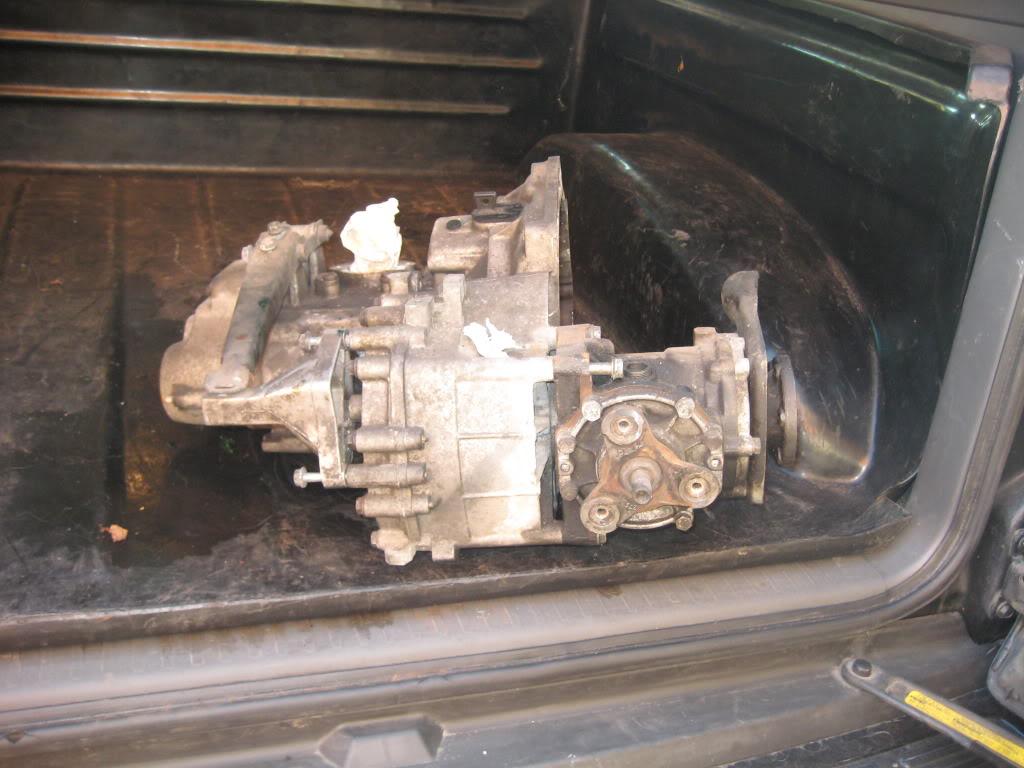
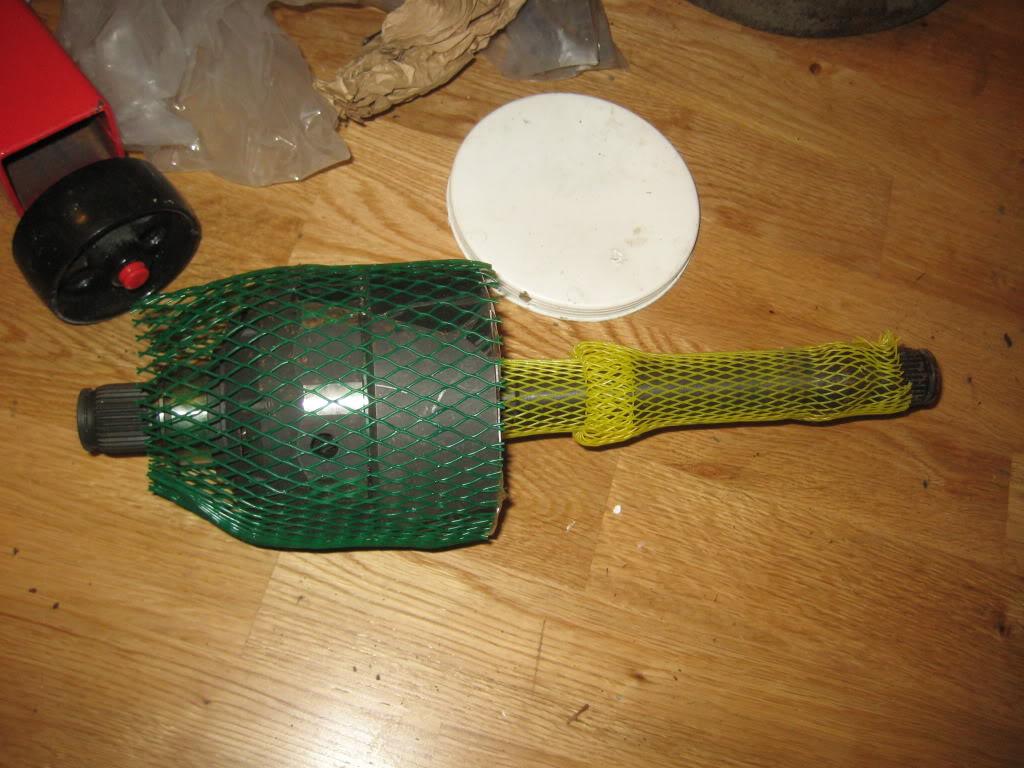
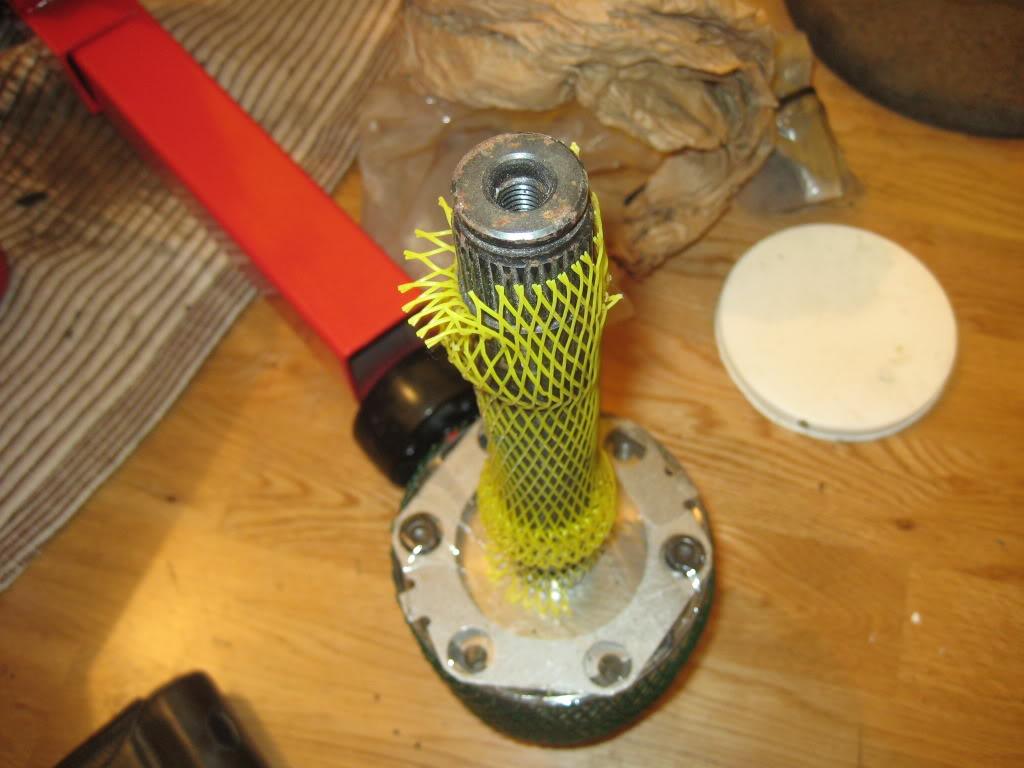
Just back from collecting the following:
o2c rallye box with quaife 6 speed semi straight cut syncromesh gear kit and peloquin front lsd, transfer box
and
rallye rear diff with a new peloquin one to be fitted and rallye arb and rallye brakes
Its some bit of kit I can't get over it. Thanks Ronan.
Pictures from what I got the other day:
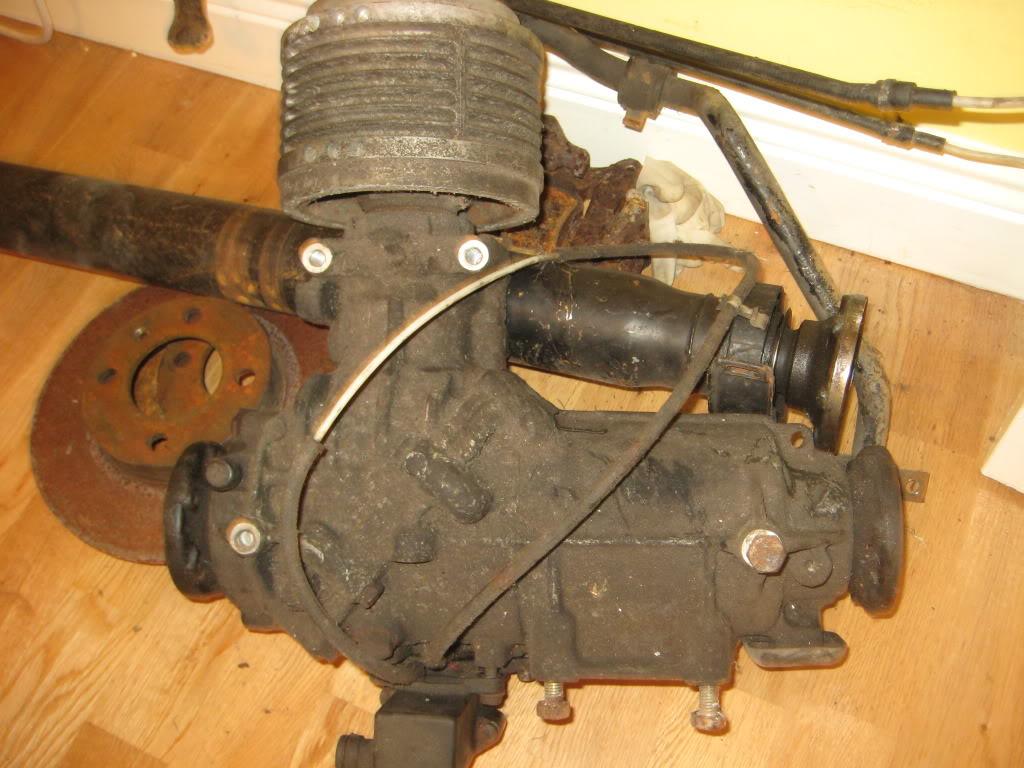
The Rallye and Syncro were principally the same idea ie a 4x4 Mkii but the Rallye had some better parts and a kit.
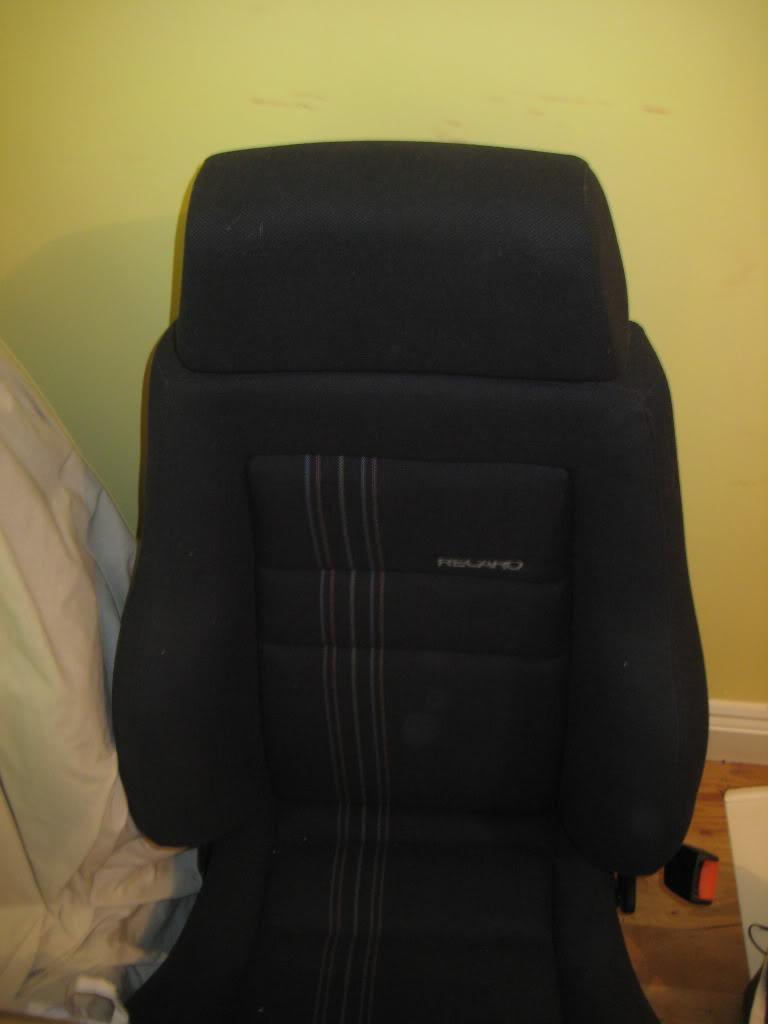
On the outside Sam it will be less is more with the theme of it unless you know what your looking at or look closer
Edition one Recaros :
Happich Green Tint Windows:

So myself and Greg are just back after collecting her from Kevin.
Some job he did its a real factory finish. Was so happy to collect it today.
Thanks Kevin.
Here are Wesleys pictures:


So myself and Greg are just back after collecting her from Kevin.
Some job he did its a real factory finish. Was so happy to collect it today.
Thanks Kevin.
Here are Wesleys pictures:
It wont be staying white it will be going a different colour.
Haven't decided fully on what painter Adam but am leaning towards Paul Ryan here in Cork.
Thanks for the comments lads. I need to get a ball of cash together now to move it to the next stage!
Right so its been ages since Ive updated this.
I got the following bits for it:
An Alternator
B4 Pedal Box
Cable Change
Brand new 16v Gti Hella rears
This Sat its going getting some attention around sealing up the work that was done by Kevin. Will try and get photos of the work and bits up as well as I know thats what makes a build thread the pictures!
A set of Rallye hubs bought this evening. Promise I will update this with photos soon instead of just text.

