Make a donation

Author Topic: Luke's Detailing Guide  (Read 13963 times)

Offline lukemk5gti

  • Just look at my post count
  • ******
  • Thank You
  • -Given: 28
  • -Receive: 118
  • Posts: 1845
    • Email
  • My Ride: http://www.mk5golfgti.co.uk/forum/index.php/topic,89715.msg907250.html#msg907250
Luke's Detailing Guide
« on: September 23, 2014, 03:30:18 pm »
So Jay’s detailing guide is what you need to read on this subject but here’s my brief guide on what work I have done on my car that’s achievable without going into depth. A weekend mechanics guide if you will. Here is the link to Jay’s thorough guide http://www.mk5golfgti.co.uk/forum/index.php/topic,74892.0.html

I’ll list the products as I go and the steps throughout. I’ll do exterior first followed by interior. I’m writing down here what works for me from a tried and tested routine. Some people prefer to apply certain products before others etc. so just do what suits you. 1 missed step won’t ruin a car!


Exterior
Step 1: Rinse

Pressure washer everything, not too close and not too high a pressure for fear of damaging car. Don’t forget wheel arches and brake calipers.

Step 2: Snowfoam 1

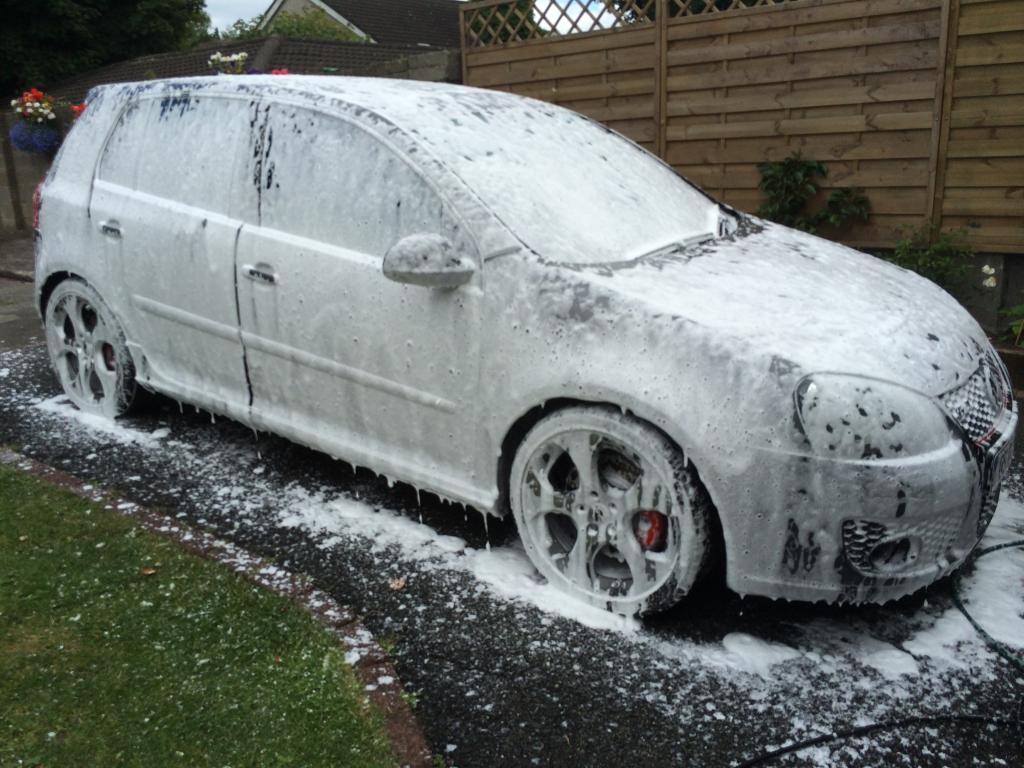
I use CNP demon foam and a homemade lance adapted for my pressure washer. Just spray it on and leave to remove the more stubborn dirt then rinse off after 5 or 10mins.

Step 3: Pre Clean

I use orchard citrus pre clean diluted down to how about my car is. This removes all traces of old waxes and sealants for a fresh base.

Step 4: Snowfoam 2

Apply some more snow because you’re guaranteed to have missed something and rinse.

Step 5: Two Bucket Method

I use a microfiber wash mitt with my two buckets. Start from the roof down and wash in straight lines. Dip and agitate mitt on grit guard after every stroke in rinse bucket. Work from the top down. Don’t go near the back bumper, skirts, underbelly, wheels, arches etc. with the same wash mitt as these areas will be filthy and contain traces of old chemicals.

When you’re all done, change water if needed in buckets and change to a coarser wash mitt. Now tackle the areas excluded above before a final rinse.

Step 6: Iron X

Get it all over the car, wheels would be the main culprit. Don’t do it in direct sunlight and leave for no longer than 5 mins or it WILL stain and rinse again.

Step 7: Clay

Start claying the car, I make the clay lube from a mix of autoglym shampoo and water. Follow your clay guide but basically it’s straight lines, medium pressure. Don’t forget the wheels and a final rinse all over.

Step 8: Dry 1

I have a chemical guys wooly mammoth microfiber drying towel. Dry in straight lines with towel folded into quarters. As each corner becomes saturated, flip over. I only dry here now as I don’t see the point in drying before applying Iron X and clay and rinsing again just to dry a second time.

Step 9: Polish

Refer to a more in depth guide here but basically I have a DAS6 pro polisher, chemical guys V34, V36 and V38 polishes which range from heavy to light and a range of chemical guys microfiber foam and microfiber pads.
Start with heavy cutting pad and V34 compound polish working up to medium polishing pad and V36 cutting polish and finishing with finishing microfiber pad and V38 final polish.
It’s not rocket science. Use good lighting to see how you’re doing and ask a friend to see if “you missed a spot”. You can also benefit from a paint thickness gauge if you want to splash out!

NOTE: Mask off all of the rubber seals and any areas that are of a dissimilar material. The polisher generates huge amounts of heat through friction and if placed on certain areas such as rubber sills it can actually cause severe damage.

Also as pointed out by Jay, your back bumper and certain trims will be made of plastic coated in paint in comparison to your metal panels coated in paint. Different pressures will be required when working on different materials so start off light!

Now this is where I go off the beaten track. I also polish my lights, the black gloss pillars and the glass. Use some common sense here with polishes and start at the lightest working your way to heavier cut as required.
The reason I polished the glass is for application of G1 later on. I use specific glass polish here.


Step 10: Snowfoam 3

Get to snowfoaming again to remove all the polish residue and any bits you may have missed and then a good rinse.

Step 11: Dry 2

Same as above.

Step 12: Glaze

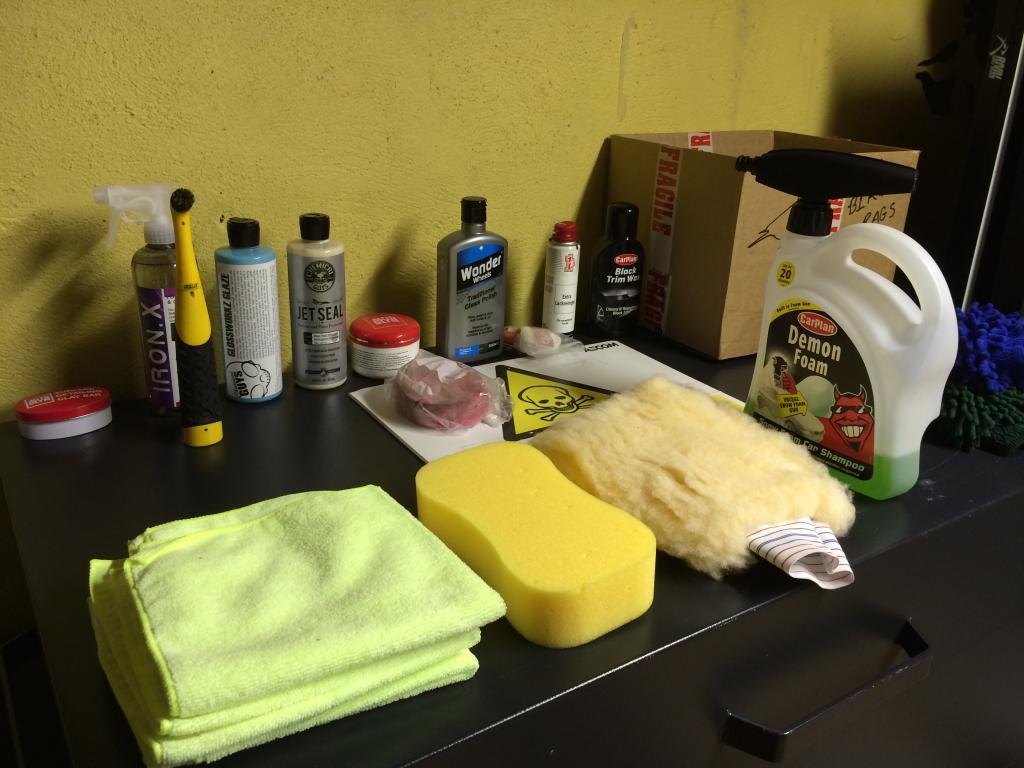
I applied 3 coats now of chemical guys glossworks glaze. It’s tough on the arms but follow the label and you’re fine. Remember that the less you put on the easier it will be to buff off later. Buff off residue after it has time to stick. Apply all your coats and then get ready to seal. The glaze fills the tiny swirls and chips that you missed in polishing.

Just some of the items I used below

Step 13: Sealant

I applied 3 coats of jetseal 109. Wait 20 mins after each application before applying the next. Don’t forget to do your wheels too but I wouldn’t bother with the plastic trims.

Step 14: Wax

I applied 3 coats of autoglym super HD wax. Don’t let it sit for too long or it’s tough to buff off. Again out of direct sunlight.

Step 15: Windscreen Protection

Now that it’s polished from earlier on I applied some G1. It’s a hydrophobic coating that you paint on and it’s amazing!! Just dab it on with the cotton pads provided. Wait a while and apply 2 more coats to the front. Remove residue with the residue remover supplied. Buff the hell out of it with a microfiber cloth after. It may seem like you’re removing the coating but you’re not. This stuff seems to get into the glass on a microscopic level. With the left over amount in the bottle give all other windows a single coat as they don’t need the full 3.


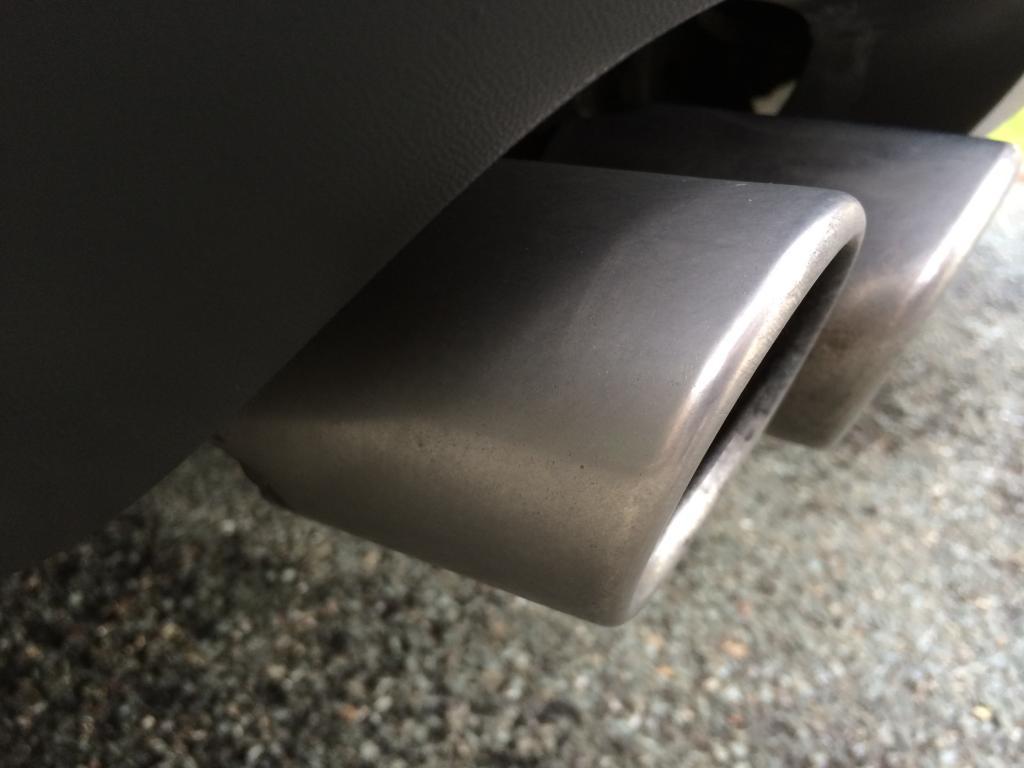
Step 16: Polish Exhausts

Refer to my build thread for a full breakdown of this.


Step 18: Apply Trim Coating

Apply your black trim coating to rear bumper, front splitter and side skirts.

Step 19: Tyre Gel

Apply tyre gel but keep it far from the newly cleaned alloys.


Interior

Step 1: Petrol Cap

Open your petrol cap and clean out all the grit inside. Unblock the small valve on the bottom of the sump to allow future water to drain and snowfoam it all if need be. Don’t forget a quick bit of grease on the hinge too!

Step 2: Door Trims

This is a good 2 hour job. I use chemical guys all purpose cleaner diluted down 10:1 with water and spray it on. Remove all of the old grease and gunk and seal it up with jetseal 109 and or wax. Don’t forget to regrease the doors.


Step 3: Drainage Channels

These are the channels that take the rain water build up from the windscreen and drop it to the ground. They get stuffed full of leaves so remove the 2 wipers and the plastic trim. Gather all you can by hand and power hose the rest. If you feel up to it then you can remove the plastic wheel arch protection. The channel drains down just behind here so sand and grit build up at the bottom of the arch. I scooped a pint glass full out last time.

Step 4: Engine Bay

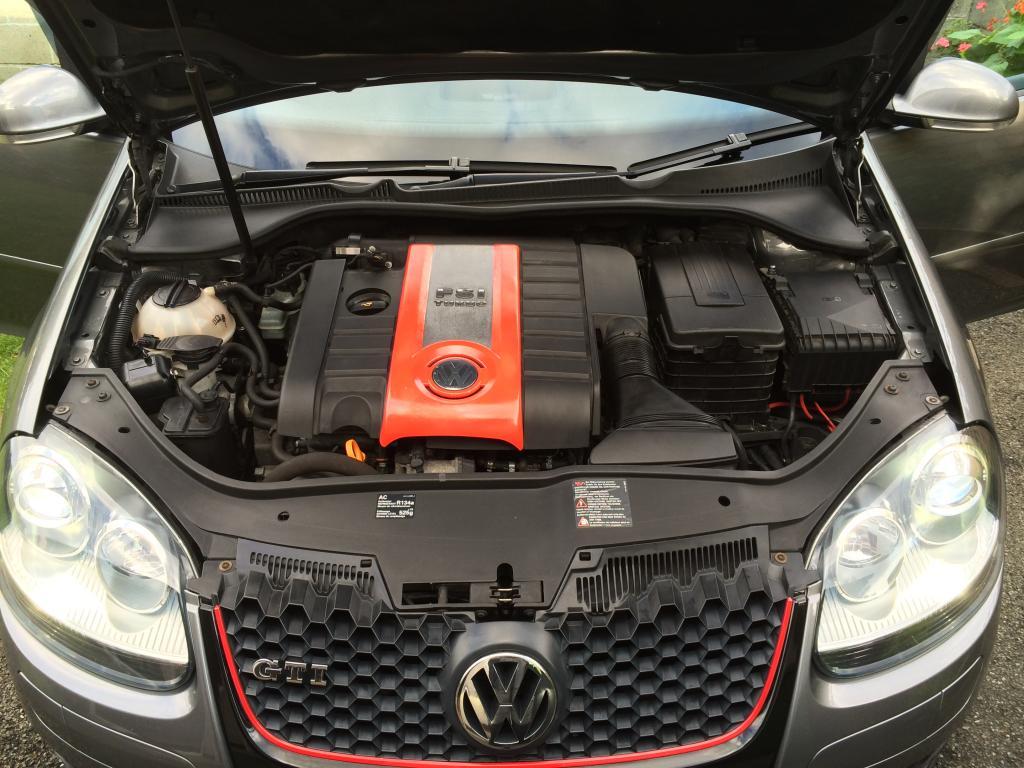
Again chemical guys all purpose diluted 10:1. If you’re feeling brave you can tape off electrical parts and power hose the bay also.

Step 5: Hoover & Canned Air

Before hovering, sweep down all the crap from high level working your war down. I use a Hurricane O2 canless air system which blasts air at 220mph. The vents in particular annoy me so a blast with this and the dust that kicks out is unbelievable. Also handy for the crevices around the window and fuel switches.


Hoover everything. Take the seats out and get down the sides. I guarantee you even find money. They’re held in place with 4 spline bolts. See build thread if you need.
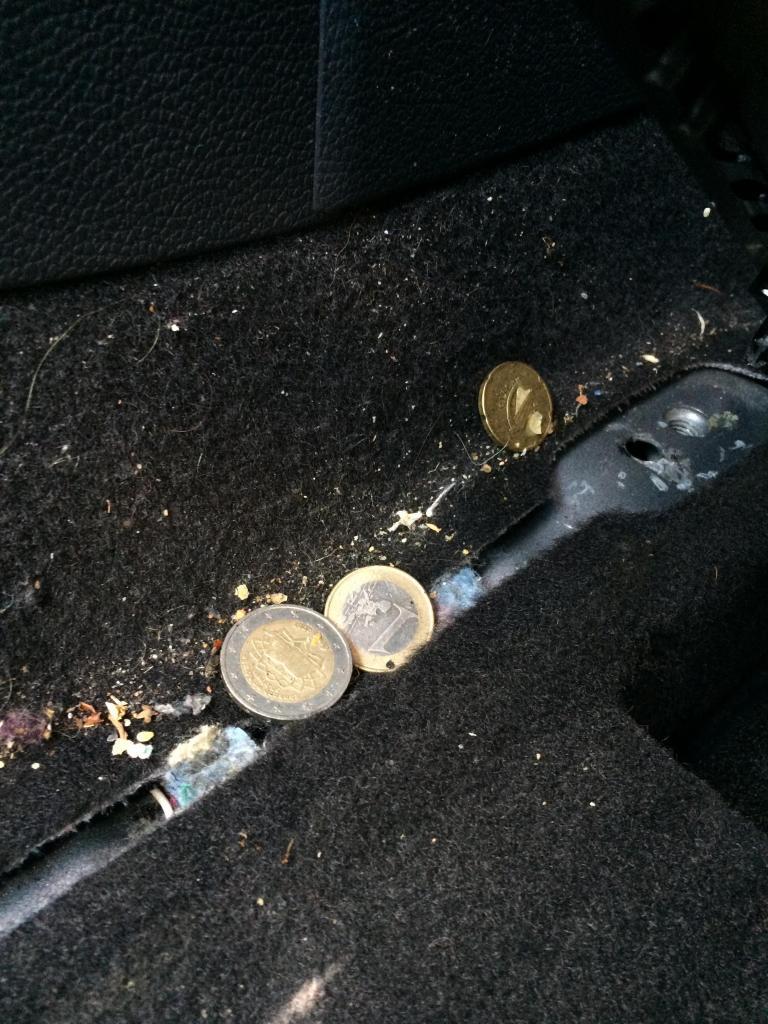

Step 6: Pre Clean

Dilute chemical guys APC to 20:1 for interior use and get spraying. Wipe up with microfiber cloth.

Step 7: Leather Clean & Condition

After a quick warm water clean off the seats I applied some leather conditioner. The conditioner gets sucked up by the leather depending on the condition so do a few coats with special attention to bolster and seatbelt area.
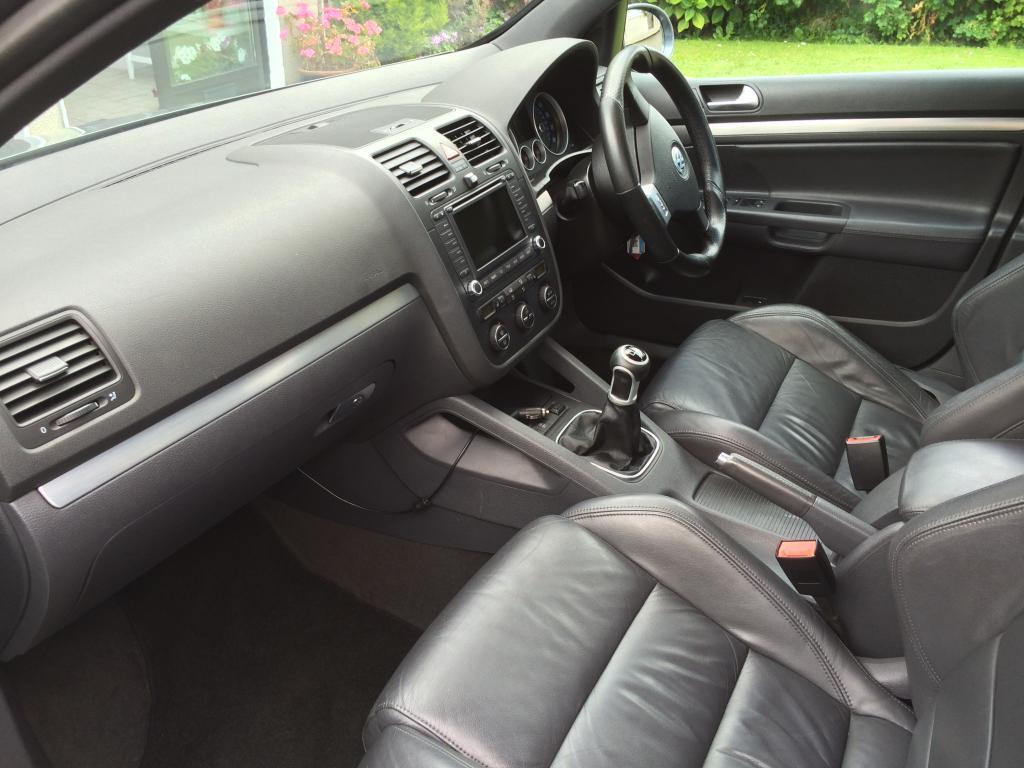

Step 8: Steering Wheel, Gear Stick & Handbrake

There’s a few how to’s on this already. A hot moist towel stuck on the area for a while opens the pores on the leather. The brush and agitate with warm soapy water. Apply leather conditioner and dry.

Step 9: Polish

Use displex polish to clean scratches on radio screen and clocks.

Step 10: Internal Glass

Clean the internal glass as normal. Apply a small amount of fairy liquid to a dry micribfibre cloth and apply to window. Make sure it’s all dry or you’ll have a soapy mess. Leave for a while and buff off. This will leave a hydrophobic coating on the window and condensation will not build up at all. Usually I apply a new coat every 3 months but it’s amazing!

Step 11: Last Few Bits

I clean down the plastic trims and foot pedals with APC. Don’t use anything slippy!
A very weak dilution of APC will remove your girlfriends make up stains all over the passenger visor.
Remove your spare wheel and hoover all around. Check the pressure of it while you’re there!
If you’re using chemical guys liquid spray air freshener don’t apply it to cloth as it leaves a sticky residue. I sometimes remove the carpets and spray the floor before putting carpet back on top.


« Last Edit: December 11, 2014, 02:27:40 pm by lukemk5gti »

Offline nickg123

  • Taking part
  • ***
  • Thank You
  • -Given: 5
  • -Receive: 1
  • Posts: 26
    • Email
Re: Luke's Detailing Guide
« Reply #1 on: September 23, 2014, 03:40:06 pm »
No offence intended but please change this part:

"If you want to mask off the rubber sills by all means do but it’s not that difficult to remove the polish afterwards"

If you catch a rubber window trim or rubber sill with a machine polisher the damage will be irreversible, the machine and spinning pad will effectively burn the rubber and inbed any polish so badly that even IPA won't remove it properly, it'll always come back white and never look the same again.  You must tape these edges up!  I'd also suggest taping door handle edges and the plastic side strips along the doors as plastics like that won't take the heat build up that a metal panel will and you'll quickly see paint burning off before your eyes.

Offline marko

  • Won't Shut up.
  • *****
  • Thank You
  • -Given: 16
  • -Receive: 34
  • Posts: 903
    • Email
Re: Luke's Detailing Guide
« Reply #2 on: September 23, 2014, 04:17:17 pm »
Good read mate..well done!!!
2007 TR gt170...heated leather,underseat drawers,auto-levelling bi-xenons,puddle leds,chrome switches,footwell lights f+r,cruise control and ed30 rear lamps,LED interior....carbon highline clocks,ed30 front spoiler,RNS 510 P+MDI,mk6 gti gearknob,TPMS done,complete r32 trim kit+ MFSW,r32 f+r brakes,RLS fitted.headlamp washers,folding mirrors and boot pop,mk6 RVC,19"Helios,AP coilies,valeo LEDs  ...dpf delete and remap to finish off

Offline lukemk5gti

  • Just look at my post count
  • ******
  • Thank You
  • -Given: 28
  • -Receive: 118
  • Posts: 1845
    • Email
  • My Ride: http://www.mk5golfgti.co.uk/forum/index.php/topic,89715.msg907250.html#msg907250
Re: Luke's Detailing Guide
« Reply #3 on: September 23, 2014, 06:57:58 pm »
No offence intended but please change this part:

"If you want to mask off the rubber sills by all means do but it’s not that difficult to remove the polish afterwards"

If you catch a rubber window trim or rubber sill with a machine polisher the damage will be irreversible, the machine and spinning pad will effectively burn the rubber and inbed any polish so badly that even IPA won't remove it properly, it'll always come back white and never look the same again.  You must tape these edges up!  I'd also suggest taping door handle edges and the plastic side strips along the doors as plastics like that won't take the heat build up that a metal panel will and you'll quickly see paint burning off before your eyes.

I agree with you 100%

It's not what I meant when I said there's no need for taping up. When I polish around the edges I typically use the corner of the pad to get a more precise polish. I would never let the polisher touch the rubber.

I would have thought when I wrote it that it was common sense not to go near the rubber with the polisher but when it's pointed out from a different point of view I can see where the confusion comes in.

Will update tomorrow on my laptop!

Offline xjay1337

  • Just look at my post count
  • ******
  • Thank You
  • -Given: 15
  • -Receive: 377
  • Posts: 4916
  • My Ride: http://www.mk5golfgti.co.uk/forum/index.php/topic,88399.0.html
Re: Luke's Detailing Guide
« Reply #4 on: September 23, 2014, 11:57:23 pm »
I don't want to be "that guy" and realise I may sound like I'm always talking down to people, and not to pretend that I'm some detailing "god" (i'm not)  but the last thing you want to do is polish using the edge of a pad, you will very quickly create a hot spot and end up with massive panel temperatures risking a burn through or chewing up of the paint.


 With a Random Orbital DA (such as a DAS 6) you're going to be more likely to get away with it because the pad will generally just stop rotating and simply oscillate..no abrasive action work talking about, hence why you've probably gotten away with it by now. If that is a habbit you have I would suggest losing it quickly  :happy2:

Do that on a rotary and on a plastic panel (EG a bumper) you can burn through in a matter of seconds.  :scared:


Offline lukemk5gti

  • Just look at my post count
  • ******
  • Thank You
  • -Given: 28
  • -Receive: 118
  • Posts: 1845
    • Email
  • My Ride: http://www.mk5golfgti.co.uk/forum/index.php/topic,89715.msg907250.html#msg907250
Re: Luke's Detailing Guide
« Reply #5 on: September 24, 2014, 08:43:00 am »
I don't want to be "that guy" and realise I may sound like I'm always talking down to people, and not to pretend that I'm some detailing "god" (i'm not)  but the last thing you want to do is polish using the edge of a pad, you will very quickly create a hot spot and end up with massive panel temperatures risking a burn through or chewing up of the paint.


 With a Random Orbital DA (such as a DAS 6) you're going to be more likely to get away with it because the pad will generally just stop rotating and simply oscillate..no abrasive action work talking about, hence why you've probably gotten away with it by now. If that is a habbit you have I would suggest losing it quickly  :happy2:

Do that on a rotary and on a plastic panel (EG a bumper) you can burn through in a matter of seconds.  :scared:

I wouldn't consider it talking down, a tip like that could stop someone from making the same mistake and costing them a lot of money.

Again from a different perspective. I find swirl marks near the edges are never that bad and are hardly noticeable hence light pressure with the corner of the DAS6.

But you do make a good point, I think I'll update to say to mask off just to be safe!

You're the man for this stuff Jay. My guide was only really made so that down the line if I choose to sell the car people can see the work I've put in.

Offline nickg123

  • Taking part
  • ***
  • Thank You
  • -Given: 5
  • -Receive: 1
  • Posts: 26
    • Email
Re: Luke's Detailing Guide
« Reply #6 on: September 24, 2014, 09:39:09 am »
No offence intended but please change this part:

"If you want to mask off the rubber sills by all means do but it’s not that difficult to remove the polish afterwards"

If you catch a rubber window trim or rubber sill with a machine polisher the damage will be irreversible, the machine and spinning pad will effectively burn the rubber and inbed any polish so badly that even IPA won't remove it properly, it'll always come back white and never look the same again.  You must tape these edges up!  I'd also suggest taping door handle edges and the plastic side strips along the doors as plastics like that won't take the heat build up that a metal panel will and you'll quickly see paint burning off before your eyes.

I agree with you 100%

It's not what I meant when I said there's no need for taping up. When I polish around the edges I typically use the corner of the pad to get a more precise polish. I would never let the polisher touch the rubber.

I would have thought when I wrote it that it was common sense not to go near the rubber with the polisher but when it's pointed out from a different point of view I can see where the confusion comes in.

Will update tomorrow on my laptop!

Cool, it's not a case of never letting the machine touch the rubber, you can never guarantee it won't with the tiniest lack of control or it suddenly grabbing - To be able to get close enough you need the area masked up, for the 30 seconds it takes it's just not a stage that's worth missing at all.

You've seen what Jay said re the edges and he's spot on, it's good practise to use the right methods from day one really as when you step up from a DAS6 you'll reap the rewards big time (as Jay well knows haha).

Offline K9

  • Just look at my post count
  • ******
  • Thank You
  • -Given: 1
  • -Receive: 14
  • Posts: 1076
  • VW LifeStyle
    • Email
Re: Luke's Detailing Guide
« Reply #7 on: September 24, 2014, 03:58:24 pm »
great guide  :happy2:
stick this  :drinking:

Offline Sjw_Vw

  • Always Involved
  • ****
  • Thank You
  • -Given: 10
  • -Receive: 5
  • Posts: 430
    • Email
Re: Luke's Detailing Guide
« Reply #8 on: October 01, 2014, 04:05:34 pm »
Nice guide for beginners :happy2:
Instagram - sjw_vw. Updated all the time :)

Offline lukemk5gti

  • Just look at my post count
  • ******
  • Thank You
  • -Given: 28
  • -Receive: 118
  • Posts: 1845
    • Email
  • My Ride: http://www.mk5golfgti.co.uk/forum/index.php/topic,89715.msg907250.html#msg907250
Re: Luke's Detailing Guide
« Reply #9 on: June 29, 2015, 01:04:07 pm »
Booked a few days off work so I can give the car it's bi-annual detail!

I'll apply less coatings this time and see if it affects the longevity of the protection....

Offline Frenzy

  • Won't Shut up.
  • *****
  • Thank You
  • -Given: 62
  • -Receive: 29
  • Posts: 653
Re: Luke's Detailing Guide
« Reply #10 on: June 29, 2015, 05:40:05 pm »
fancy doing mine afterwards?  :grin:

I can never find the time these days, 2 young kids plus i like riding my bike = no time for detailing  :sad1:

Offline lukemk5gti

  • Just look at my post count
  • ******
  • Thank You
  • -Given: 28
  • -Receive: 118
  • Posts: 1845
    • Email
  • My Ride: http://www.mk5golfgti.co.uk/forum/index.php/topic,89715.msg907250.html#msg907250
Re: Luke's Detailing Guide
« Reply #11 on: June 30, 2015, 01:07:44 pm »
fancy doing mine afterwards?  :grin:

I can never find the time these days, 2 young kids plus i like riding my bike = no time for detailing  :sad1:

I'm the exact same! Hence taking actual days off work to do so... It'll be worth it though. I have to admit I'm not enjoying the car as much in it's current state and as everyone knows they go faster when they're clean!

Offline Frenzy

  • Won't Shut up.
  • *****
  • Thank You
  • -Given: 62
  • -Receive: 29
  • Posts: 653
Re: Luke's Detailing Guide
« Reply #12 on: June 30, 2015, 03:32:38 pm »
yep the more love you give them the more you love them  :happy2:

Looking forward to seeing the results  :popcornsoda:

Offline Pesky jones

  • Just look at my post count
  • ******
  • Thank You
  • -Given: 2
  • -Receive: 19
  • Posts: 1639
Re: Luke's Detailing Guide
« Reply #13 on: July 09, 2015, 10:51:52 pm »
Looking forward to seeing it this time around. Just wish I had the stuff to get mine as pretty as yours!

Offline rich83

  • Just look at my post count
  • ******
  • Thank You
  • -Given: 165
  • -Receive: 802
  • Posts: 13444
    • MK5 Golf GTI
  • My Ride: https://www.mk5golfgti.co.uk/forum/index.php?PHPSESSID=ne1mqeuiqg4gchor54m4fi7hcf&/topic,19740.0.html
Re: Luke's Detailing Guide
« Reply #14 on: July 10, 2015, 12:37:20 am »
Great work fella.  Can't beat a shiney GTi  :congrats:

 :happy2:

That didn't take you long..... There is no prize for most accounts held in ones lifetime!!!   :laugh: