Had a few queries about the DAB install on my build thread so though I'd expand it a bit so we've got a half decent 'how to'. There's a lot of guys and girls on here with earlier mk5's with no roof mount aerial on. If you've a retro fitted DAB head unit and don't want stick on aerials in your windscreen but scratching your head as to how to get the DAB to work without them look no further

See this link along with my rough overview in my build thread.
http://www.golfgtiforum.co.uk/index.php?topic=263921.0 All the parts cables and connectors are available online and if you've can find a cheap DAB amp then you can probably do it quite cheap (5K0 035 552 H), if you haven't go here as its everything you'll need apart from the DAB headunit
http://www.kufatec.co.uk/shop/en/DAB-/-DAB-Tuner/Retrofit-kit-DAB-/-DAB-antenna-module1 - Remove tailgate trim, both main trim and window surround trim. For the main trim there are two recessed screws in the inner grab handles it should then just pull (be firm with it), there are 4 clips along top, 4 at the bottom and two at the sides. Then just pull and remove inner rear window trim and then you should have access to everything
2 - Take out stereo from dash and leave perched safely but all connected up in the front of you car.
Stereo removal, loads of threads about this, nothing to with me but a vid for those who can't be ar$ed to search
3 - Back to the rear of the car, the antenna to be removed is the one on the left hand side of the tailgate as you look from the rear of the car. See below

The original amp / antenna needs the retaining screw removing and the connector disconnecting on the window antenna end. The cable will then have to be traced and removed that's hard wired in to the amp, trace it back and unplug and remove. You can see the standard amp and the DAB here, the retaining screw is on the other end for the new DAB one.

Take out the encapsulated nut in the bodywork and move to the other punched out square hole in the bodywork, this allows the new DAB antenna to be screwed back into the body securely and keep it all OEM. You can see the encapsulated nut below. Where it moves to is behind my finger for the new DAB antenna

4 - Install DAB amp and connect tailgate aerial end secure in position with bodywork screw.
5 - Connect double Fakra connector to amp and lash up through car (don't worry about installing neatly at the moment) plug in to the DAB port on your headunit.
On my RCD510 its the uppermost connector higher up on the rear of the stereo than the twin connector that FM etc is normally connected to. see below

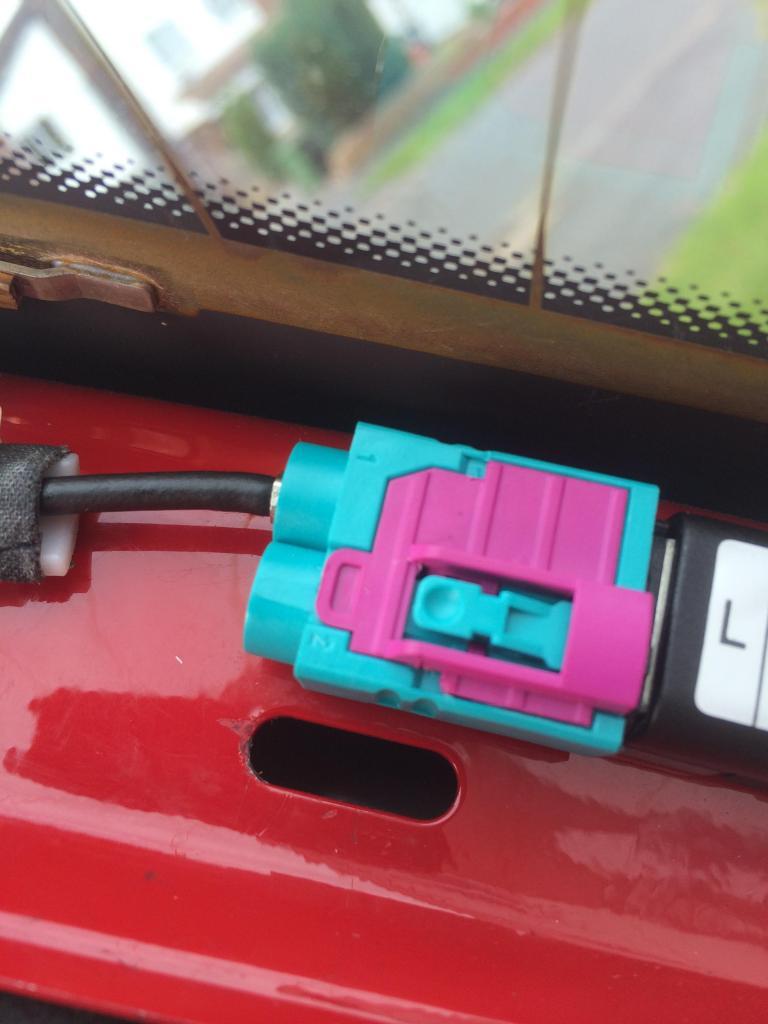
The double Fakra should have the cable in the side shown (pin 1), I tried the other pin (pin 2) and it didn't work.

run DAB and tune, hopefully you have a decent signal by you ?
Should all just work

.
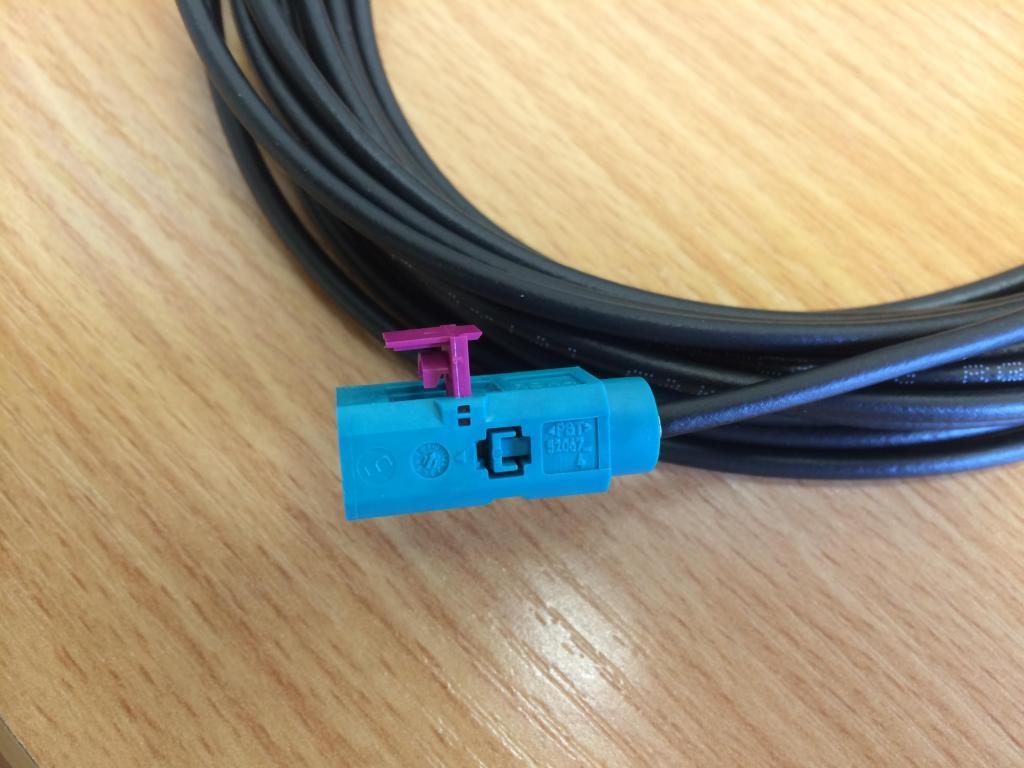
6 - Disconnect stereo end and remove connector on this end, you will struggle to run the cable through the trim etc with the shell of the connector attached to the cable.
Pop out the purple segment. The right angled connectors are exactly the same principle that come with the Kufatec kit.

Gently unclip the clip section pictured on top and slide out the cable

Cable is now ready to run.
7 - Run the connector-less free end of the cable from your new amp inside the tailgate neatly across to the right hand side (viewing from the rear) of the vehicle by cable tying / taping to existing looms, aim for the tailgate grommet see below.

8 - Your cable needs to go through this. For those with absolutely no finesse with cables I would suggest slicing the grommet, not ideal I know and I couldn't face doing this, you could re-seal with tape if you wish to. If you know what you're doing and can be patient and careful it will go through with some coaxing using something like Helerine lubricant to help her slip in

. Best to attach a reasonable stiff draw wire to the cable and feed or pull through gently, be careful not to damage other cables within the grommet if doing this.
9 - Once done run through the trim in the roof liner, it just lifts by hand on the edge and you can pop the cable along the side of the liner. You might need to pop a screw out the top of the side airbag trims to lift the interior trim in places. The screws are behind the airbag plastic labelled airbag covers. Run all the way across and down the A-pillar. Go through the fuse box area and jump across to the rear of the stereo.
10 - Now put your casing for your Fakra connector back on and plug in your removed stereo. Check again everything works.
11 - Tidy the wires up (tape / cable tie), you don't want a cable rattling around behind the dash
12 - Re-install the stereo and central dash section and boot trim and enjoy the delights of DAB.

Note: There is a remaining pin (pin 2) in the double Fakra and a connector where the original amp ran to. I tested the reception etc with this removed and it all worked fine. I did however, buy another 1m lead off ebay and connected this to where the original amp ran to. It didn't change functionality but I was of the opinion that the OBD might spot this open circuit connector and flag a DAB fault up on the fault codes,
I've yet to confirm this and look at my codes yet. *****Note: Installation of 1m Fakra cable between pin 2 on DAB amp and original connector in boot eliminate any fault codes flagging up********
Just to re-iterate DAB, FM and AM will still function perfectly without this cable added in but you will get a code flag up.
Comments, queries and general abuse let me know. Cheers
