Had a really productive day on the golf today and got a few jobs done. Before I go further I must give a massive thanks to my friend Matt who's help meant I could actually get this job done.

So today I gave the car an oil + filter change, changed the inlet manifold to the alloy one from the pd140, cleaned out my egr valve/ASV and also blanked off my EGR. Here are some pics of the day along with a few little descriptions of what's happening in each picture. I wanted to write this post of my experience for anyone else considering changing the BMN pd170 inlet manifold (with swirl flaps) for the BKD pd 140 inlet manifold (no swirl flaps) as there isn't really that much info on doing this job.
So first off this is how the car started today. The car was a little lumpy at idle although nothing too bad but just hesitated slightly and shuddered a little.
We started by jacking up the car, removing the belly pan and dropping out the oil, we left it to drip out as we did the rest of the work on the car and filled it up once we'd finished all the other jobs, I didn't take any pictures as you all know what an oil change looks like.
In this picture then I have already removed one of the engine cover brackets, taken the bolts out of the egr pipe connecting it to the egr valve and moved a few electrical connections and pipes out of the way. By far one of the most awkward parts of the whole day was trying to get the one bolt that holds the egr pipe to the engine block as it's super hard to get to/see. This had to be removed though so that there was enough give (and only just enough give!!) to get to the bolt connecting the egr valve to the inlet manifold which is obscured by the egr pipe. Said awkward bolt is not pictured but if you follow the egr pipe from the valve down to the engine block you will find it tucked away under the inlet manifold and half obscured by coolant pipes...

Access for tools was slightly improved by removing some of the air intake.
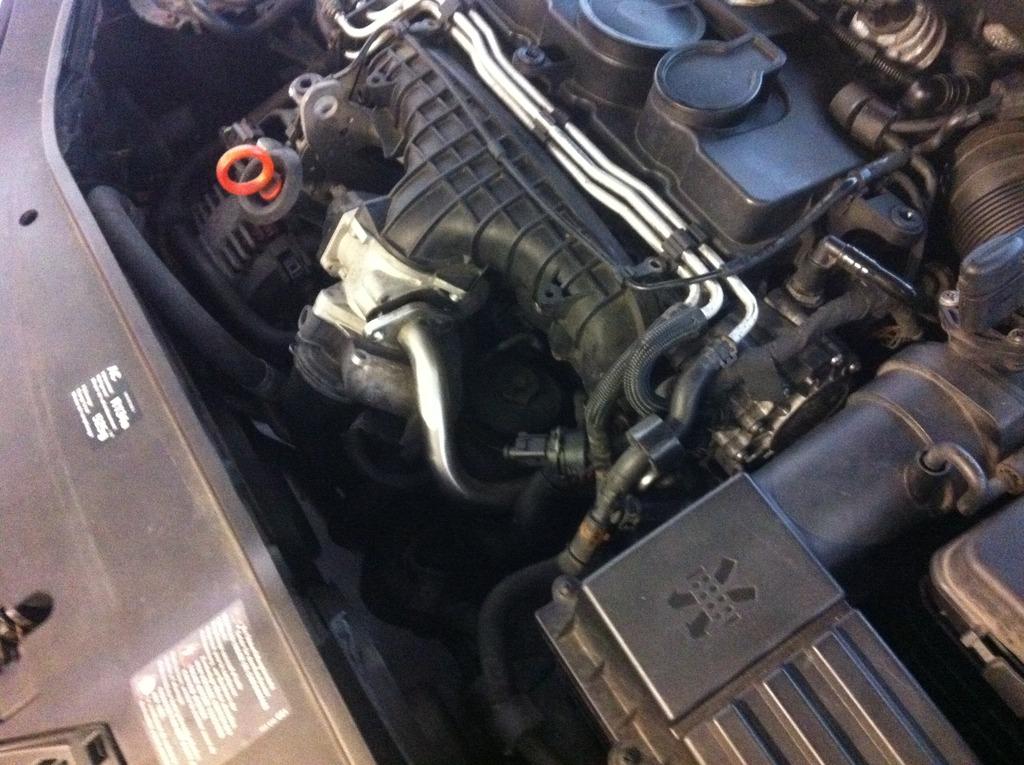
The three torx bolts that hold the egr valve/asv to the inlet manifold were awkward but manageable using different combinations of extension bars etc, the one obscured by the egr pipe was the most time consuming and required two people, one to hold the egr pipe out the way, leaving the other person two hands to get the torx bit into the bolt and undo it. This was made harder on my car because someone had knackered the head on that torx bit...

Once the egr valve/asv was off we were met with this lovely gungy mess:
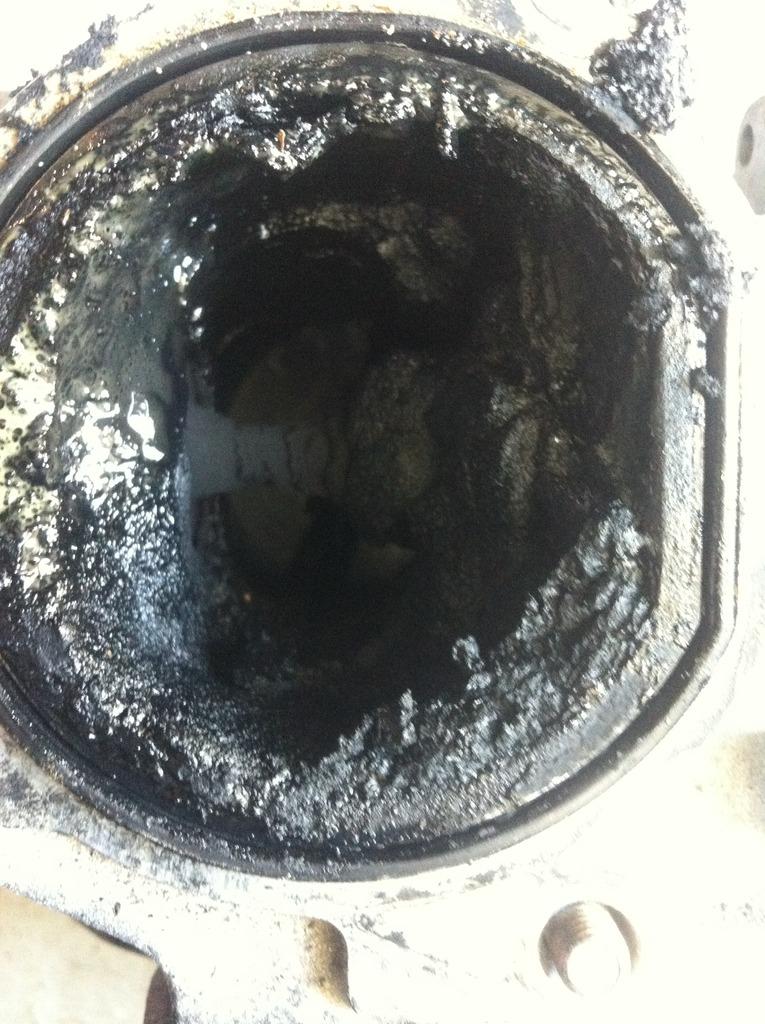
For anyone who has been reading my thread then you'll know I have only recently sorted a problem with the tandem pump leaking oil into the fuel system meaning the car was burning a lot of oil, I guess this accounts for some of the gunky mess but this is the main reason I wanted to block off the egr, this horrible exhaust crap should not be going back through the engine...
Anyway, all cleaned up using a flat bladed screw driver and various brake/carb cleaners etc it came up like this:
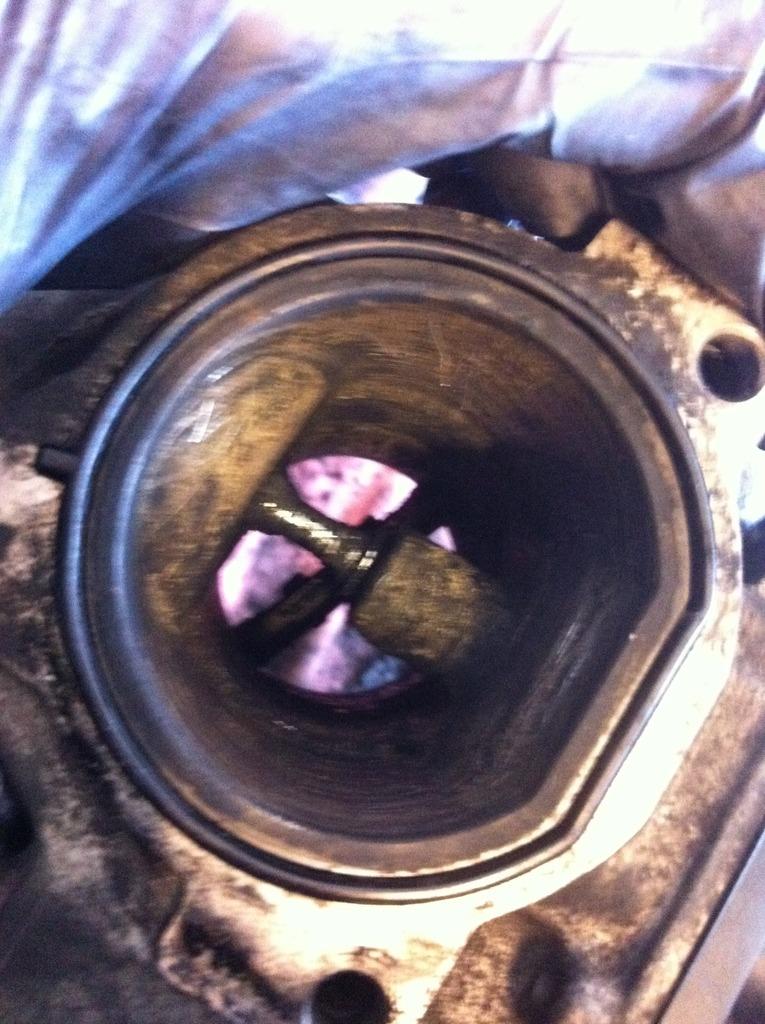
Not perfect but a lot better than it was.
Here's just some of the stuff that came out of it:
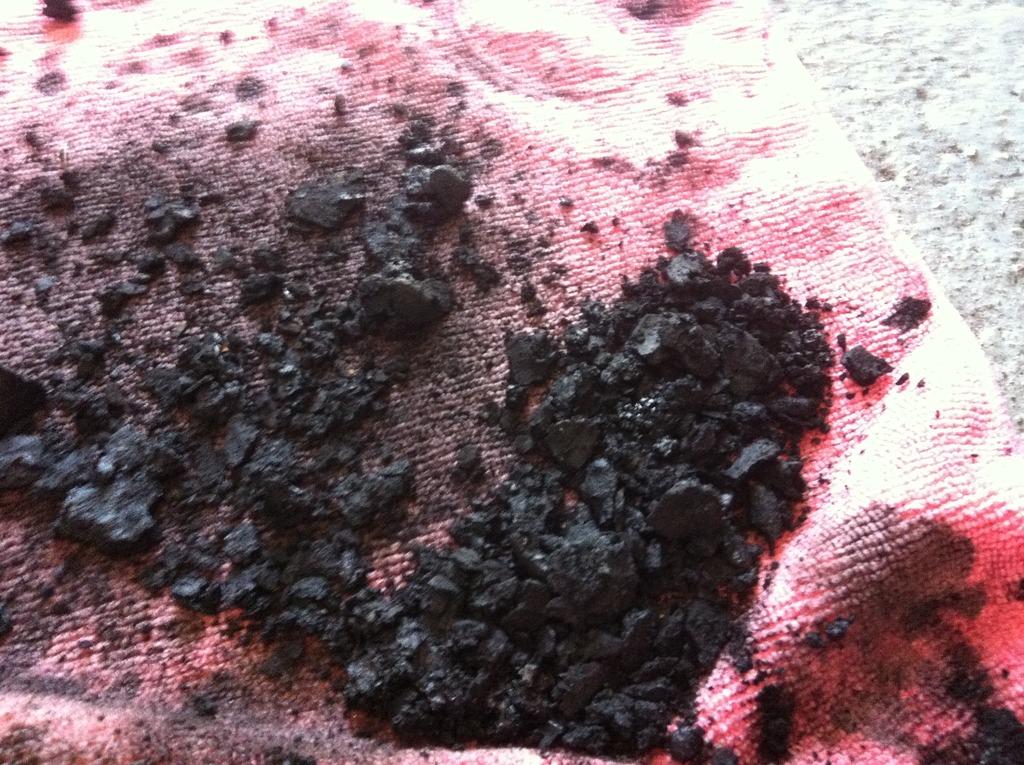
With the egr valve removed it gave us access to the rest of the bolts securing the inlet manifold to the engine block.

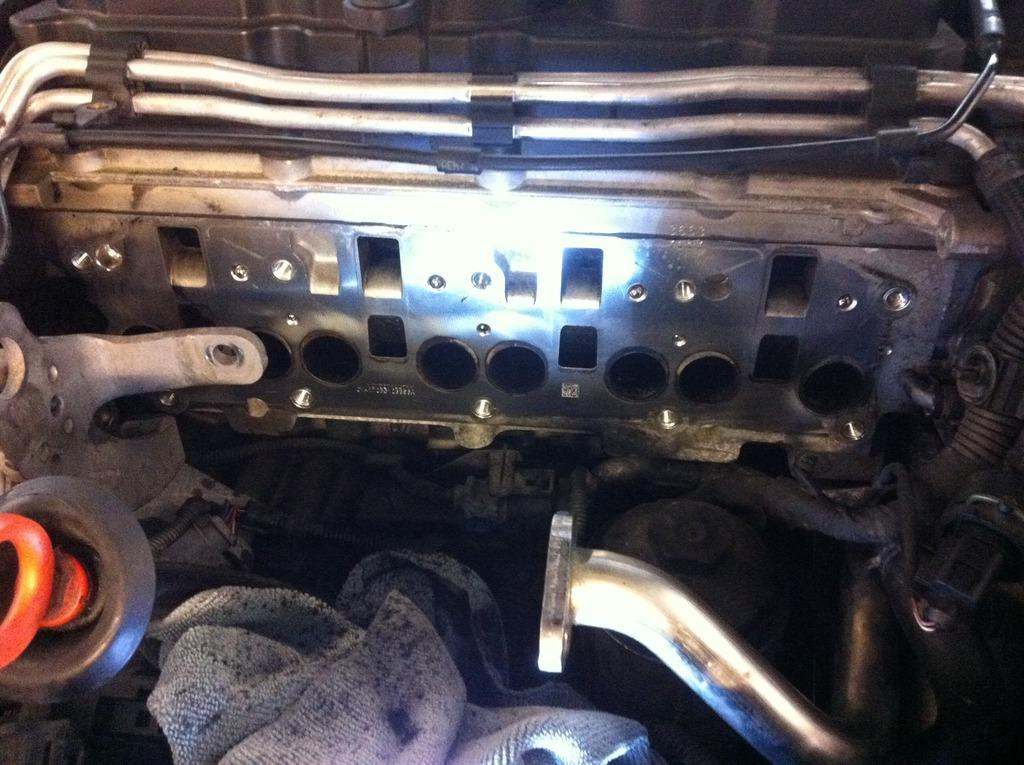
It took quite a while to clean out the inlet on the inlet manifold to find the bolt hidden inside the manifold itself... stupidest place for a bolt ever... A couple of the other bolts were awkward to get to but a bit of patience and trying various combinations of tools/extensions they all came out leaving is this:
This is the inside of the old inlet manifold, you can see it's all gunged up like the egr/asv:

In the picture you can see the swirl flap on the left is all covered in stuff stopping it from working properly, there was slight play in the shaft that holds the flaps and runs right from one end of the manifold to the other which suggests it was definitely not working as it should.
This picture shows the swirl flap actuator which has been leaking pressure out of the inlet manifold. You can tell because the horrible gunky residue has been blown out of the intake seal and covered that side of the manifold and engine cover bracket.

So, fitting the new manifold. The kit I got from darkside developments comes with a used but aqua blasted pd140 intake manifold, a metal gasket (not rubber like the pd170) and also 5 new bolts with washers which are used for the bottom row of intake manifold bolts as the ones from the pd170 manifold are slightly too long.
Here's a link to the kit I bought which costs £95 rather than a new plastic pd170 manifold with swirl flaps which will set you back at least £360 (I have seen them advertised for over £500 though...):
http://www.darksidedevelopments.co.uk/products/ppd170-used-bkd-aluminium-inlet-manifold-conversion-kit.htmlSo, it is also worth noting that the bolt which sits inside the intake manifold (the one that was hard to find under all the gunge) had a slight shoulder on it which needed to be ground away in order for it to sit inside the hole in the alloy manifold. We did this by wrapping some insulating tape around the thread of the bolt and putting in a drill, then used the drill to spin the bolt on a file to grind down the edge neatly and evenly. Worked pretty well.
So here's the new manifold in place:

Now the fun really begins...

Once the manifold was in place and a few of the bolts put in then we had to start modifying some of the other parts to get them to sit right as the alloy manifold has a slightly different outer profile in some places. This meant that the brackets which hold the engine cover some clips for pipes and electrical connectors and also the swirl flap actuator had to be adapted to fit.
First the left hand side, which holds the swirl flap actuator. This bracket had to be modified the most. We cut off the leg that went down to the bottom bolt as it was nowhere near the bottom bolt now. What we figured was that now the swirl flap actuator had been got rid of all that bracket was doing now was holding that corner of the engine cover and has one electrical sensor attached to it so it really didn't need much bracing. It is also connect by a bolt to the oil level dipstick which is fairly stiff so helps support the bracket as much as the bracket supports it. So, the lower leg was removed. The top part where the other bolt goes into the top row of intake bolts had to be modified like this in order to sit where it was before:
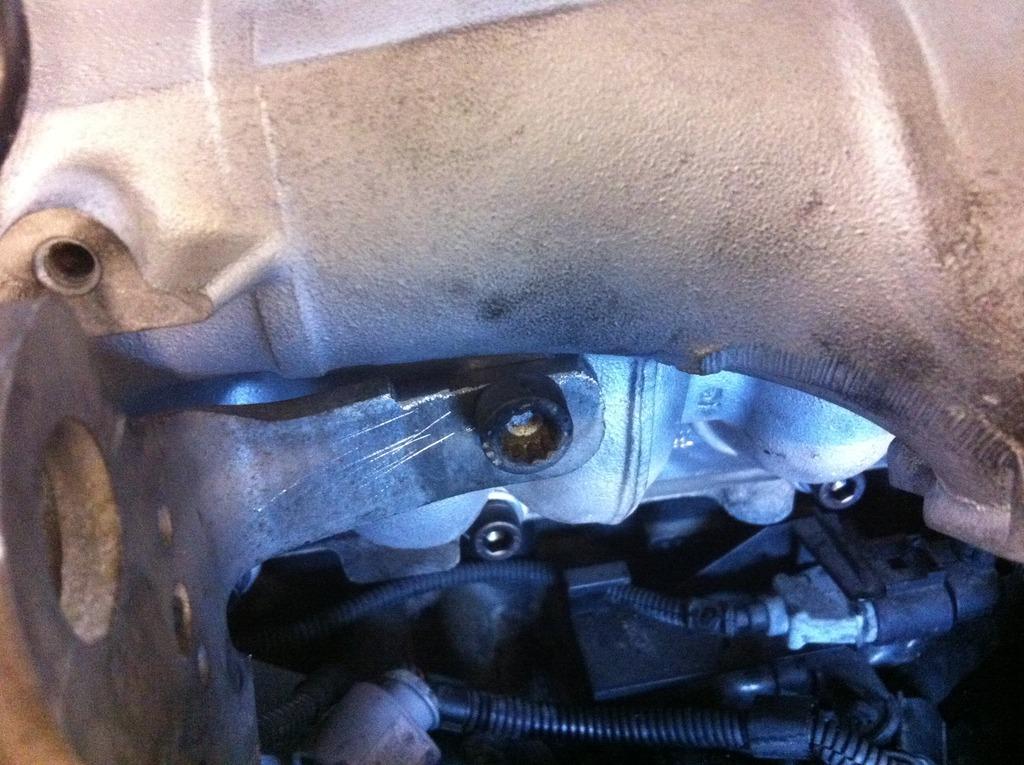
We used a hacksaw and a file to modify it and it worked ok.
Now, the bracket on the other side required quite a bit more work although less was actually removed. In the next picture you can see where we had to cut out two V shapes so that the bracket didn't foul on the manifold casing:

I am happy to report that the brackets both support the engine cover as they did before.
Once the brackets were modified and the bolts all in securing the new manifold to the engine block then we refitted the now cleaned egr valve/asv and connected all the various wires/pipes etc from where they were before.
I took this chance to block off the egr pipe while I had it apart and it was all clean, I used a blanking plate I got from Darkside developments. The reason I wanted to blank it off here but keep the pipe etc is so that it still looks roughly stock to anyone having a look. The blank is pretty chunky so was a bit of a fight to get the pipe to line up correctly with the bolt holes, partly as the new manifold sets the pipe off very slightly, Anyway, the original two bolts that hold the egr pipe to the egr valve were too short so I used two of the old intake manifold bolts that had been on the bottom row and had been replaced. I had to cut them down slightly as they were too long but they worked perfectly and made sure there was plenty of the bolt holding it all together. The horrible awkward bolt that holds the egr pipe to the engine casing was now quite a bit out of position so that was left out. Honestly though the pipe isn't going anywhere and is completely solid where it is.
The last thing to do was to block off the vacuum pipe that operated the swirl flap actuator. I did this by bending it back on itself and tightening a cable tie around it. Ideally I'll get something to put in the pipe to block it properly but to be honest it's not leaking the way it is so not too worried.
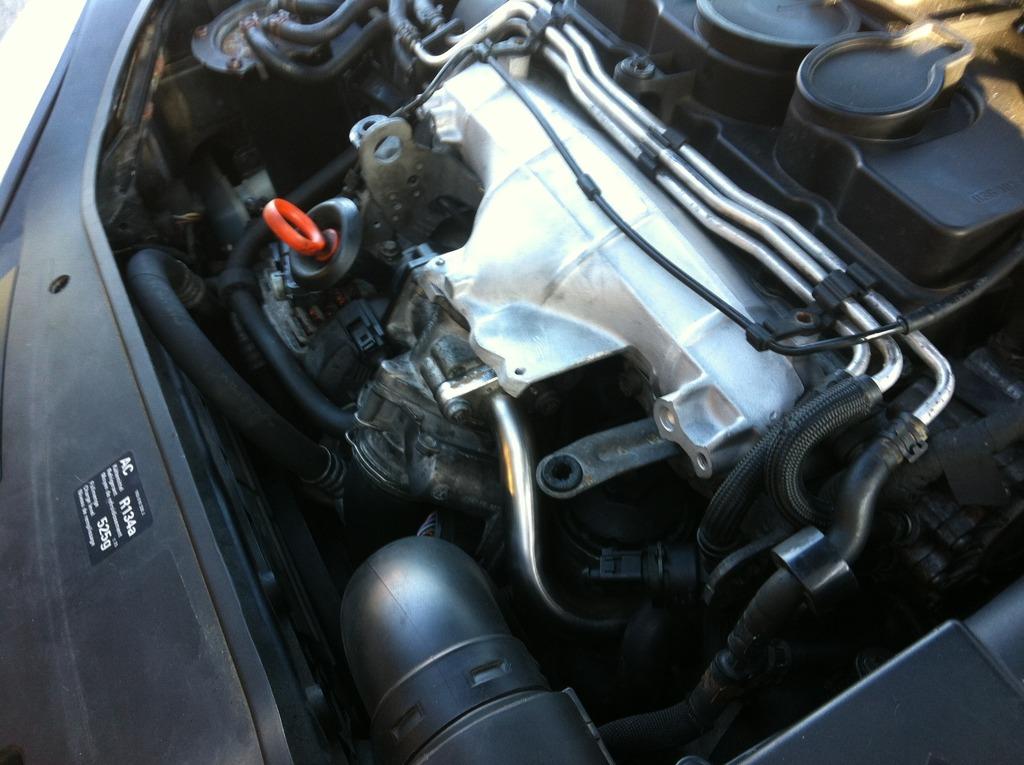
Here are a couple of picture s of the finished job:
egr pipe with blanking plate:

Modified left bracket with vacuum pipe blocked off (although I hadn't clipped it back onto the bracket in this picture):

Right side bracket which holds a couple of coolant pipes and fuel pipes in place as well as supporting the engine cover:
The car blew out quite a bit of white smoke for the first couple of miles but it cleared up pretty quickly, I'm guessing it was just from disturbing the gunk that was in there and letting it burn through a bit. It idles much better and feels like it pulls a lot better lower down the rev range, the engine management light came on after about 20 miles but that was expected due to the egr being blocked off and it's getting mapped out soon so not worried about that.
Thanks for reading if you got this far and hope some of the information might be handy to anyone else thinking of this mod.
Cheers,
Chris
Edit May 2017: I have just done another oil and filter change and having the alloy inlet manifold compared to the standard plastic one does make getting the old filter out a little more tricky as it sits closer to the cap for the oil filter. What we had to do was unscrew the oil filter cap and then separate the filter from the cap before it could be removed from the canister, awkward but manageable. I would also note that the bolts supplied by darkside developments for fitting the manifold have all rusted quite badly compared to the original bolts. Overall I'm still happy enough with the kit and it's still been cheaper than replacing the plastic manifold but just want people to know what's really involved as it's not quite as straight forward as unbolting the old one and bolting the alloy one on.
Chris