Make a donation

Author Topic: How-To "change the cam follower"  (Read 21436 times)

Offline monte

  • Just look at my post count
  • ******
  • Thank You
  • -Given: 116
  • -Receive: 134
  • Posts: 2747
  • Global Ruler
    • Deep-Shine Detail. Detailing-Wrapping-Tints. Lincoln.
  • My Ride: http://www.mk5golfgti.co.uk/forum/index.php/topic,67679.0.html
How-To "change the cam follower"
« on: August 10, 2010, 12:24:44 pm »
Right first of all I must stress that this is not my "How-to" however it is a great "How-to" and surely deserve a place on our forum as it appears that more and more 2.0tfsi are prone to this wear causing bad or should I say Terrible fuel consumption.

It is from the Briskoda Forum and all the praise goes to Carl for his hard work and great write up.
Here goes, and like I say, this is just copied and pasted.  :wink:

"How-To Change Fuel Pump Cam Follower on VAG 2.0L TFSi"

Ok here's another Tutorial. This is done on a MK2 Skoda Octavia vRS but i would imagine the process is the same or pretty similar for all 2.0 TFSi Engines. I have had a look round on the net and not been able to find a tutorial for this. Apologies if someone has done this already.

Before i start the usual disclaimer

NEITHER I NOR BRISKODA WILL BE HELD RESPONSIBLE IF YOU UNDERTAKE THE PROCESS DETAILED BELOW AND SOMETHING GOES WRONG. YOU DO SO AT YOUR OWN RISK!!

Ok formalities out the way here we go.

You will need the following:

T30 Torx Bit
13mm Ratchet Spanner / Ring or Open ended Spanner
17mm Open Ended Spanner
Cloth
New Cam Follower Part no. - 06D 109 309 C

Ok this whole process took me about 45mins which included taking pics and setting TDC. Ensure that nobody opens the driver door throughout this or you will end up with a nice stream of fuel all over you as this charges the fuel system when doing this. To get around you can just disconnect the battery.

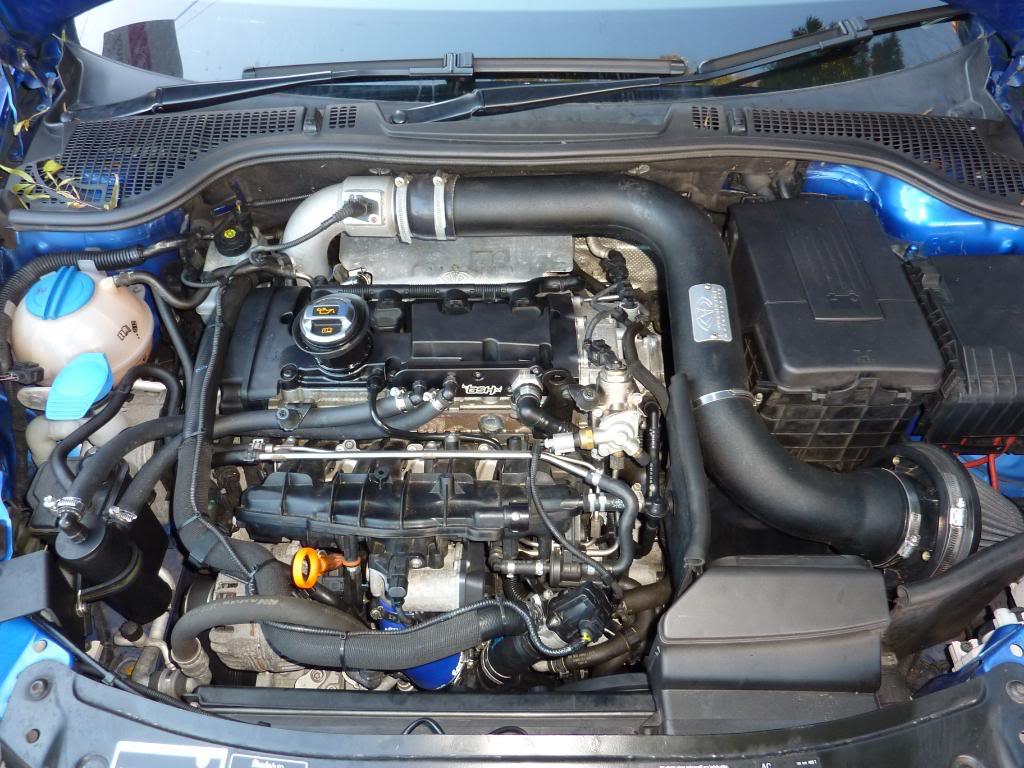
Firstly remove engine cover. To do this just pull up firmly but slowly till the rubber lugs pop of the housing.


I didn't take any Pics of setting TDC as i had to use a small dentist type mirror and torch to be able to see what i was doing and it would never have worked on a picture.

Basically to set TDC undo the 2 left hand nuts at the side of the Cylinder head. You will need 2 people to do this next bit.

GENTLY and i mean gently pull back the side of the cover and look at the cogs on which the timing belt is sat. The biggest cog which is nearest the front of the engine at the top has a Small arrow on the left had side as you look at it. Also on the side of the engine just above the cog is a small arrow again. The aim is to get these 2 in line so you know your engine is at Top Dead Centre or TDC. Now to move the cog round put the engine in gear (i found it easiest in 4th) and have someone gently rock the car forwards to get the cog to turn. You keep your eye on the side of the timing cog looking for the small arrow. Keep doing this until the 2 Arrows are in line. Once this is done apply the handbrake and then tighten up the nuts on the cover as you don't need access to it again.

Im not sure if you have to Set TDC. When i installed the Autotech internals i was told that you must do it. So as you are removing the fuel pump i always do it just to be safe. If anyone with any mechanical expertise knows different please let me know.

Now we are ready to tackle the pump.

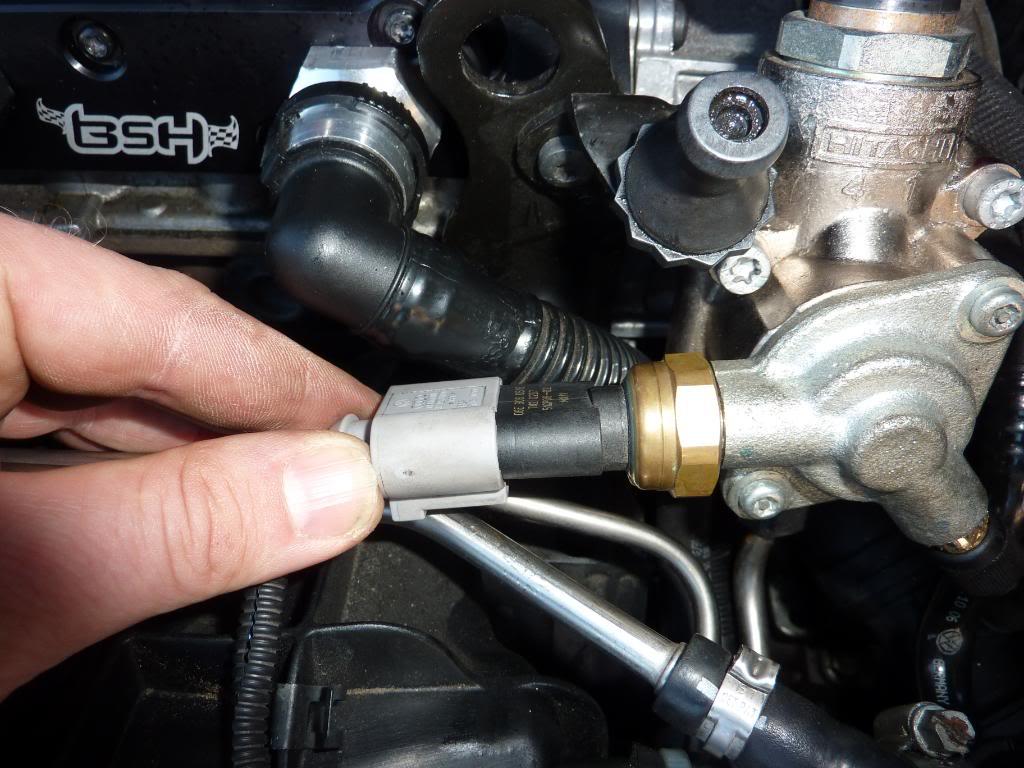
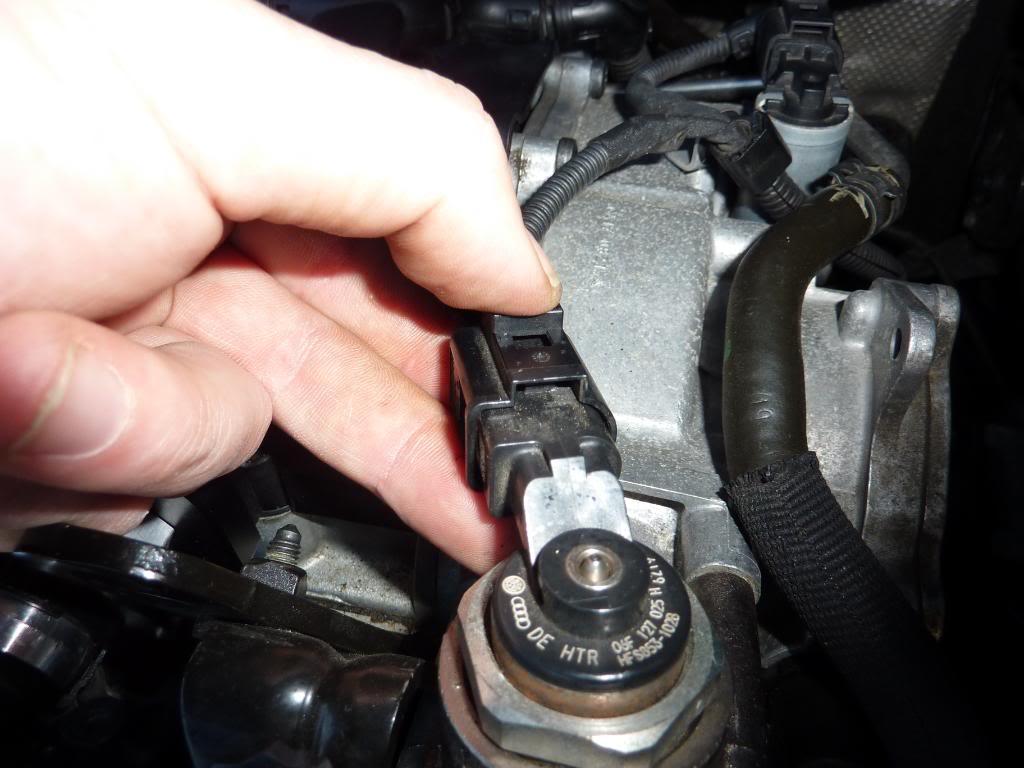
Firstly disconnect the 2 electrical connectors.


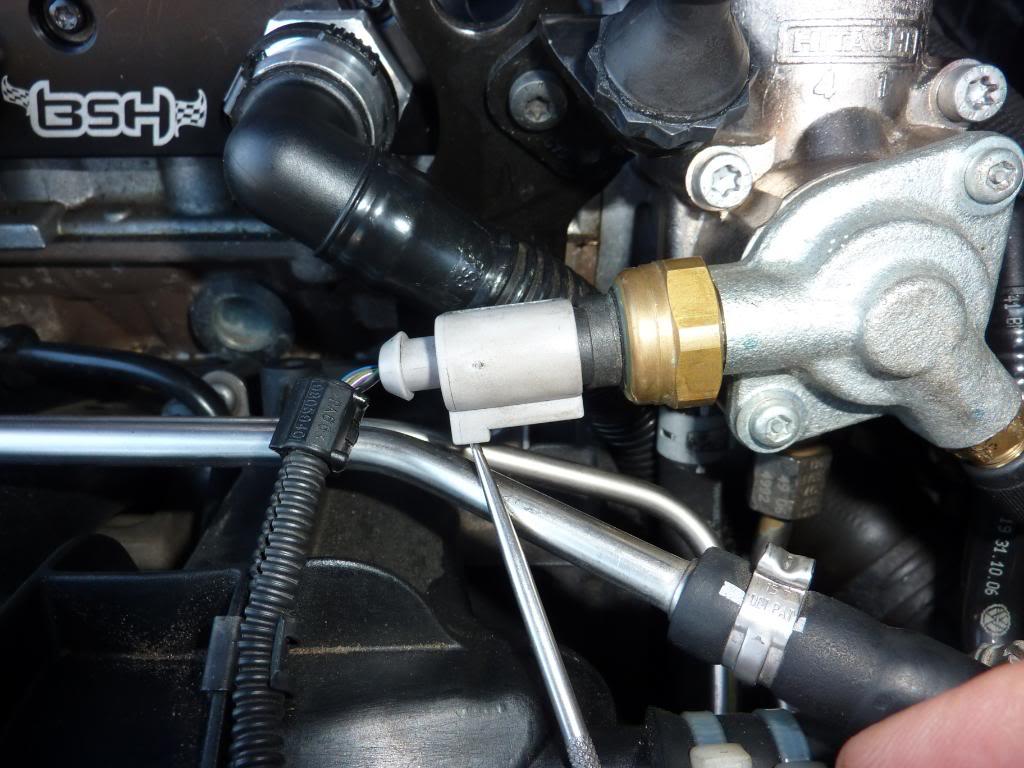
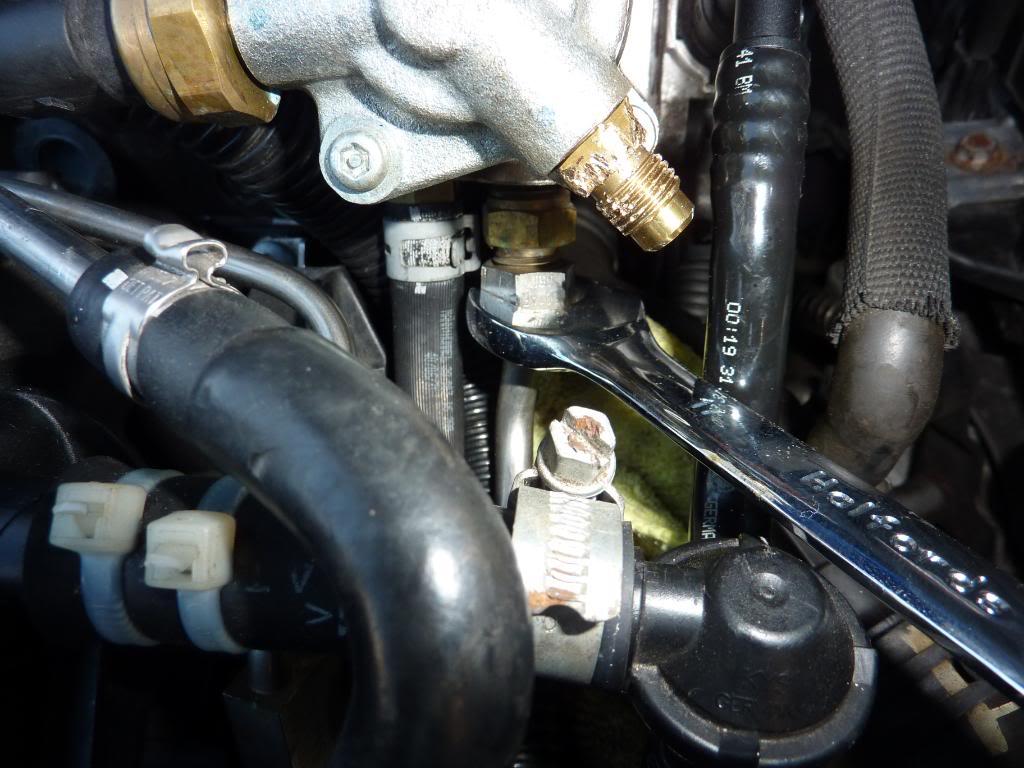
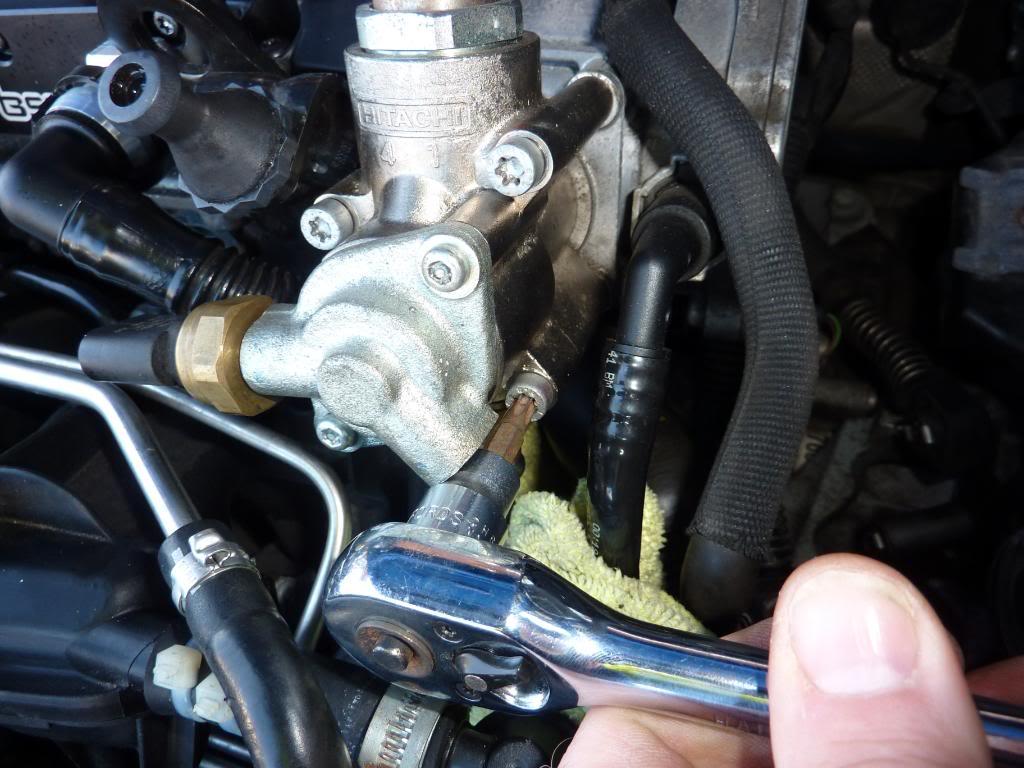
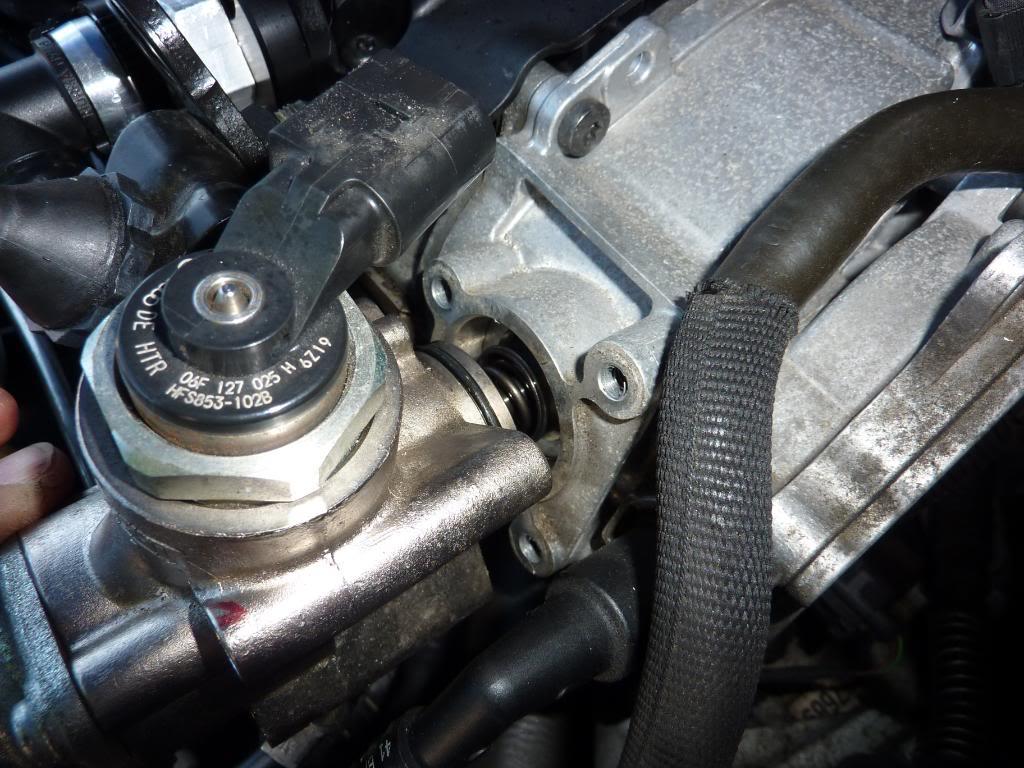
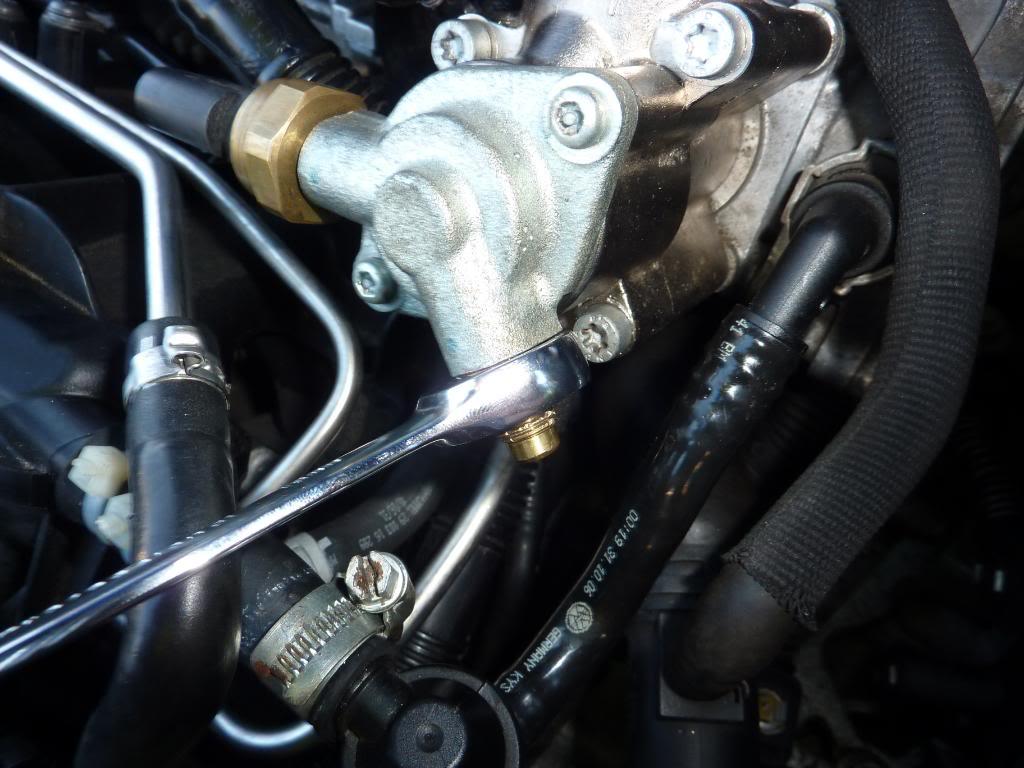
The next thing to do is to let out any excess fuel in the pump. On the lower right hand side their is a pressure valve. Remove the black dust cap then using a screwdriver or allen key press in the valve (same as on a tyre) and hold in till all fuel is released. Ensure you place a cloth underneath to catch the excess.


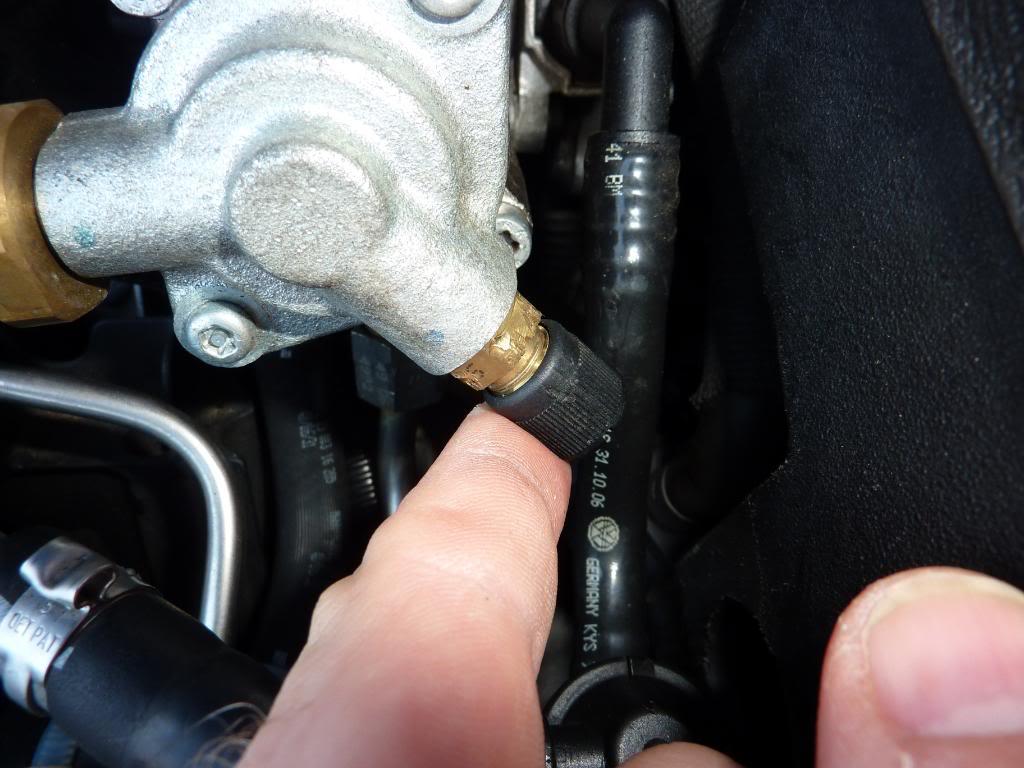
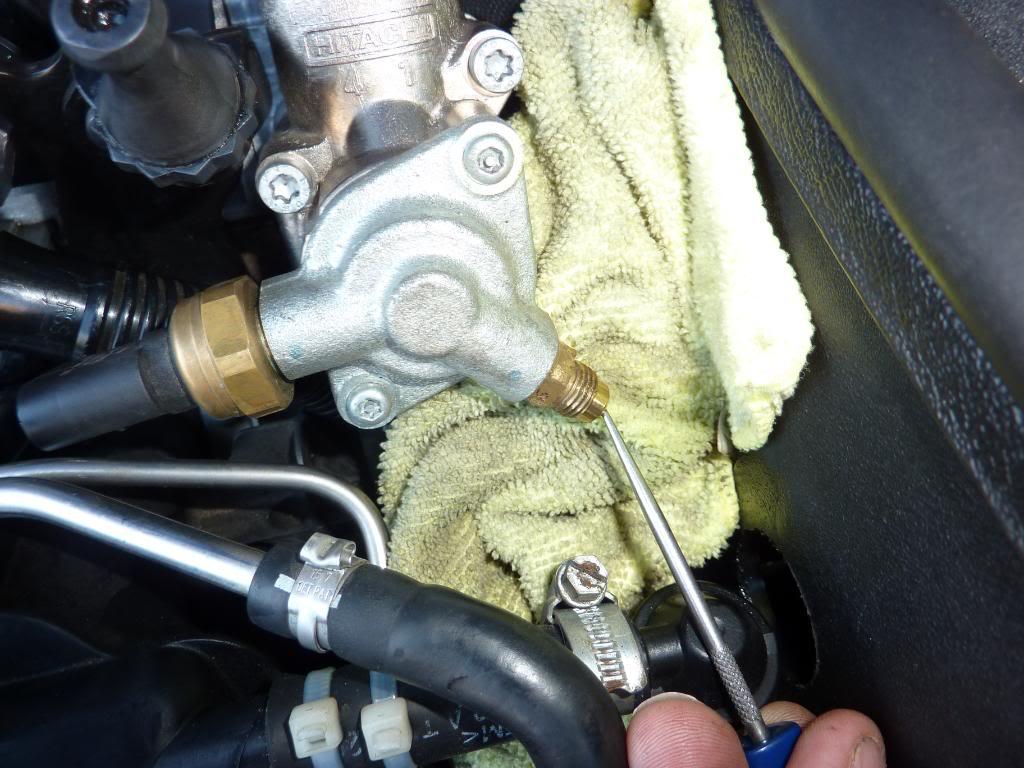
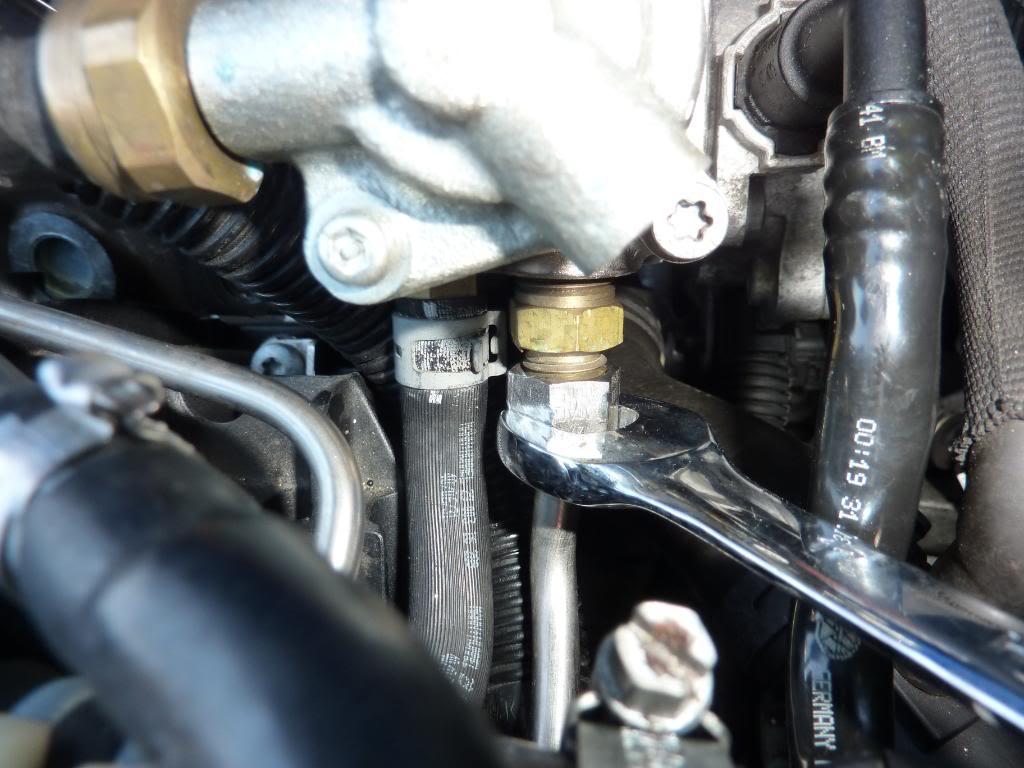
Once you have done that using a 13mm Ratchet spanner/Ring spanner. Remove this valve ensuring you leave the cloth underneath as a bit more fuel will leak out. You have to remove this valve to get at the bottom bolt on the pump.


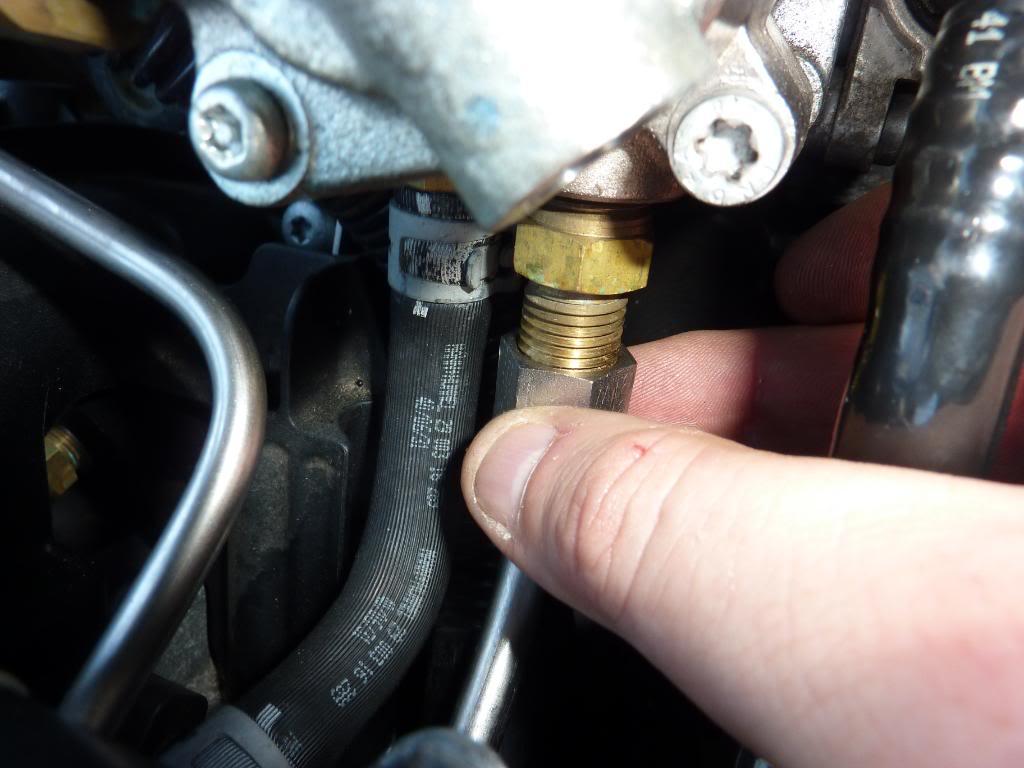
Now depending on how old your car is you will either have 2 metal pipes or 1 metal 1 rubber pipe at the bottom of the pump. Mine has 1 metal 1 rubber so the process is quite easy. I am assuming (but haven't seen the other fitting) that the 2 metal pipes are held in by the same size nut. Any way take a 17mm open end spanner and undo the nut all the way till it falls down the metal pipe. Again make sure cloth is underneath to catch any excess fuel.


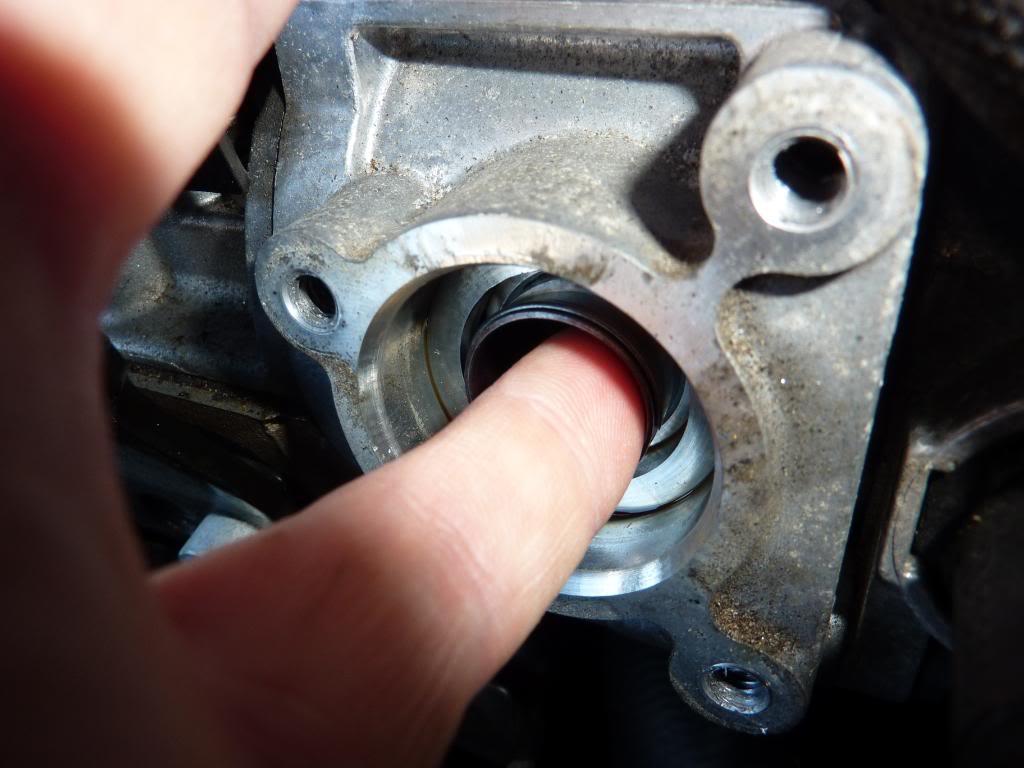
Once this is done you are now ready to tackle removing the pump. The pump is held in by 3 x T30 Torx bolts. Undo these bolts and remove. The pump will now come away from the engine.


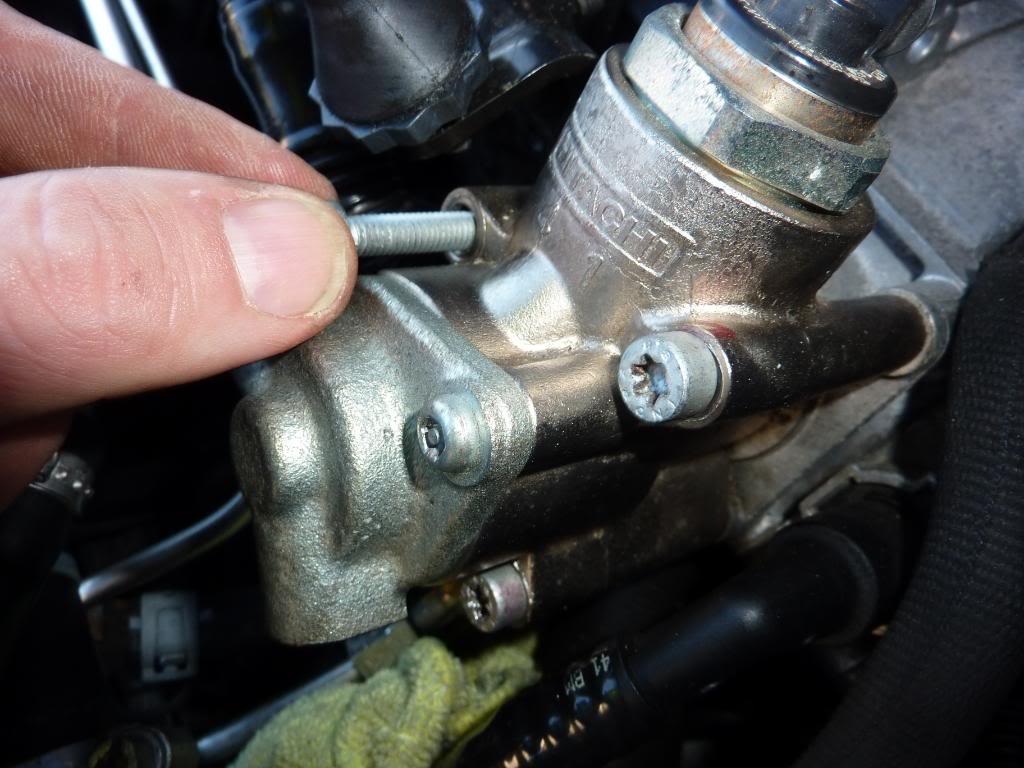
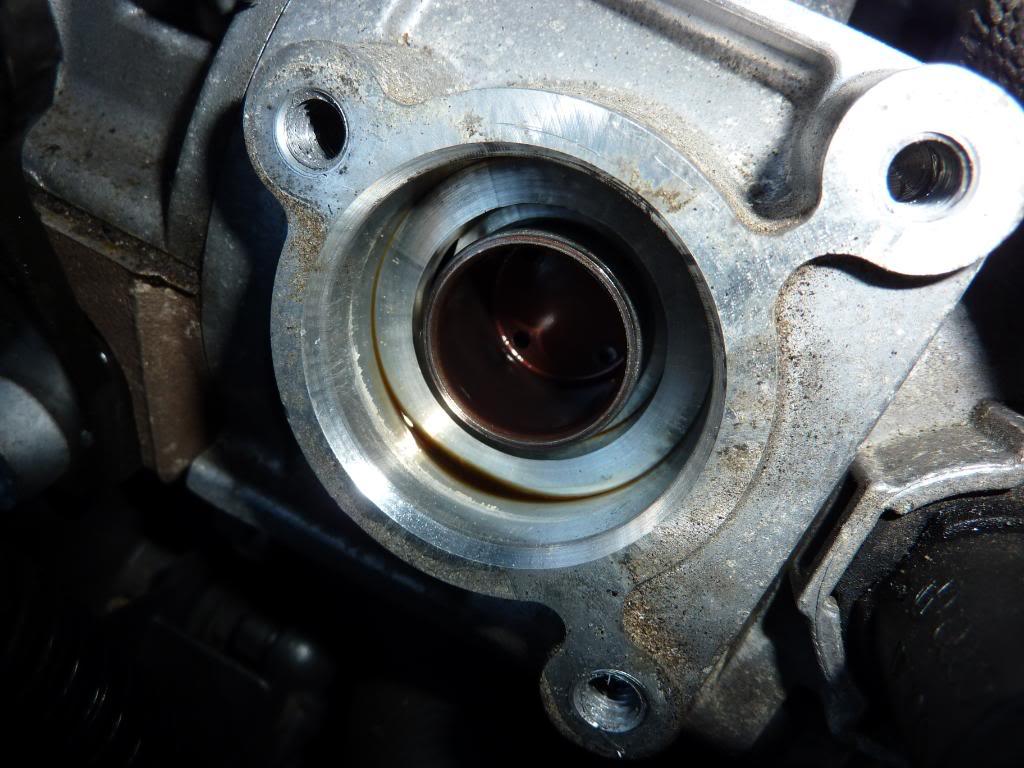
Inside you will see the cam follower. Using your little finger just pull it out. Check for signs of wear. This one has covered 14 k miles since it was last changed but i don't think that wear is too excessive.


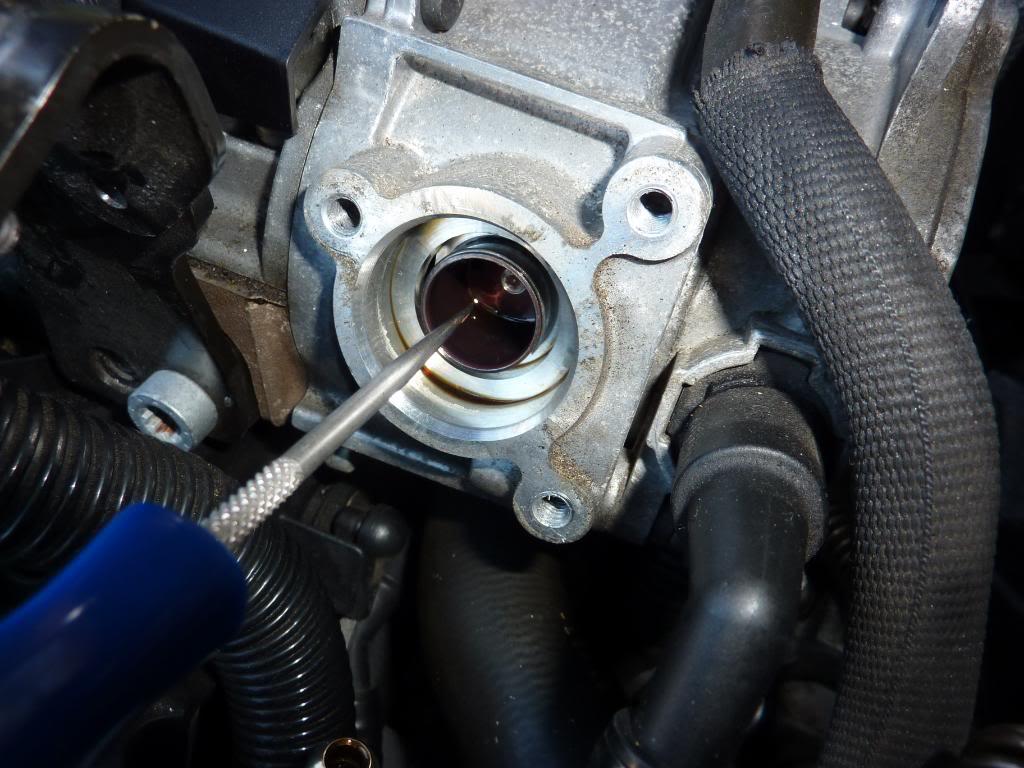
Take a new cam follower and place into the hole you took the old one from. There is no need to coat it in oil/fuel etc as it comes already coated in the little pot it is delivered in.


Once done you are now ready to put the pump back on.

Firstly line up pump and push up against engine so it is flush. Then by hand only tighten the 3 x T30 Torx bolts. This ensures the bolts don't cross thread etc. Once your happy the bolts are as tight as you can do it with your fingers and they are not cross threaded then using your T30 Torx bit tighten up the bolts. DO NOT OVER TIGHTEN. Basically do these hand tight using a ratchet. But DO NOT apply to much force. If you knacker the thread holding the pump in it's gonna become expensive.


Once they are done then reconnect the metal pipe at the bottom using hands first so no cross threading then the 17mm spanner. Note the nut does not go all the way to the top.


Then reconnect the pressure valve using the 13mm Ratchet Spanner/Ring Spanner and replace the dust cap.


Now reconnect the 2 electrical connectors and check everything is all seated properly and correct.


If you disconnected the battery reconnect it. Put keys in ignition turn it on and then open drivers door 2-3 times to charge up the fuel system and get rid of any air in it. Once that is done start engine and check all is ok no leaks from around pump etc.

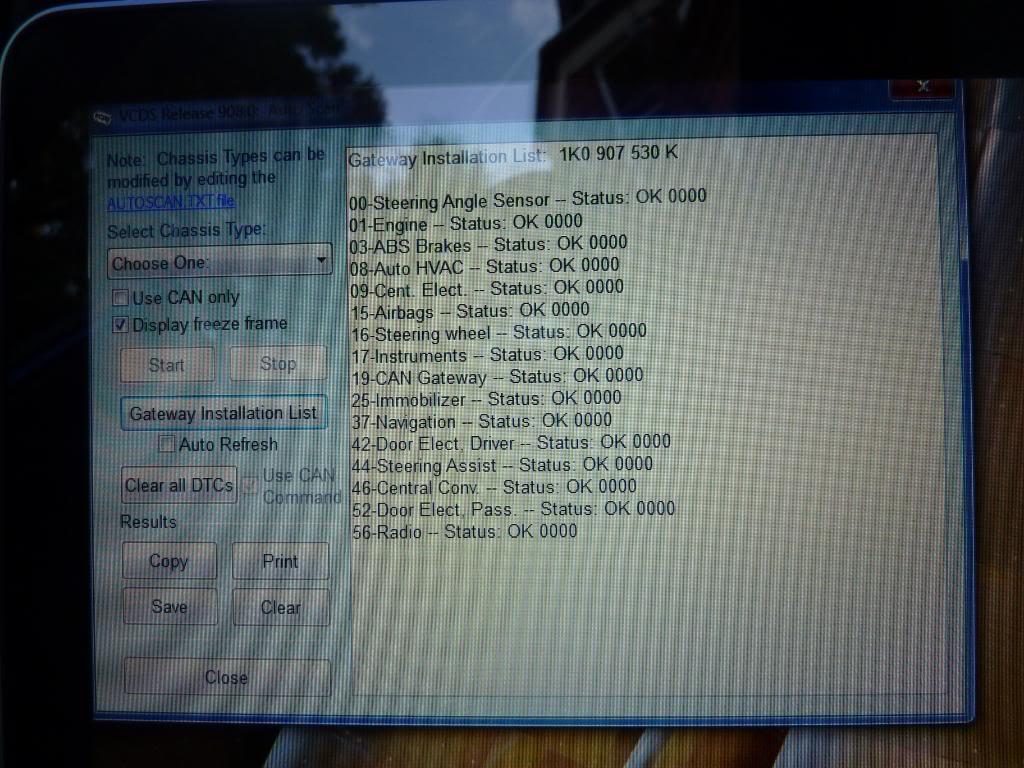
If you have VCDS check no faults and Voila all done.


As i said took me 45 mins including taking pics. You could quite easily do it in about 25-30mins.

Comments good or bad welcome

HIH

Carl


So there you go  :happy2: Excellent write up from Carl  :notworthy:

Reading some of the comments though, there are a few people that say you don't need to bother setting the engine to TDC. I guess if you want to be on the safe side then do it, but it is up to you!
« Last Edit: August 13, 2010, 05:08:45 pm by monte »

Offline Hedge

  • Just look at my post count
  • ******
  • Thank You
  • -Given: 484
  • -Receive: 304
  • Posts: 6621
Re: How-To "change the cam follower"
« Reply #1 on: August 10, 2010, 12:30:43 pm »
I'm pretty sure Carl posted it on here :confused:

Offline monte

  • Just look at my post count
  • ******
  • Thank You
  • -Given: 116
  • -Receive: 134
  • Posts: 2747
  • Global Ruler
    • Deep-Shine Detail. Detailing-Wrapping-Tints. Lincoln.
  • My Ride: http://www.mk5golfgti.co.uk/forum/index.php/topic,67679.0.html
Re: How-To "change the cam follower"
« Reply #2 on: August 10, 2010, 12:33:41 pm »
I'm pretty sure Carl posted it on here :confused:

WHAT???  :confused: :confused: :confused: Well our search function couldn't find it mate  :ashamed:

It did cross my mind that he would have, thats why I searched a few times.  :sad1:

Offline Hedge

  • Just look at my post count
  • ******
  • Thank You
  • -Given: 484
  • -Receive: 304
  • Posts: 6621

Offline vRStu

  • Just look at my post count
  • ******
  • Thank You
  • -Given: 90
  • -Receive: 159
  • Posts: 2562
    • Octavia-vRS Information Resource
Re: How-To "change the cam follower"
« Reply #4 on: August 10, 2010, 12:38:10 pm »
I'm pretty sure Carl posted it on here :confused:

Yep that's a Blue Bullet tutorial I think.
Stu...

Quartz Grey Audi A4 3.0 TDi S-Line Quattro, 7 Speed S-Tronic, 19" Twin Spoke Alloys, Alcantara Upholstery with Silver Stitching and Heating, Sat Nav High, B & O Sound, Audi Music Interface, DAB Radio, Parking Advanced with Rear View Camera, Advanced Keyless Entry, LED Interior Light Pack, Hill Hold Assist, Heated and Electrically Folding Mirrors, Through Load.

RNS510 Video in Motion unlocking, PIN recovery & DVD Region Free available

Offline monte

  • Just look at my post count
  • ******
  • Thank You
  • -Given: 116
  • -Receive: 134
  • Posts: 2747
  • Global Ruler
    • Deep-Shine Detail. Detailing-Wrapping-Tints. Lincoln.
  • My Ride: http://www.mk5golfgti.co.uk/forum/index.php/topic,67679.0.html
Re: How-To "change the cam follower"
« Reply #5 on: August 10, 2010, 12:41:17 pm »
Here.  :P
http://www.mk5golfgti.co.uk/forum/index.php/topic,8339.0.html

oh poo  :scared: Sorry guys. I don't understand why I couldn't find it. I searched for "how to change cam follower" and had no results....so I googled it

Offline monte

  • Just look at my post count
  • ******
  • Thank You
  • -Given: 116
  • -Receive: 134
  • Posts: 2747
  • Global Ruler
    • Deep-Shine Detail. Detailing-Wrapping-Tints. Lincoln.
  • My Ride: http://www.mk5golfgti.co.uk/forum/index.php/topic,67679.0.html
Re: How-To "change the cam follower"
« Reply #6 on: August 10, 2010, 12:43:02 pm »
Oh well, now its on twice people will definitely find when they search...... or maybe not  :ashamed:

Offline Hedge

  • Just look at my post count
  • ******
  • Thank You
  • -Given: 484
  • -Receive: 304
  • Posts: 6621
Re: How-To "change the cam follower"
« Reply #7 on: August 10, 2010, 12:43:18 pm »
Not this "Blue Bullet" then?


Offline vRStu

  • Just look at my post count
  • ******
  • Thank You
  • -Given: 90
  • -Receive: 159
  • Posts: 2562
    • Octavia-vRS Information Resource
Re: How-To "change the cam follower"
« Reply #8 on: August 10, 2010, 12:44:18 pm »
Some of your own Ian??
Stu...

Quartz Grey Audi A4 3.0 TDi S-Line Quattro, 7 Speed S-Tronic, 19" Twin Spoke Alloys, Alcantara Upholstery with Silver Stitching and Heating, Sat Nav High, B & O Sound, Audi Music Interface, DAB Radio, Parking Advanced with Rear View Camera, Advanced Keyless Entry, LED Interior Light Pack, Hill Hold Assist, Heated and Electrically Folding Mirrors, Through Load.

RNS510 Video in Motion unlocking, PIN recovery & DVD Region Free available

Offline Hedge

  • Just look at my post count
  • ******
  • Thank You
  • -Given: 484
  • -Receive: 304
  • Posts: 6621
Re: How-To "change the cam follower"
« Reply #9 on: August 10, 2010, 12:45:10 pm »
Nope mine are not for sharing.  :wink:

Offline Gene Hunt

  • Just look at my post count
  • ******
  • Thank You
  • -Given: 59
  • -Receive: 61
  • Posts: 2478
    • Email
Re: How-To "change the cam follower"
« Reply #10 on: August 10, 2010, 01:15:16 pm »
Is there a set milage change for this ?. Seems to be a bit vague & i know a lot of yanks have had problems with these but then there oil is not the same quality we get over here.
ED35. Standard factory condition.

Offline vRS Carl

  • Just look at my post count
  • ******
  • Thank You
  • -Given: 282
  • -Receive: 240
  • Posts: 3088
  • I'm the F.A.G (Forum Apple Guru)
Re: How-To "change the cam follower"
« Reply #11 on: August 10, 2010, 02:14:30 pm »
Thought i recognised that tutorial & car.

Suppose i should seeing as it's my tutorial & my car  :P :P :P

With regards to Mileage to change - It depends who you ask. The general consensus is between 8-12k miles ( so that will be a round 10k :laugh:) however i do mine around every 15-20k miles and the wear is never anymore excessive than you see in the Pics.

However i don't drive like i stole it, it never goes on a track and i regularly maintain it and keep everything tip top.

I know some people say it's not necessary on later cars (2007 onwards) due to revised designs. But for the sake of £25 and about 30mins work it's a no brainer for me. Especially if you are running a highly modified engine :happy2:

Oh and regards not seeing the pics on Briskoda i think you have to be logged in :wink:
« Last Edit: August 10, 2010, 02:18:17 pm by vRS Carl »

Offline Gene Hunt

  • Just look at my post count
  • ******
  • Thank You
  • -Given: 59
  • -Receive: 61
  • Posts: 2478
    • Email
Re: How-To "change the cam follower"
« Reply #12 on: August 10, 2010, 03:02:45 pm »
Thought i recognised that tutorial & car.

Suppose i should seeing as it's my tutorial & my car  :P :P :P

With regards to Mileage to change - It depends who you ask. The general consensus is between 8-12k miles ( so that will be a round 10k :laugh:) however i do mine around every 15-20k miles and the wear is never anymore excessive than you see in the Pics.

However i don't drive like i stole it, it never goes on a track and i regularly maintain it and keep everything tip top.

I know some people say it's not necessary on later cars (2007 onwards) due to revised designs. But for the sake of £25 and about 30mins work it's a no brainer for me. Especially if you are running a highly modified engine :happy2:

Oh and regards not seeing the pics on Briskoda i think you have to be logged in :wink:
.........thanks for that.Think i should get mine changed,due a service soon so will add that to the list.
ED35. Standard factory condition.

Saint Steve

  • Guest
Re: How-To "change the cam follower"
« Reply #13 on: August 10, 2010, 03:58:05 pm »
Why would you need to set the engine at tdc for changing the cam ??

That i dont understand??

Great write up Carl.  :happy2:

Offline Richn83

  • Just look at my post count
  • ******
  • Thank You
  • -Given: 49
  • -Receive: 85
  • Posts: 1883
Re: How-To "change the cam follower"
« Reply #14 on: August 10, 2010, 04:17:26 pm »
Im guessing this isnt something that will be done by VW under normal servicing conditions?  So I would guess my car has done 5 years and 35k on the original MY05 follower.

5Dr Black GTI, DSG, Leather, Xenons. Retrofitted - Cruise, RNS 510, MFSW, Armrest, Skoda BT, 6cd changer, Monza II's, VW speaker upgrade kit, Lux pack, High-line, new CAN gateway, Polar FIS info display, R32 tinted rear lights, RVC

To Come...NQSBBK, highline CCM.