EGR Valve / EGR Cooler Delete Mk5 TDI (BKD / BMN)My car has recently been experiencing juddering problems when cruising as constant speeds, mostly around 30 - 40 mph. Also, black / grey smoke from the exhaust at low speeds and when reversing.
No error codes logged in VCDS. I noticed a build of oil residue around the EGR valve and had suspected it for a while. So time to change it...
This guide is for the BKD (TDI 140) engine but may also be applicable to the BMN (TDI 170 engine).
Update: EGR cooler on the PD 170 (BMN) engine is mounted underneath the exhaust manifold and much more difficult to remove.I have checked to make sure the details are correct, but if anything is wrong, or there is a better way of doing things, shout up and I will update the guide!Whats the EGR?EGR stands for
Exhaust
Gas
Recirculation.
Most modern cars are fitted with an EGR system to help with emissions and economy.
The EGR system consists of the EGR valve which directs exhaust gases from the exhaust / turbo to the inlet manifold, and a control valve which actuates the system according to engine load and speed.
On engines with a vacuum operated EGR system (BKD), the control valve is a solenoid valve which opens vacuum from the inlet manifold to the EGR valve actuator, when the solenoid is energised by the ECU.
Where a re-circulation potentiometer is fitted (BMN), control of the system is directly from the ECU which activates the control motor.
The EGR valve is mounted to the inlet manifold and is connected to the exhaust manifold by a metal pipe and a gas cooler (EGR cooler).
The EGR cooler uses coolant from the engine cooling system to cool the exhaust gases before passing them to the inlet manifold.
The main reason for EGR is to reduce combustion temperatures so that NOx (nitrogen oxided) emissions are reduced. In the UK, NOx is not measured during an MOT so is not actually required.
The EGR valve only operates at idle and during cruising. The EGR valve does not open under heavy load and therefore, you will not be burning exhaust gasses while at wide open throttle.
The EGR valve also helps your engine by richening up the air/fuel mixture but without additional fuel. It does this by reducing the amount of oxygen in the cylinders and thus the amount of fuel needed to keep a sane engine temperature while at cruising speeds. This reduces the amount of fuel your engine needs to burn when power demands are low.
Whats does this mean?On new cars (less than 3 years old, this means exhaust gases are recycled through the engine, meaning less emissions from the exhaust as more is burnt off in the engine, improving fuel economy, using less fuel at low speeds.
However, as the car gets older, these exhaust gases clog up our supposedly clean inlet manifold. Im not sure if it will cause any performance issues though.
There is all sorts of arguments before and against on the internet!
Regularly, EGR valves are known to fail due to build up of carbon deposits, as has mine, and the cost of removing it is often cheaper than replacing with a new EGR valve which is likely to fail again in the future.
Are there any adverse affects if I remove my EGR?You are removing the nasty exhaust gases from clogging up the inlet, leading to a healthier engine. If you have a DPF and remove that also, you will see a performance improvement.
You will get an engine management light on the dash which can be mapped out (more on that later).
You will probably not get any noticeable performance improvement if only removing the EGR.
There is no harm in removing it, and it will not affect MOT.
However, Im not here to argue about the reasons why... I just want rid... so here goes...
DurationThis took me about 3 hours for EGR valve and cooler, while taking photos!
As with anything you havent done before, allow your self plenty of time and ensure you have the correct tools before you start...
Tools you will need:For EGR Delete:
- EGR Delete Pipe (Allard or Darkside?) Approx £80
- Torx bit set (T25 / T30)
- Small ratchet & socket set & extenstions
- Allen Keys
- Hose Clip Pliers or large grips
- Flat blade screw driver
Addition parts required for EGR cooler delete:
- Water coupler (EGR Cooler Delete Pipe) 3B0 122 291 B approx £8 from VW
- Remote Hose Clip Pliers
- Hose Clip Pliers or large grips
- Spare length of hose (read EGR cooler delete guide (below) for guidance
- Container to catch leaking coolant
- New coolant from VW / motor factors to top up when finished.
EGR Delete Pipe
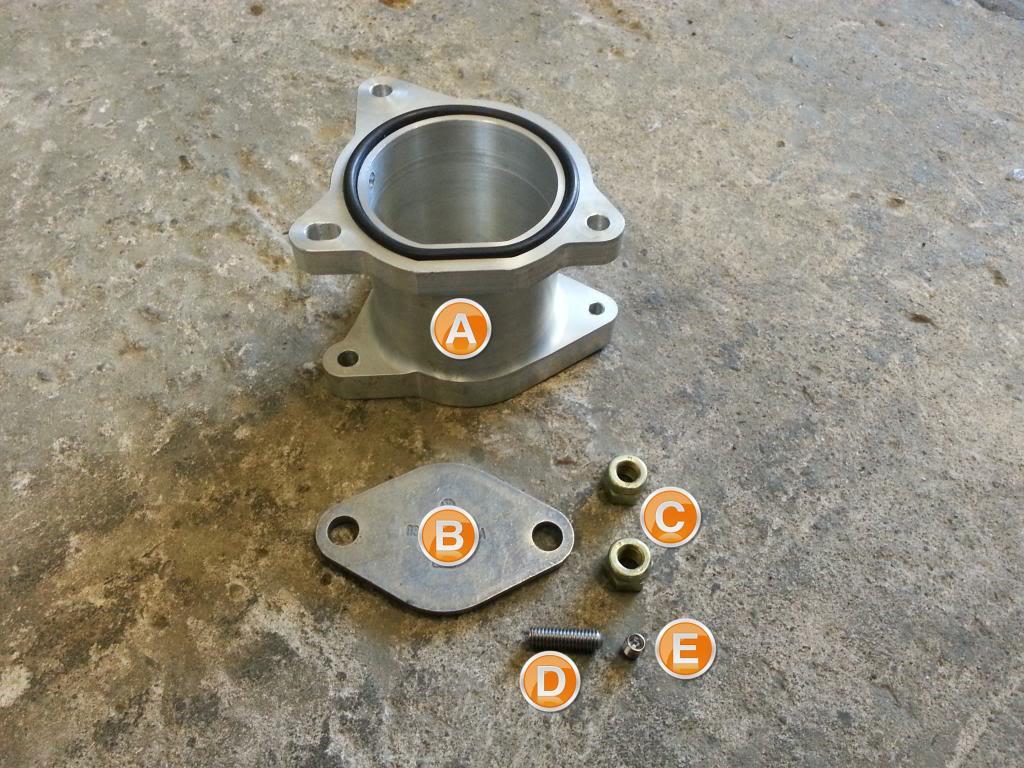
- A - EGR delete pipe
- B - EGR blanking plate
- C - EGR Blank plate mounting nuts
- D - Boost gauge take off tap (for connecting a boost gauge)
- E - grub screw (if boost gauge not fitted, blank the hole with grub screw)
EGR Cooler Delete Pipe (3B0 122 291 B)
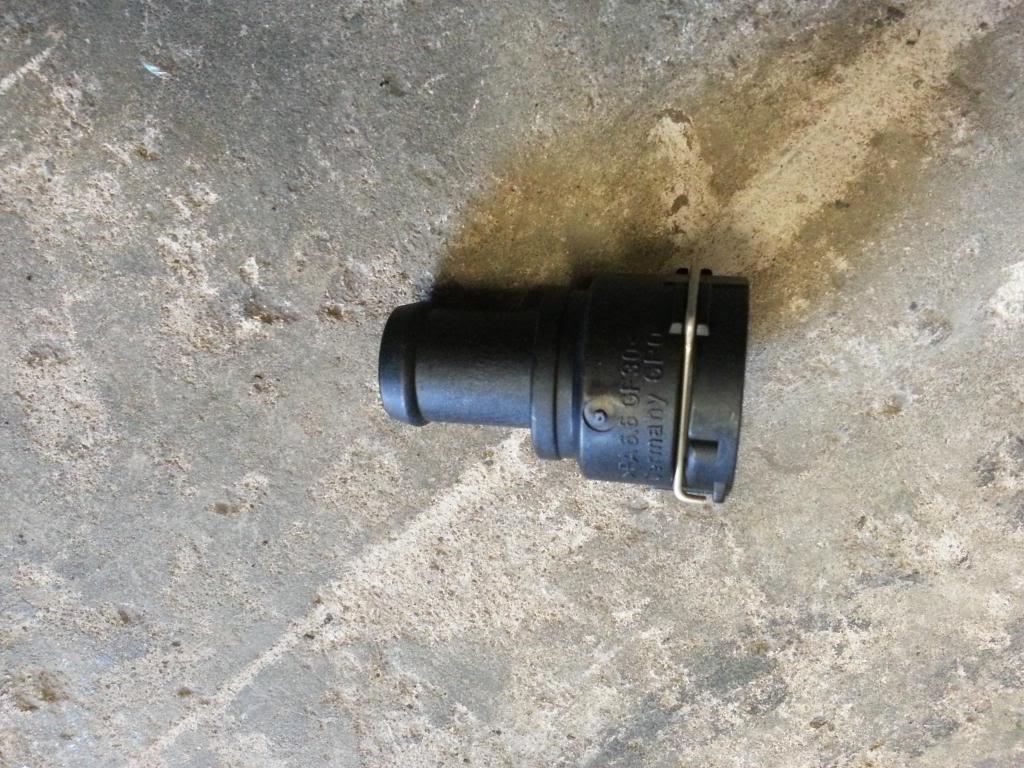
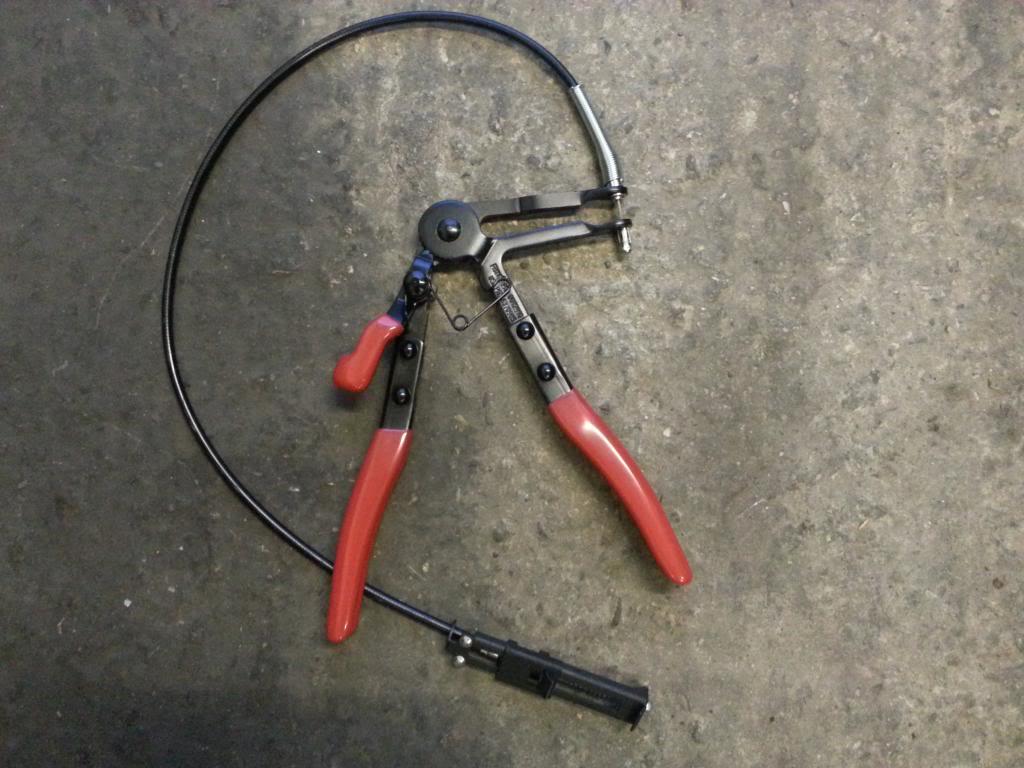
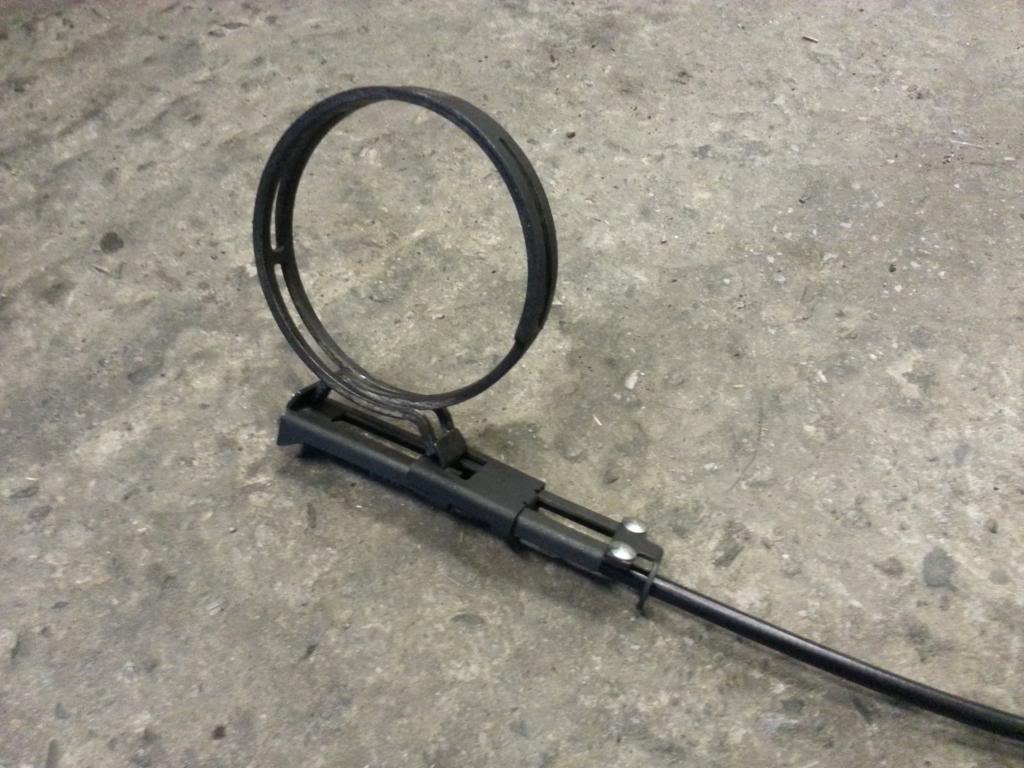
Remote Hose Clip Pliers (to remove band clamp on turbo / intake hose)
 NOTE:
NOTE: You do not have to remove the EGR cooler, and it can be done later if you want. Once the EGR valve is removed, the cooler is redundant so not required.
This guide details removal of both parts.
EGR System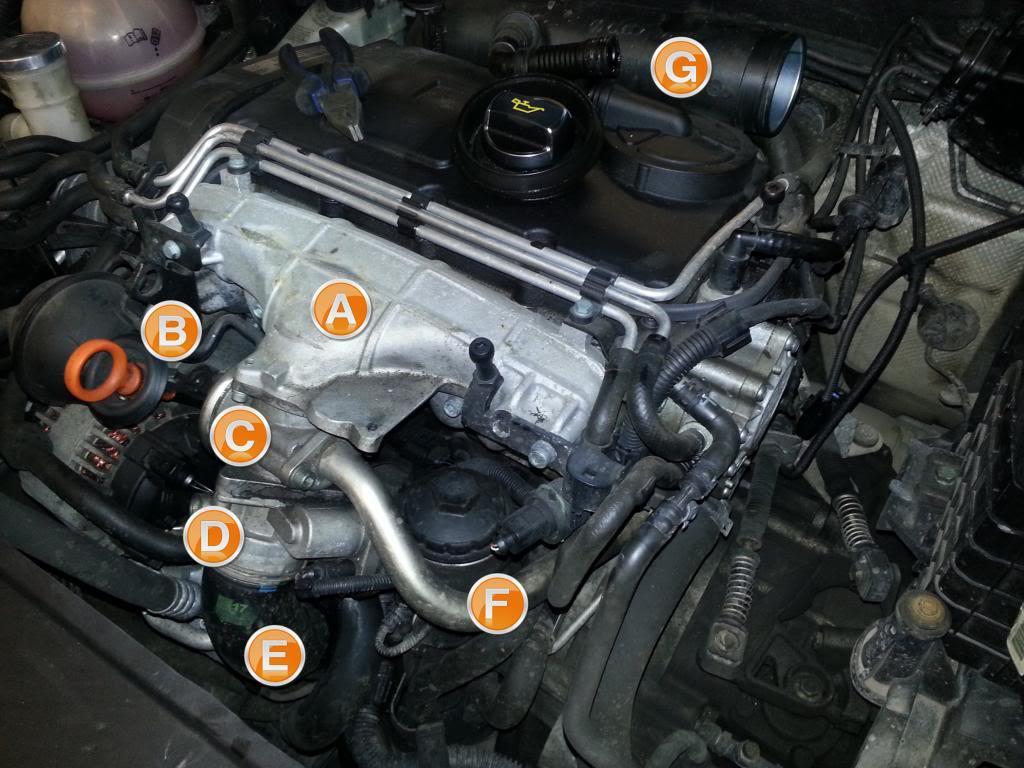
- A - inlet manifold
- B - EGR vacuum hose
- C - EGR valve
- D - Anti Shudder Valve (ASV)
- E - inlet pipe
- F - inlet / exhaust manifold connecting pipe
- G - turbo intake pipe
- EGR Cooler is not picture, but is situated at the back of the engine, underneath 'G'
-----------------------------------
EGR Valve Delete-----------------------------------
Remove engine cover
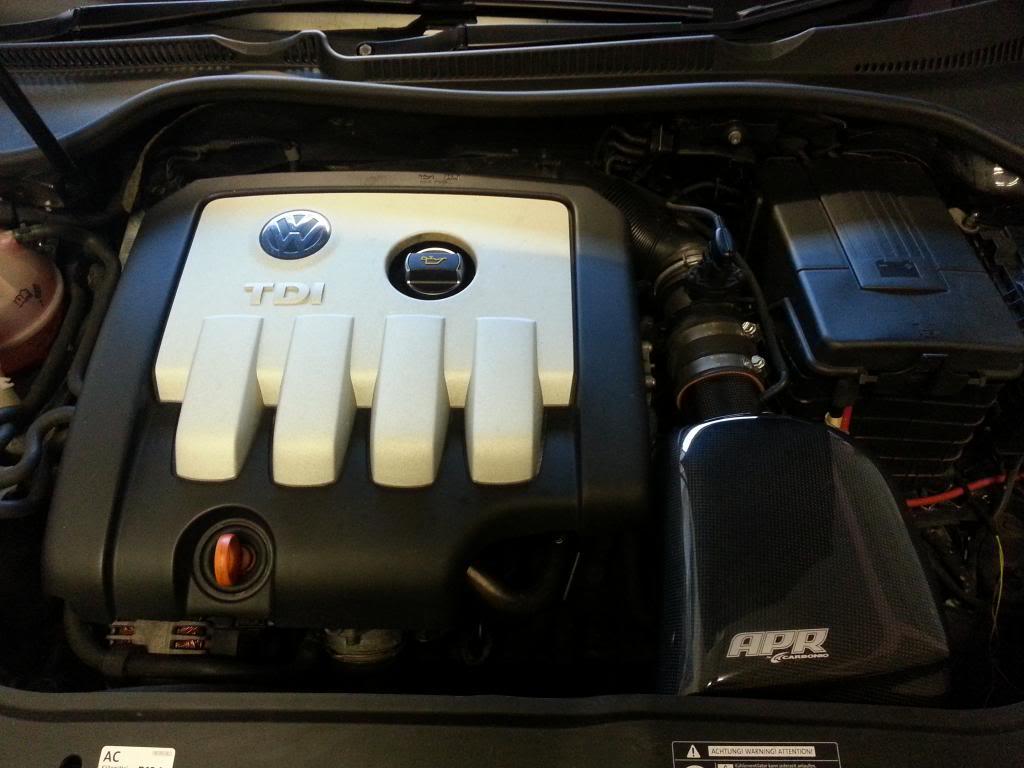
Pull cover upwards, off rubber grommets on front left and right and rear right (as you face the engine).
You can then slide the cover off the rear left mounting.
Engine cover removed
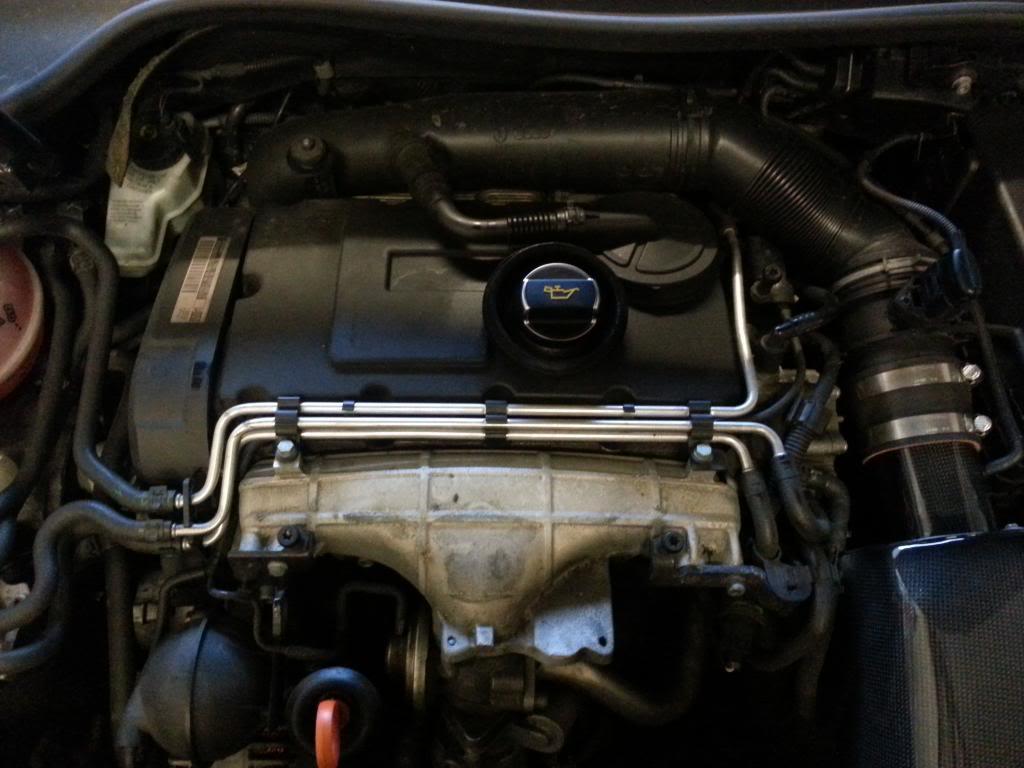 You will now need to remove the airbox. I have an APR intake and so will not detail airbox removal here....
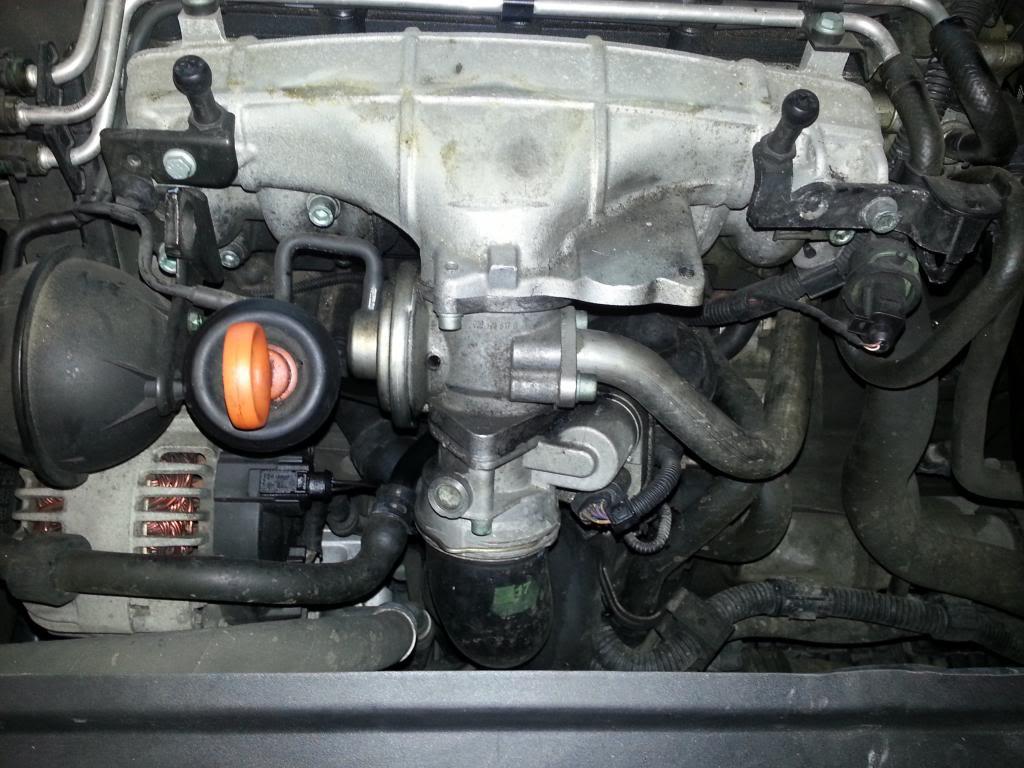
Here you can see the EGR valve connected to the inlet manifold.
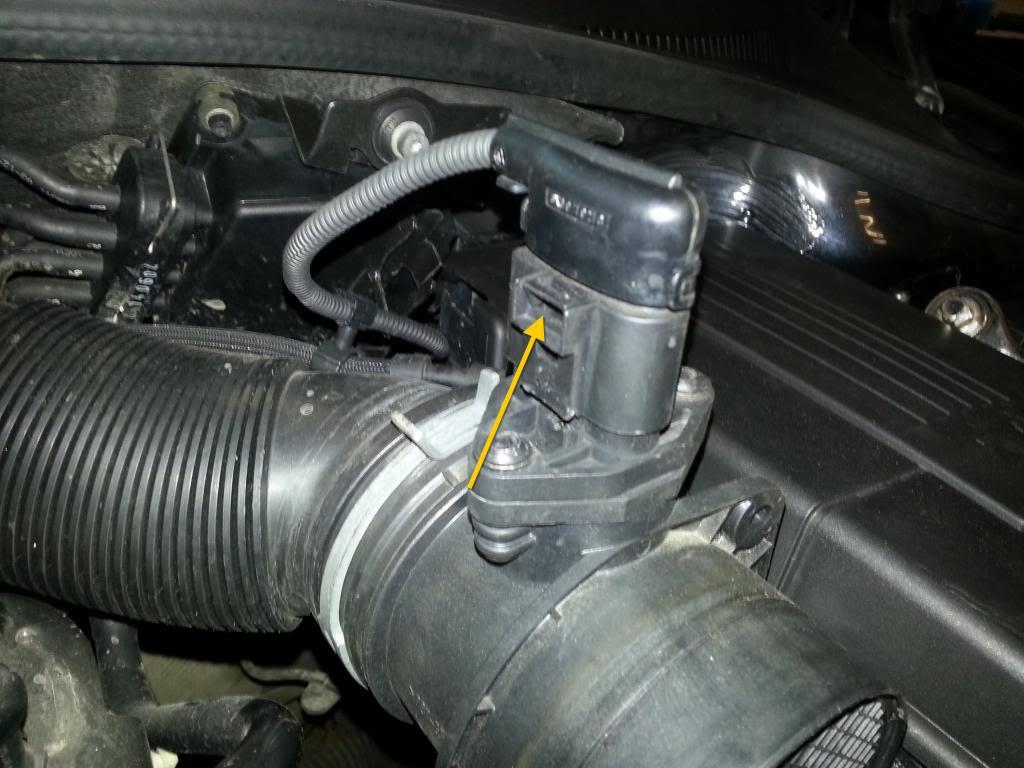
Disconnect MAF sensor connector plug.
Pull up on the tab (arrowed) while pulling up on the connector.
Remove band clamp from turbo intake pipe.
You can use pliers for this but will need either large grips or hose clip pliers to get it back on.
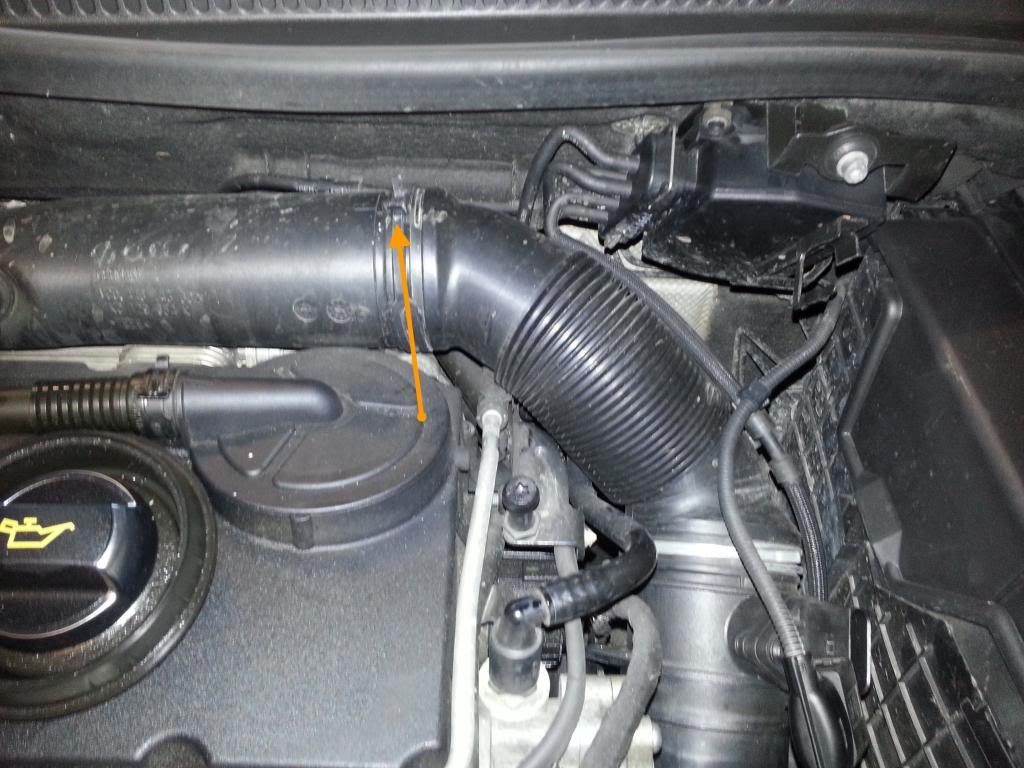
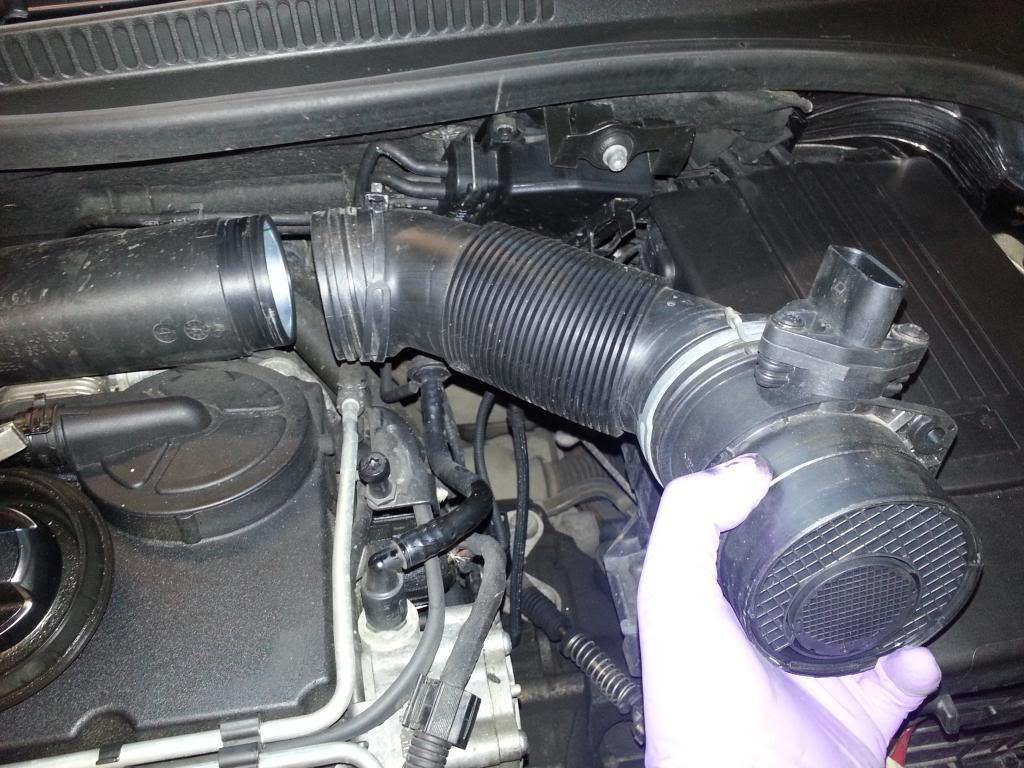
Remove MAF assembly.
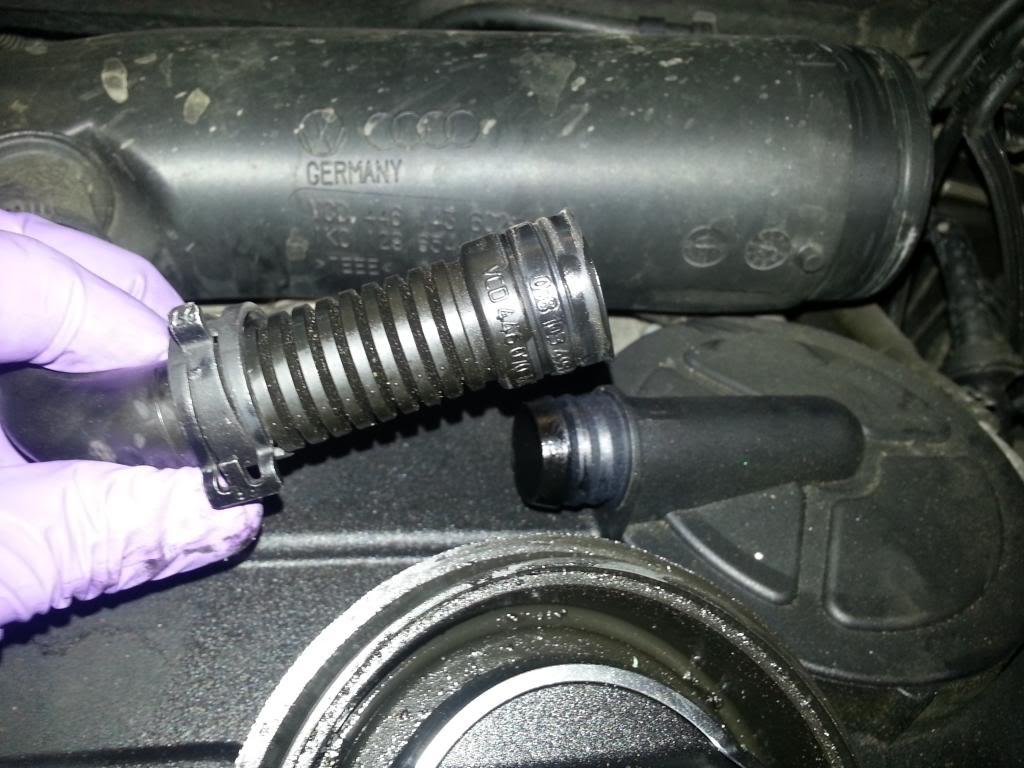
Release hose clip on rocker cover breather hose and disconnect breather hose.
The turbo intake pipe is secured to the EGR cooler mount by a T30 torx screw...
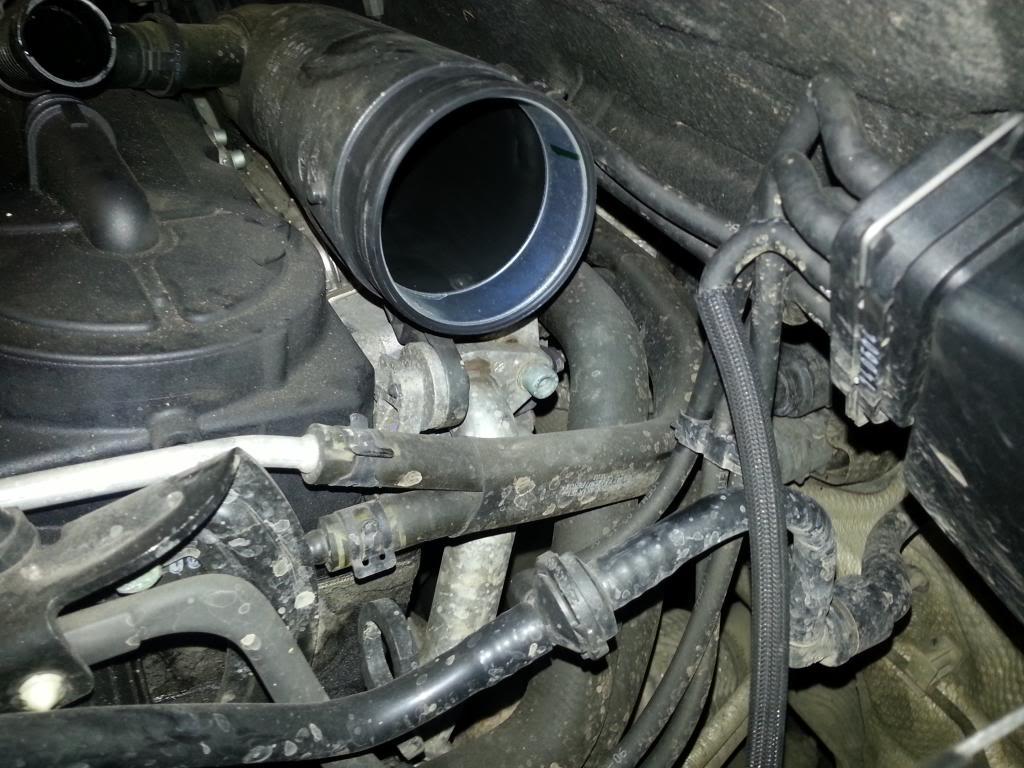
Remove the T30 screw, to free the intake pipe giving better access to the EGR cooler.
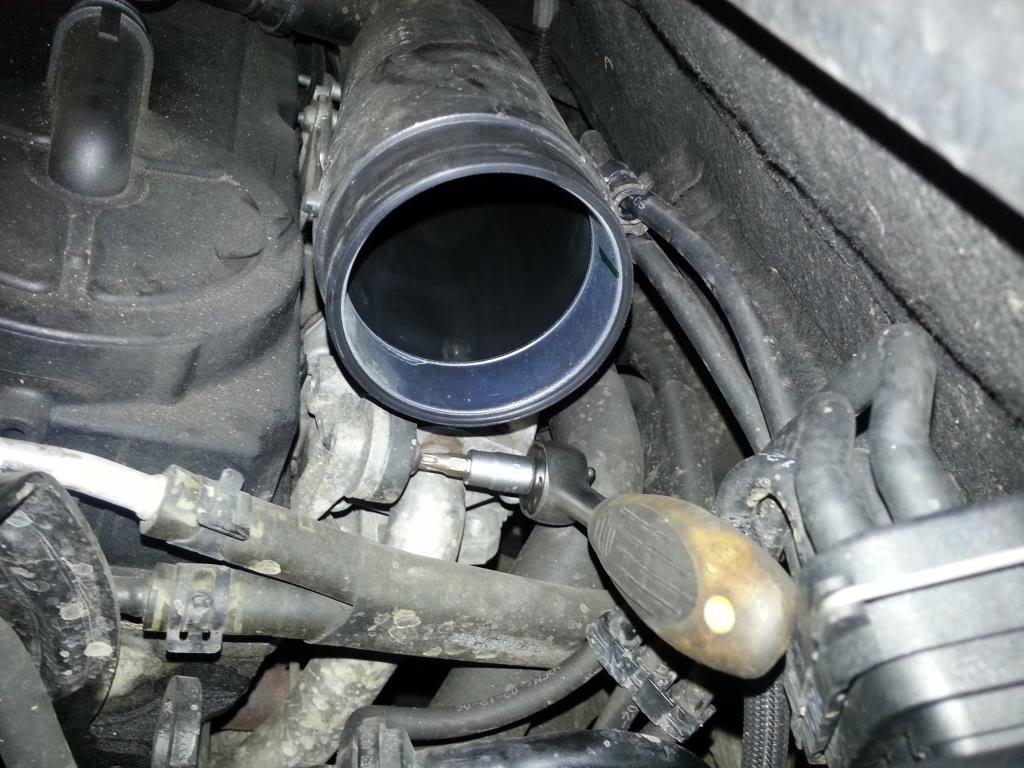
Below the turbo intake pipe you will see the inlet / exhaust manifold connecting pipe bolted to the side of the EGR cooler by 2 x 6mm allen bolts.
Remove them to release the pipe from the cooler.
Be careful to recover the gasket, dont let it drop down the engine bay!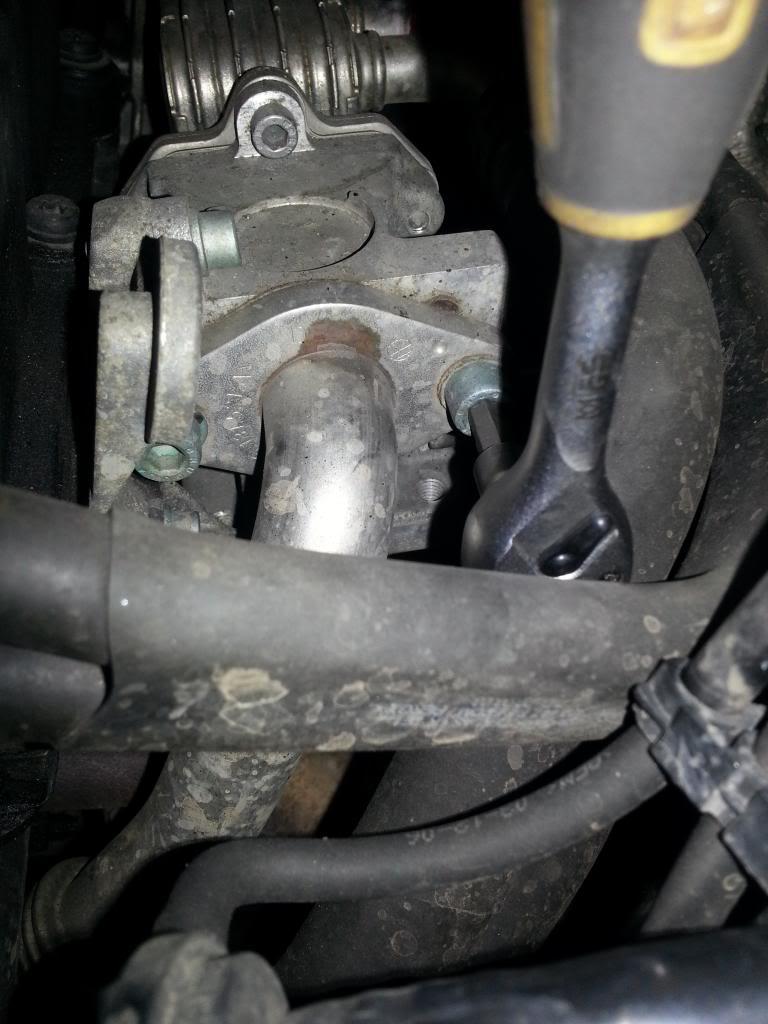
The inlet / exhaust manifold connecting pipe also connects to the side of the EGR valve by 2 x 6mm allen bolts.
Remove them to release the pipe from the EGR.
Be careful to recover the gasket, dont let it drop down the engine bay!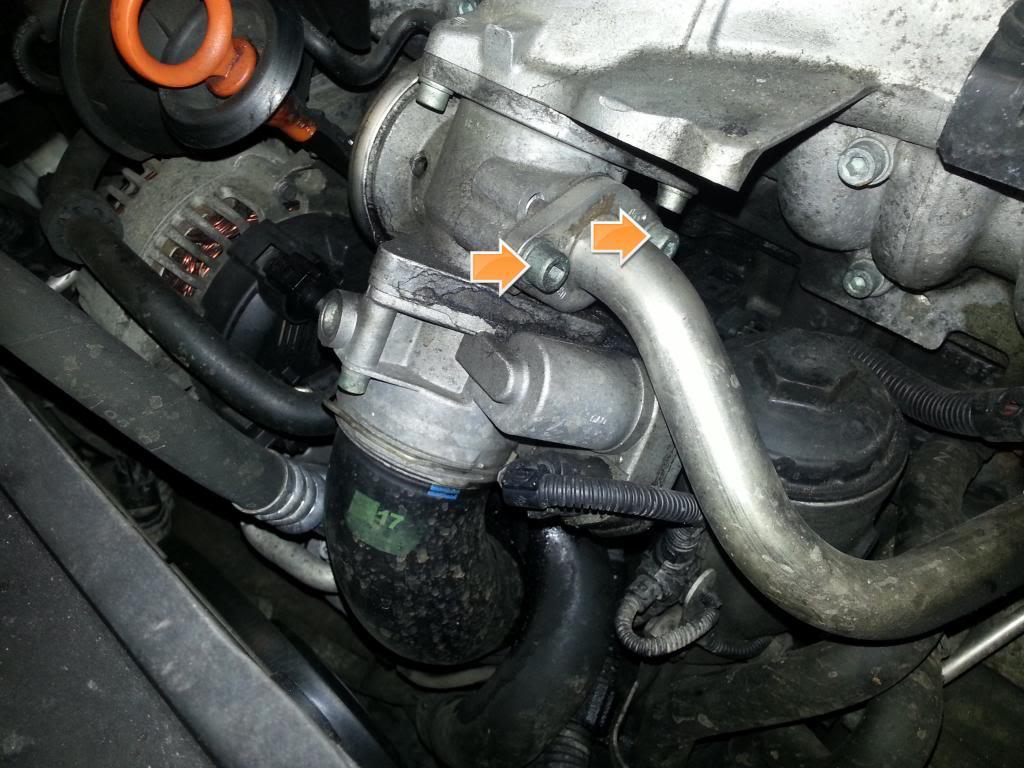
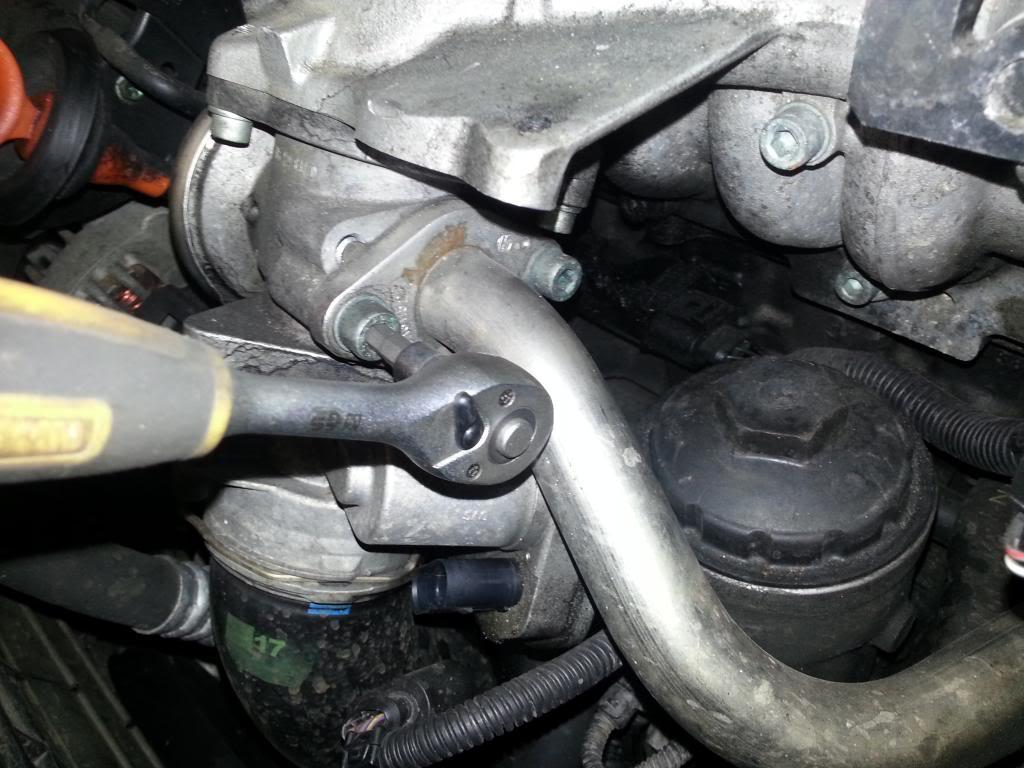
The inlet / exhaust manifold connecting pipe is finally secured to the side of the engine by a 10mm nut which needs to be removed I couldn't picture this, but see the ratchet for an idea of location...
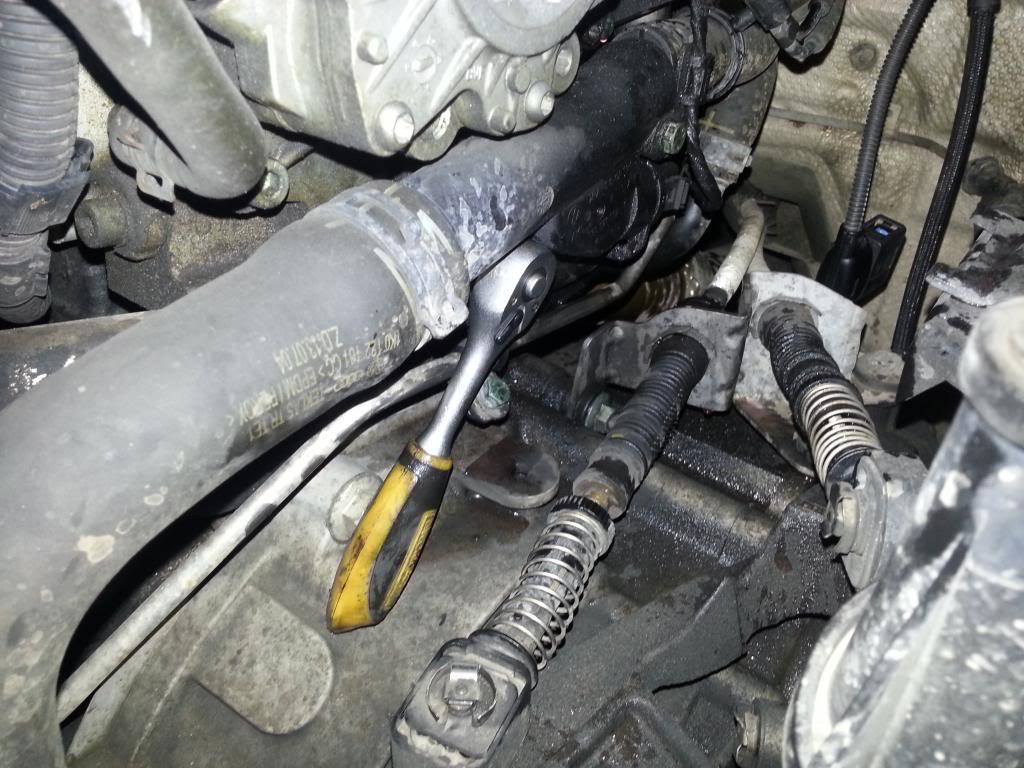
The inlet / exhaust manifold connecting pipe should now wriggle free and can be fully removed, in the direction of the airbox, navigating it around the various pipes to get it free.
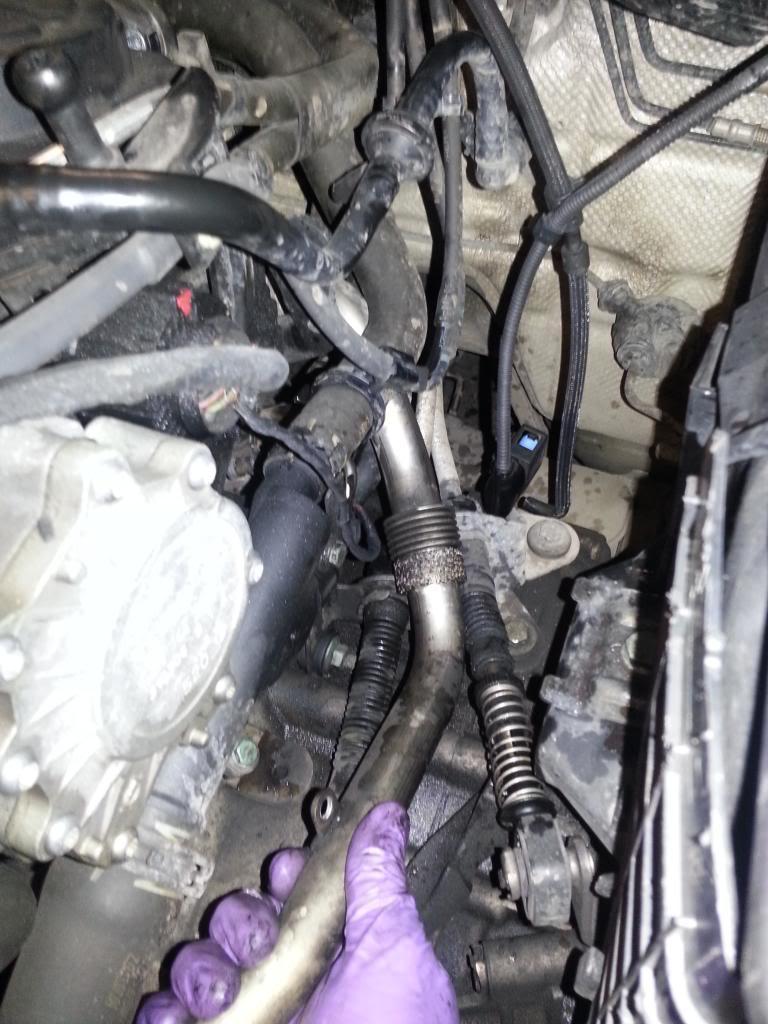
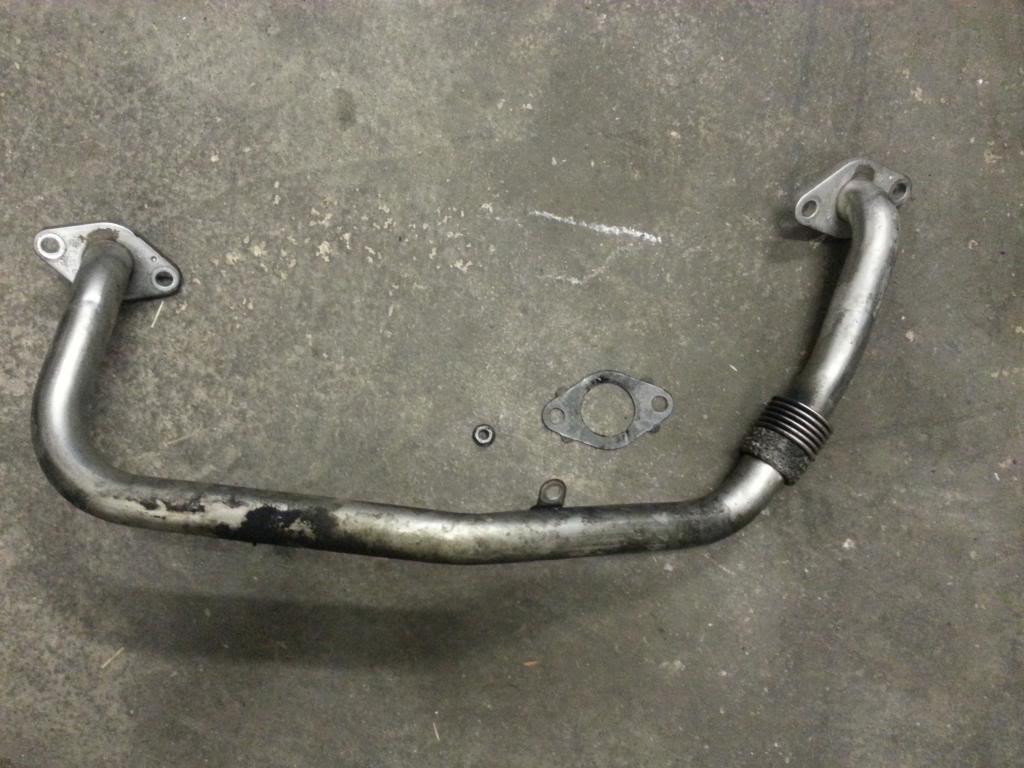
The inlet / exhaust manifold connecting pipe, gaskets and nut..
NOTE: there are 2 gaskets and 4 bolts not pictured here.
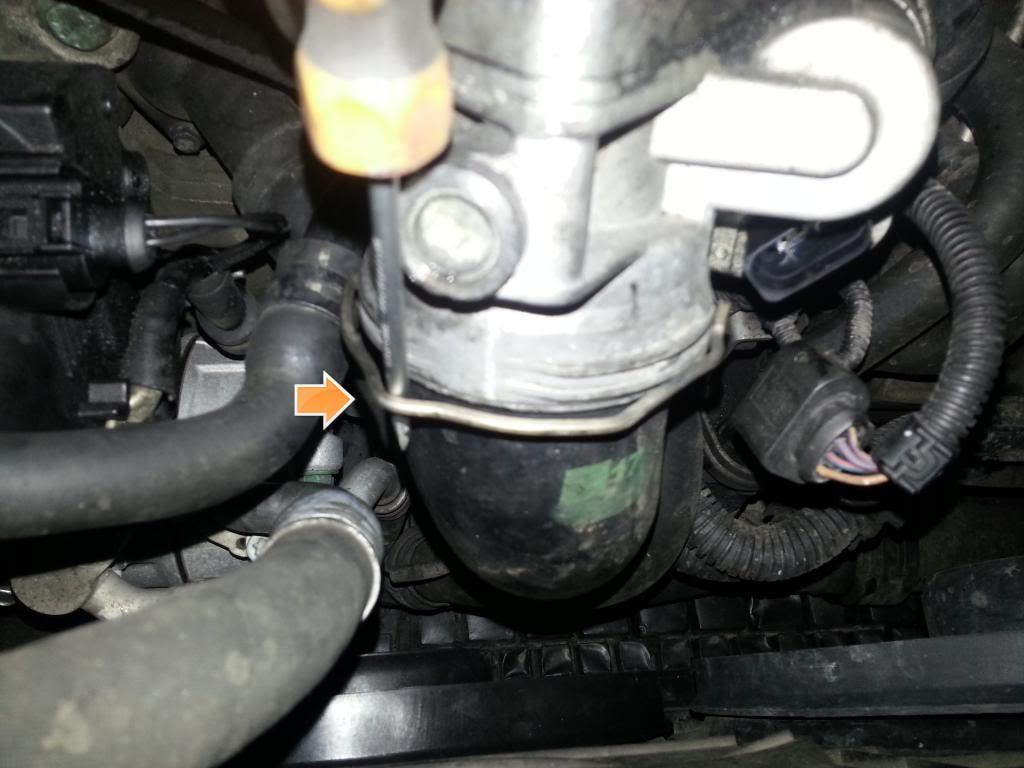
Now to remove the inlet pipe.
Prise out the clip with a flat blade screw driver. The clip does not need to be fully removed.
Pull down on the pip to free it from the ASV.
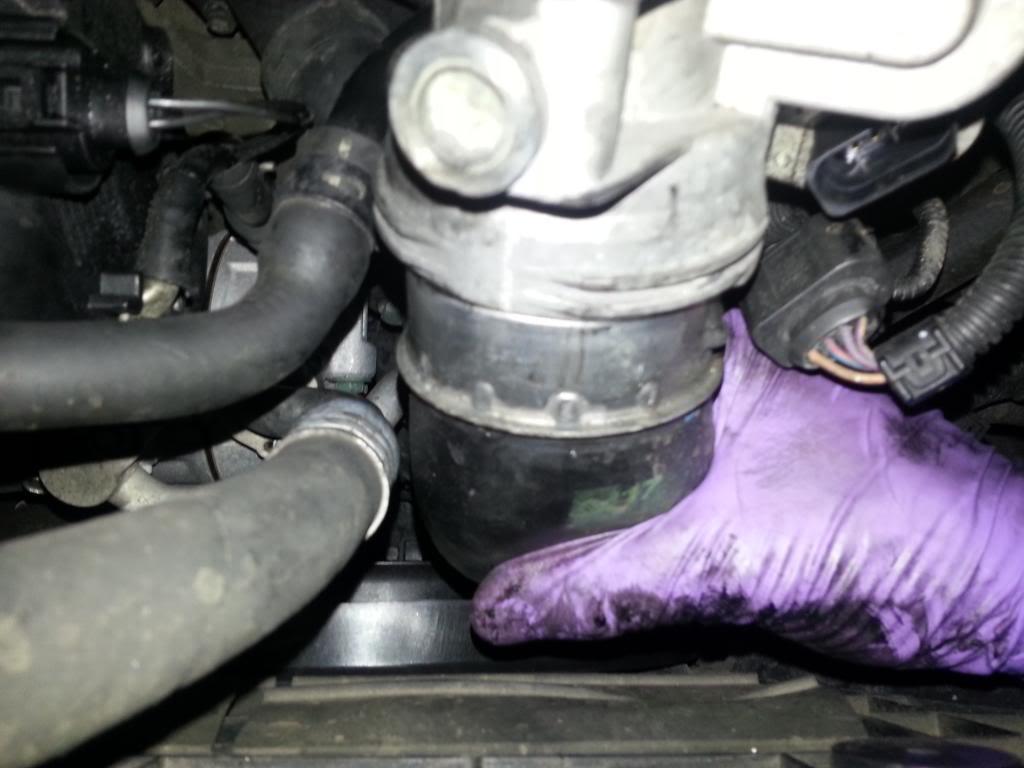
Now to remove the EGR Valve
Remove the connector plug from the ASV.
The EGR Valve is secured to the inlet manifold by 3 5mm allen bolts which need to be removed.
One is a little tricky to get to, and is longer than the other two, see pictures...
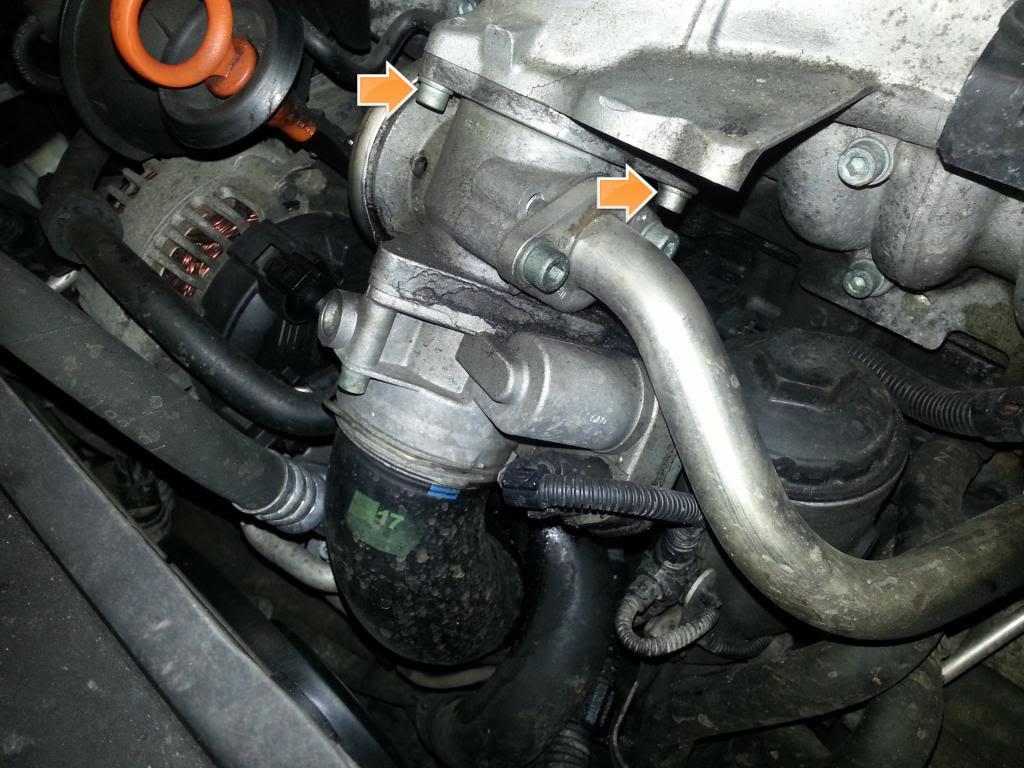
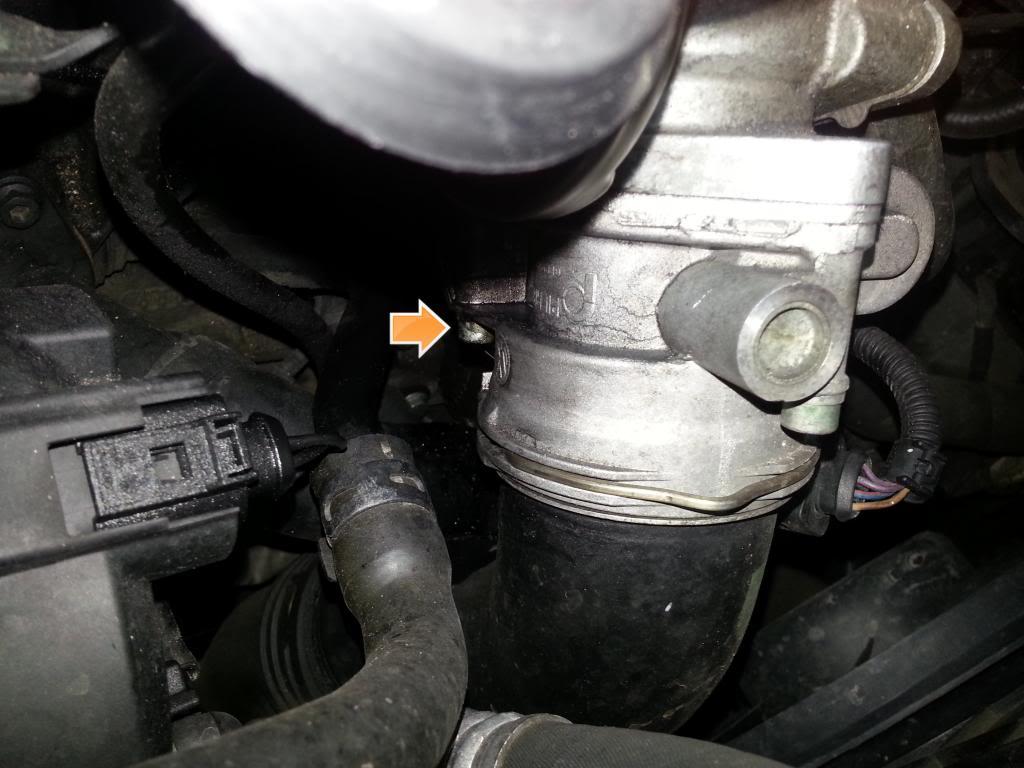
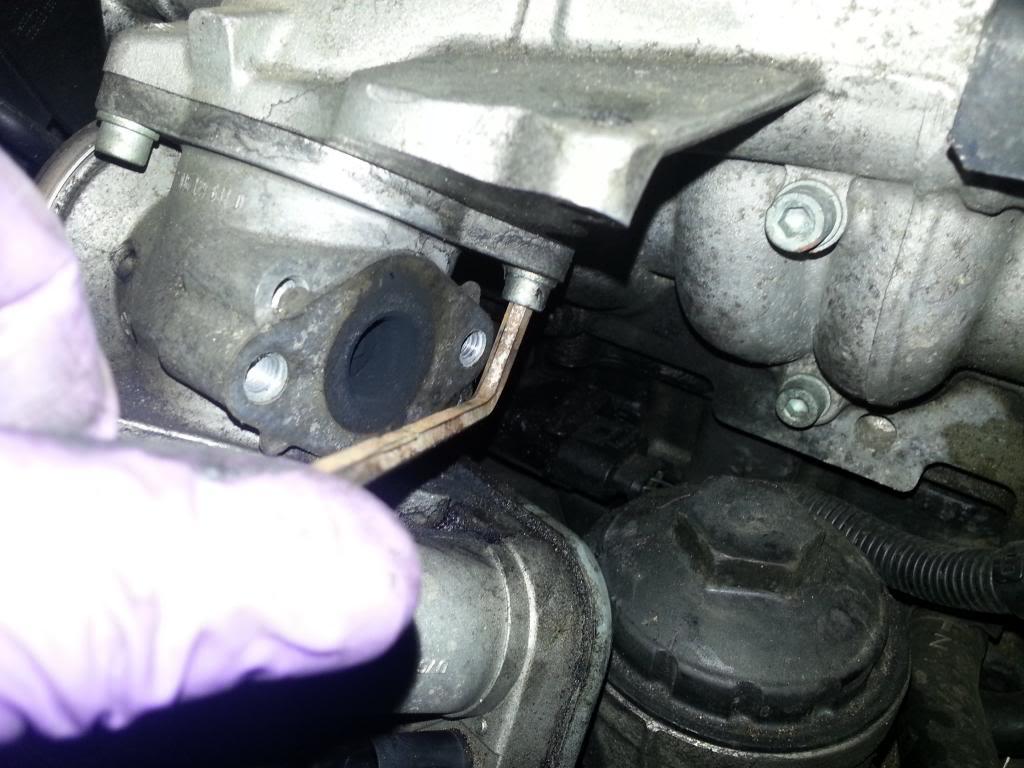
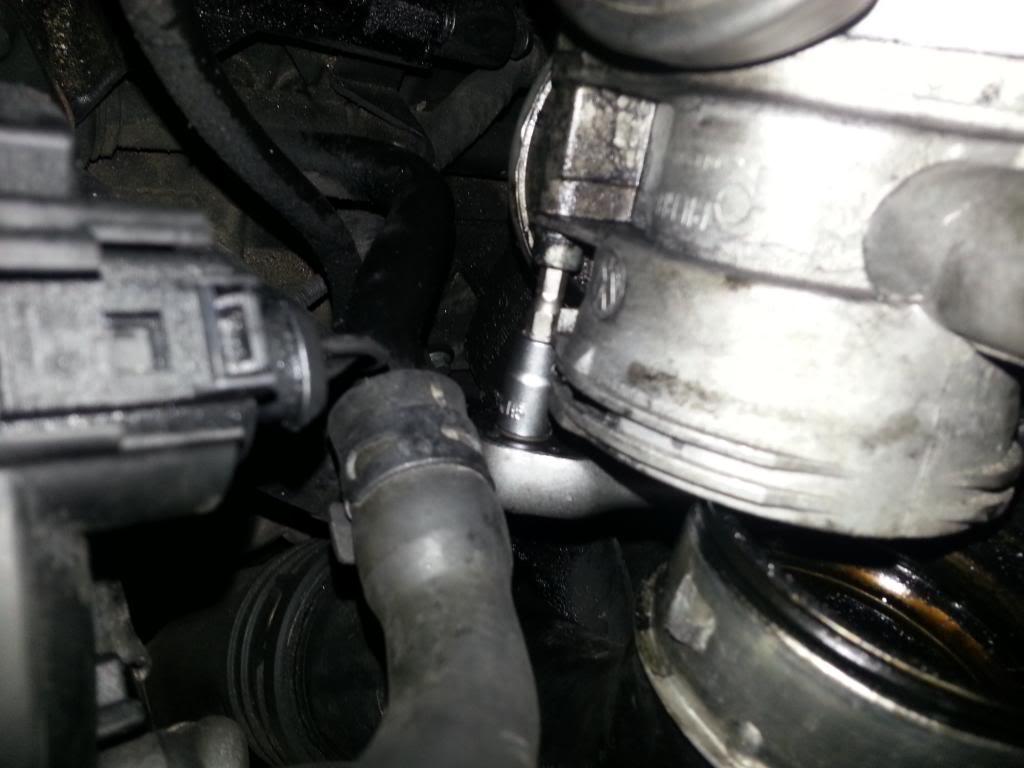
The EGR valve and ASV should now come free and can be removed from the engine bay.
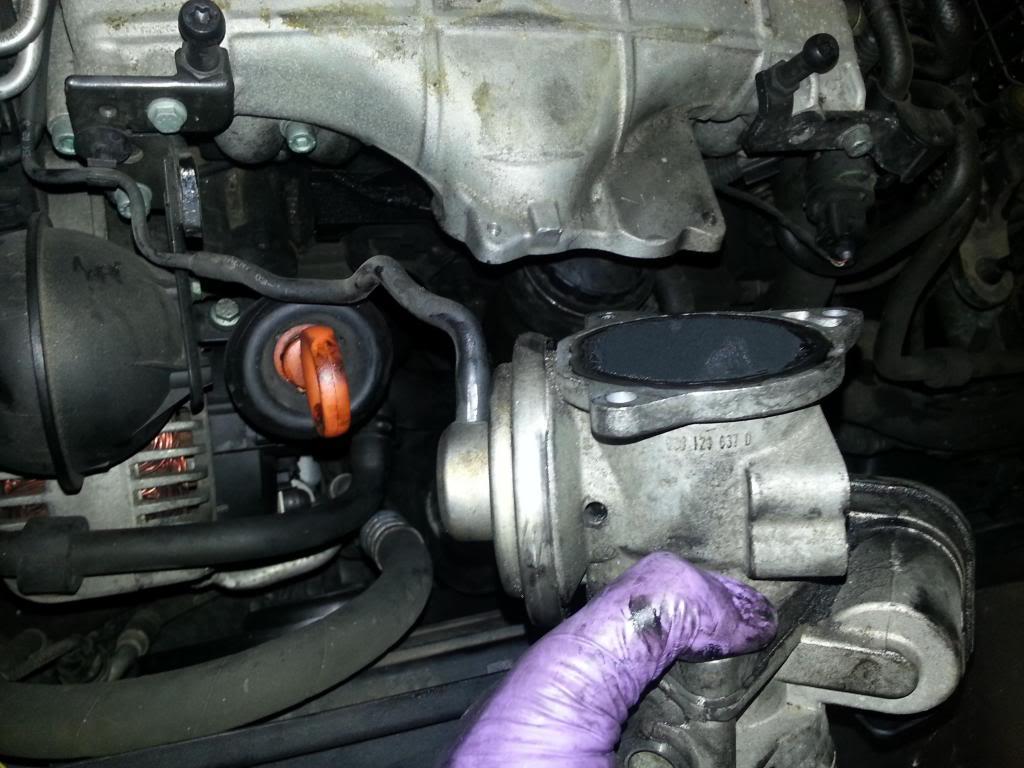
Notice the huge build up of carbon and sludge!
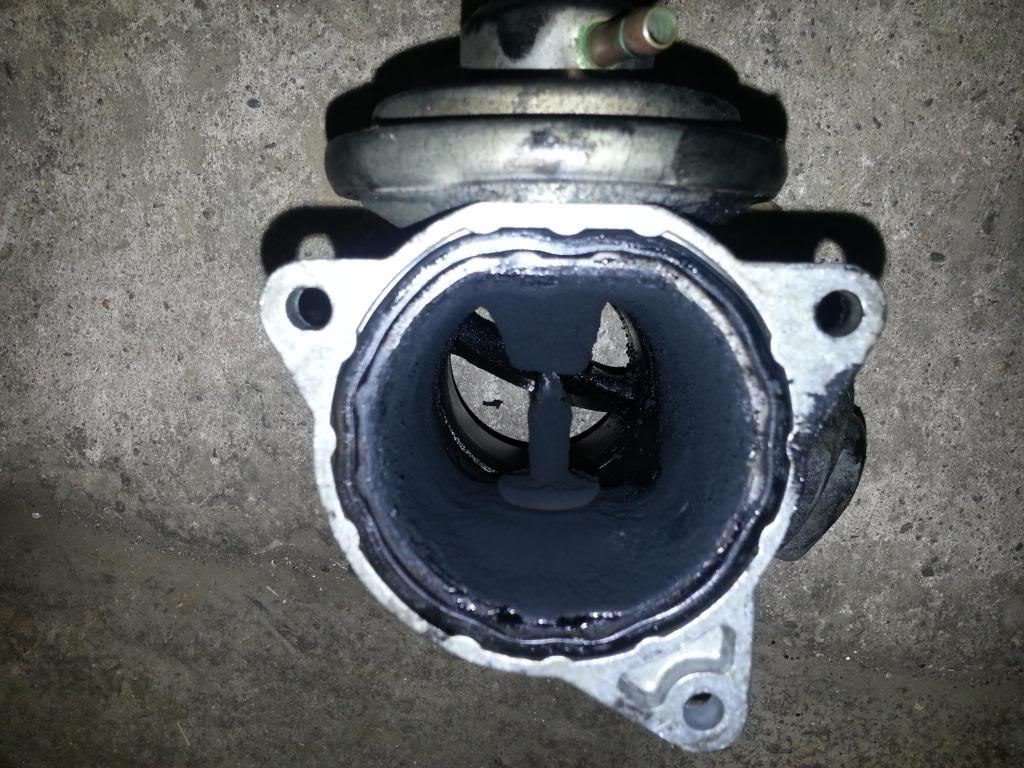
The EGR is connected to the ASV by 2 x 5mm allen bolts. Remove them and separate the two units.
The bolts will be required shortly.
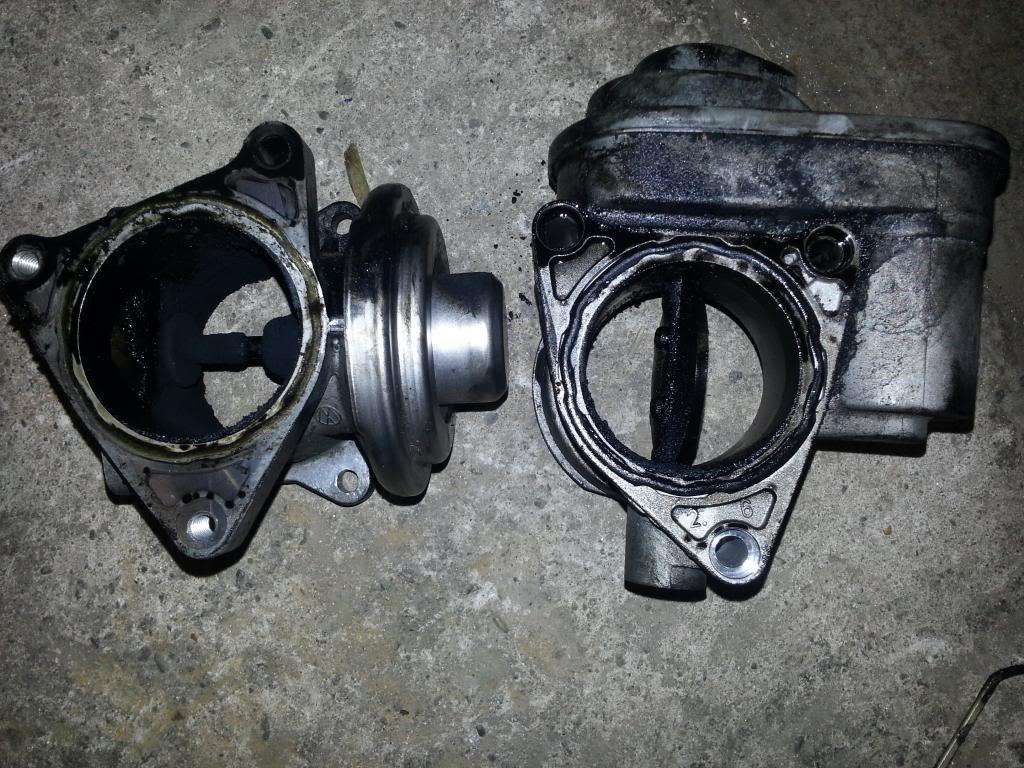
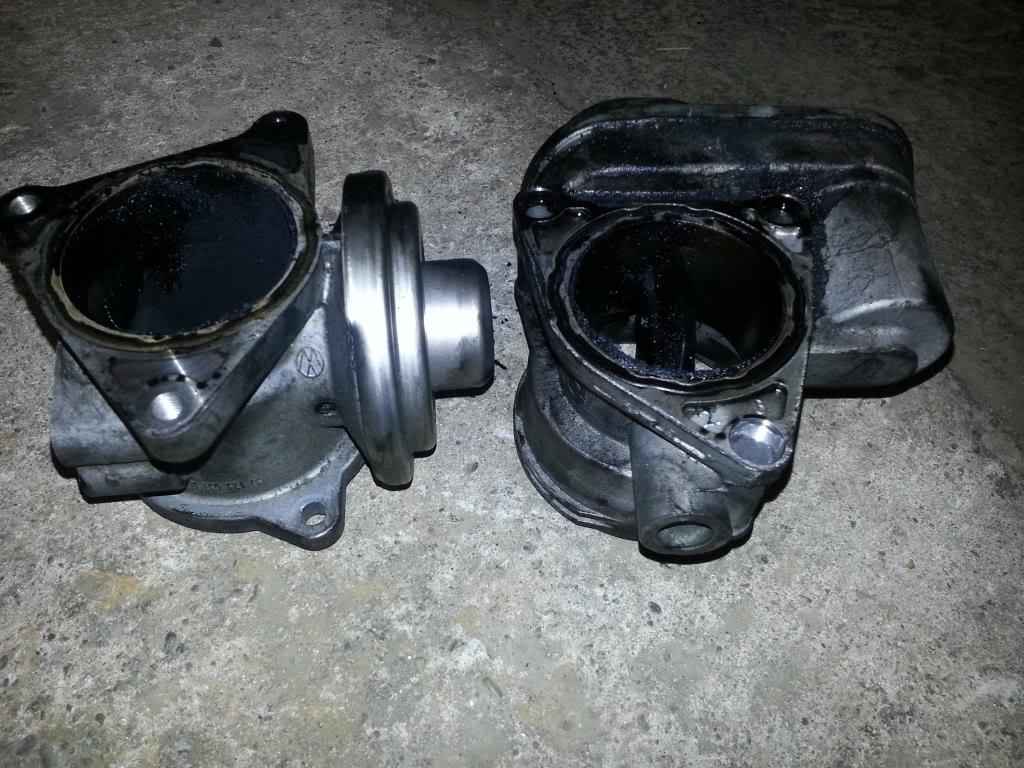
Take this opportunity to clean the ASV. I used intake cleaner (aerosol) but WD40 might work also, with a rag.
Ensure it is clean and dry once finished.
You might also want to clean your inlet manifold, but I recommend removing it first, which will be covered in a separate guide...
Notice the build of carbon there also.
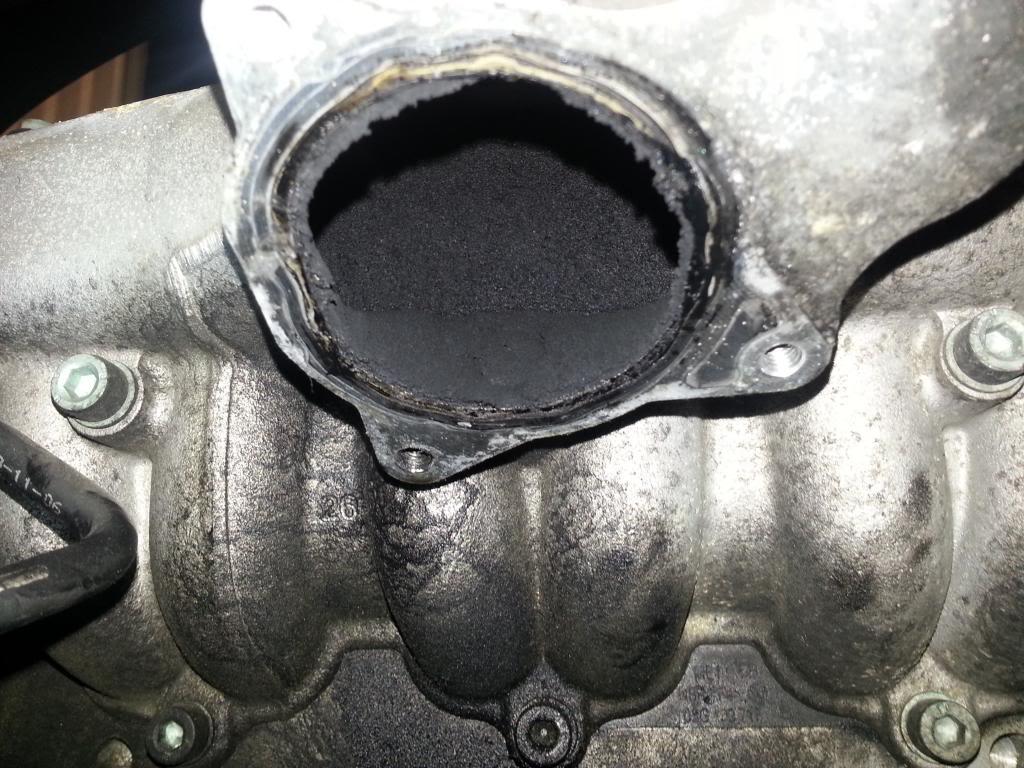
Grab your EGR delete pipe!
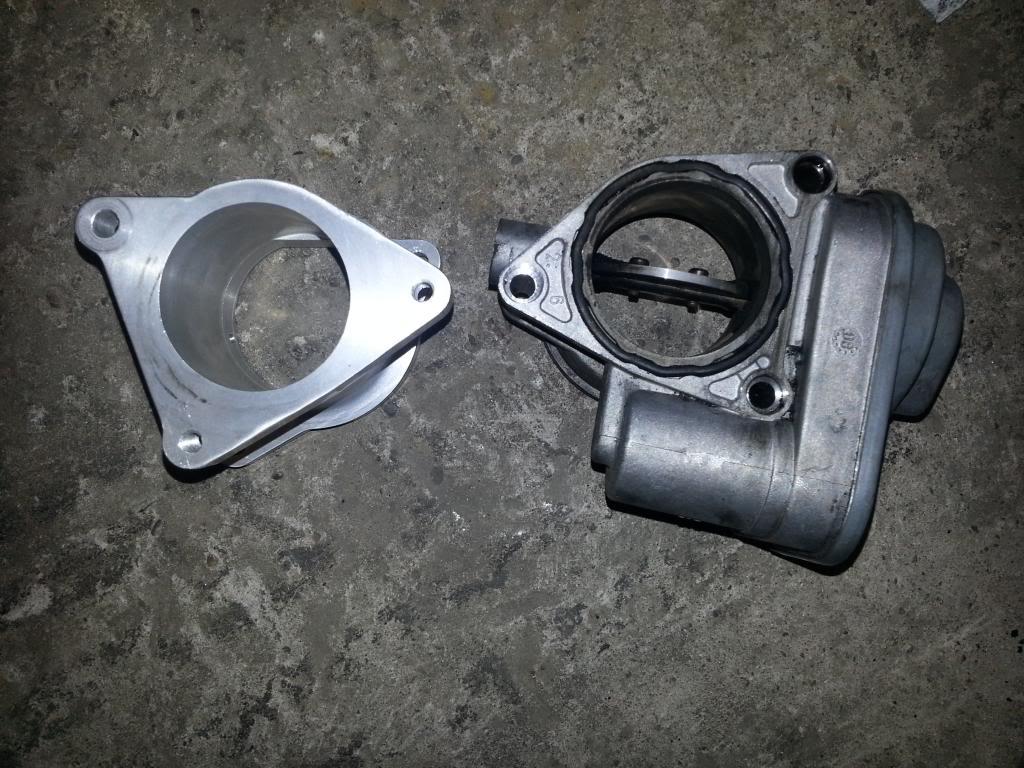
Connect the EGR deete pipe to the ASV.
NOTE: only the two smaller 5mm allen bolts will be fitted now, the 3rd longer bolt connects the ASV and EGR delete to the inlet manifold.
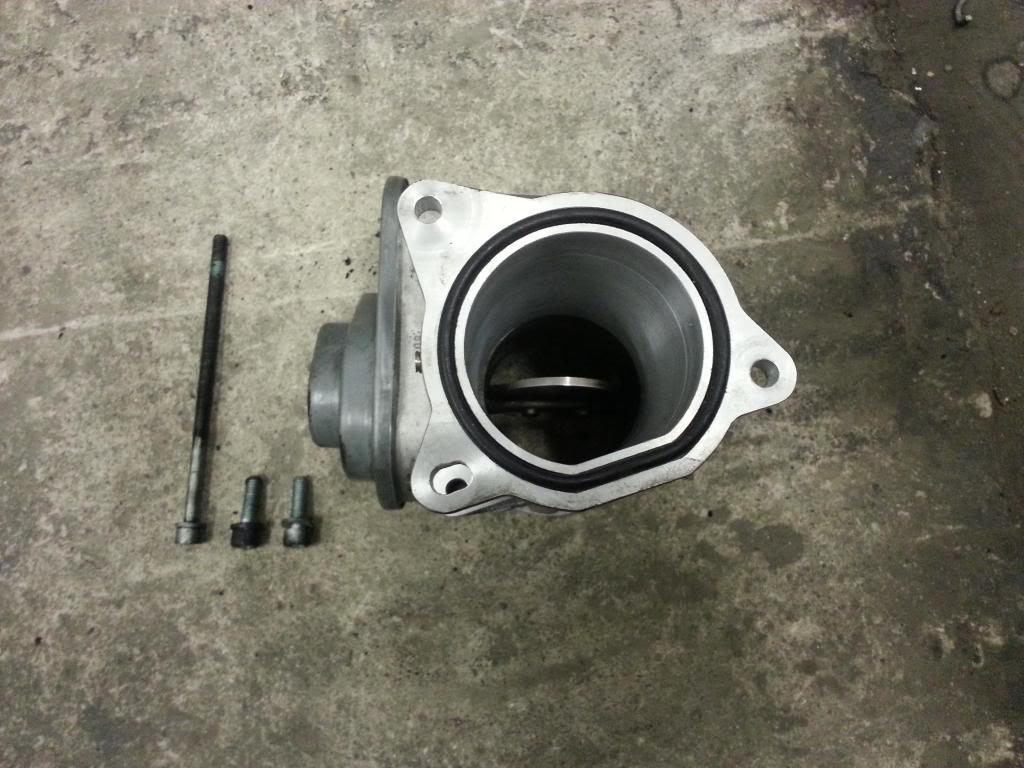
Ensure the supplied O ring is fitted to the top of the EGR delete pipe.
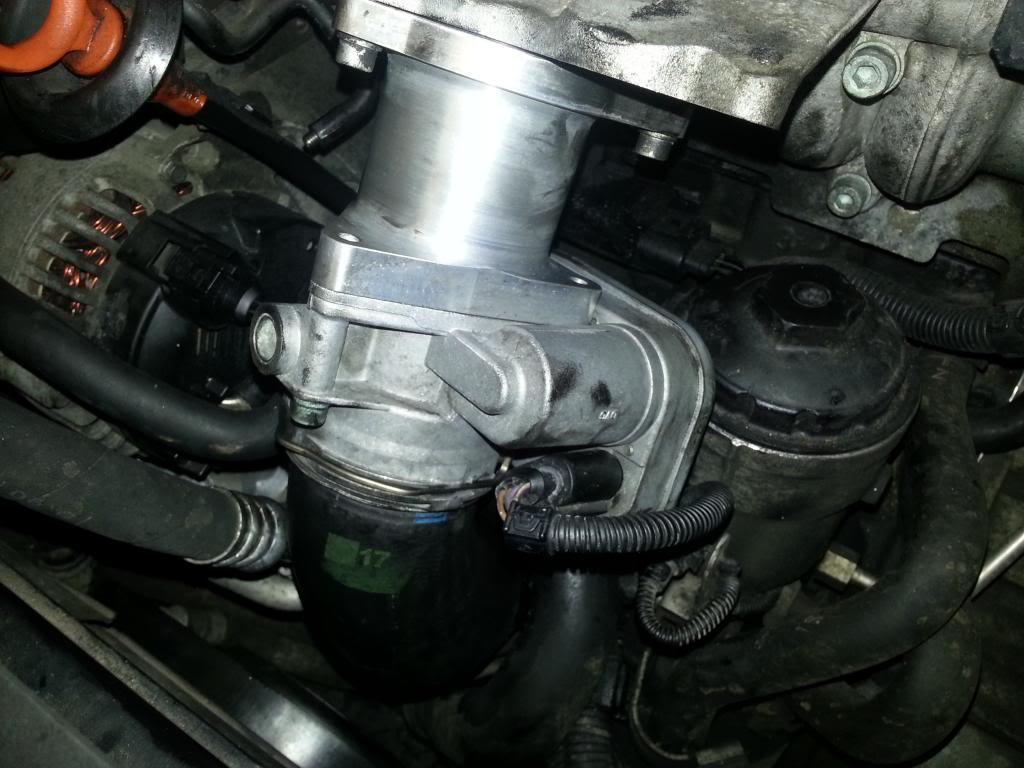
Also fit the small grub screw to the delete pipe, this blocks a hole that could be used for a vacuum hose to run a boost gauge. Easily removed later on if you decide to do that.
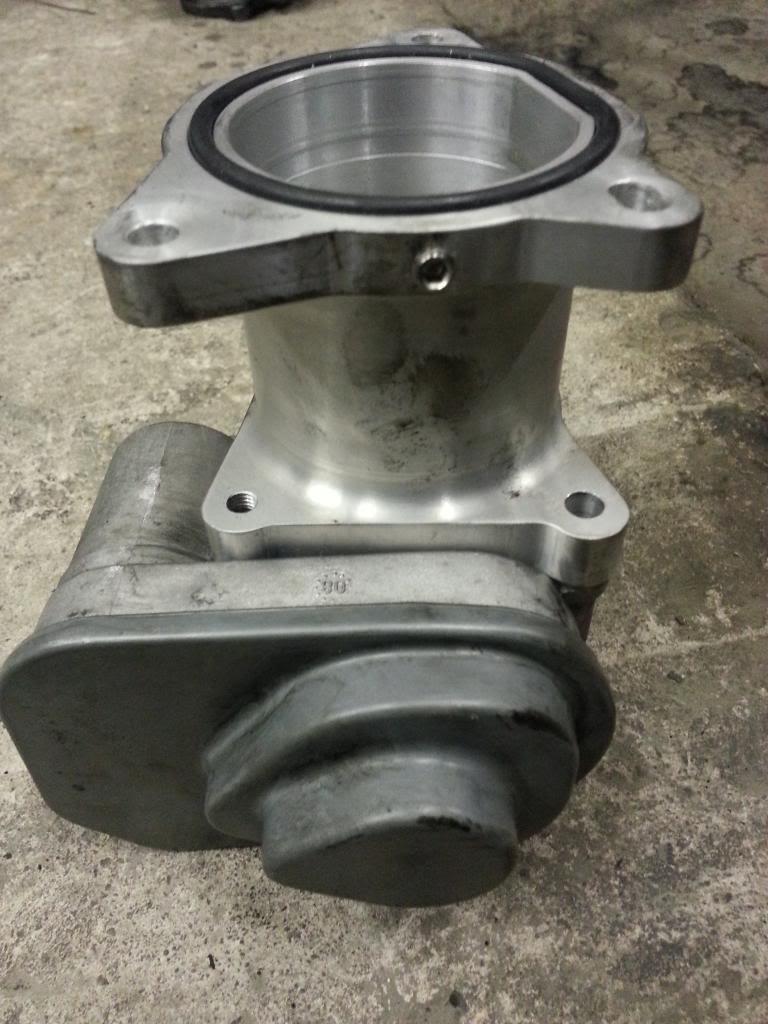
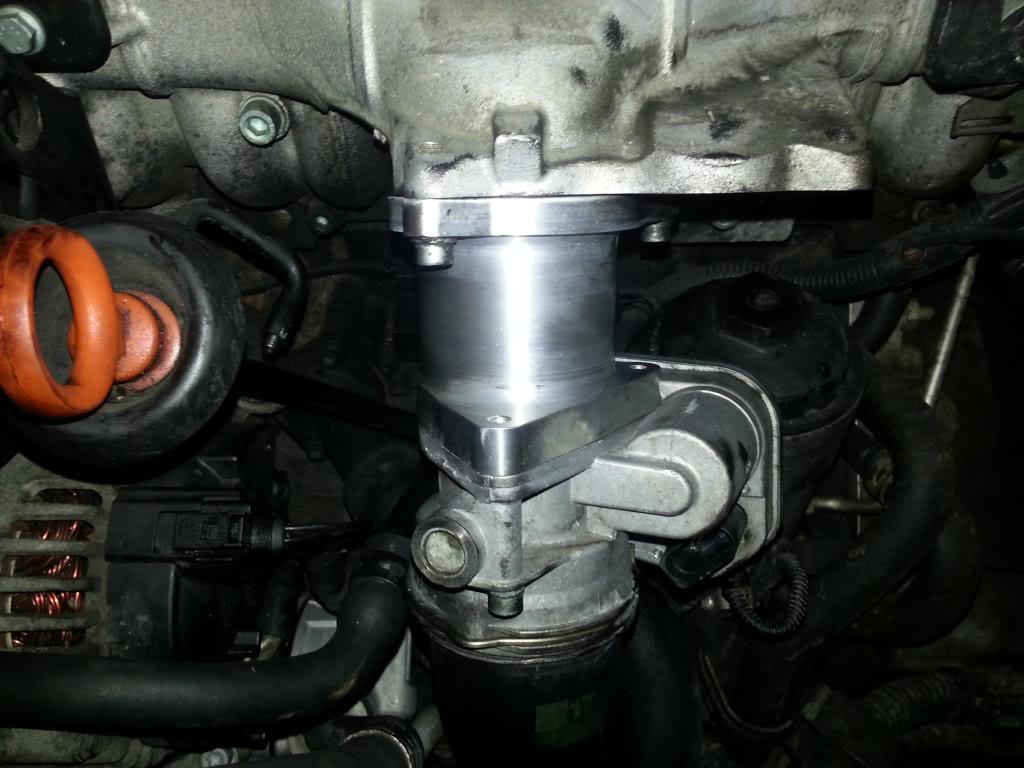
Fit the complete EGR delete / ASV assembly to the inlet manifold, with 2 small 5mm allen bolts and the longer allen bolt pictured above.
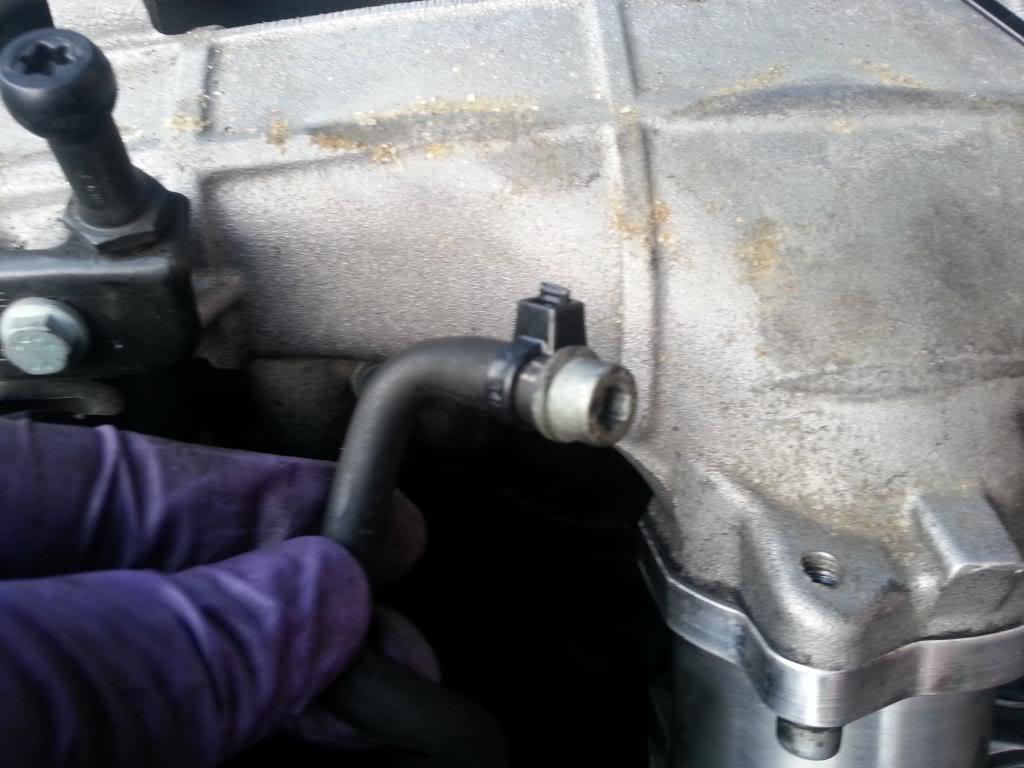
The EGR vacuum hose now needs to be plugged. Use one of the spare 5mm allen bolts, secured with a cable tie. Any similar sized bolt will do.
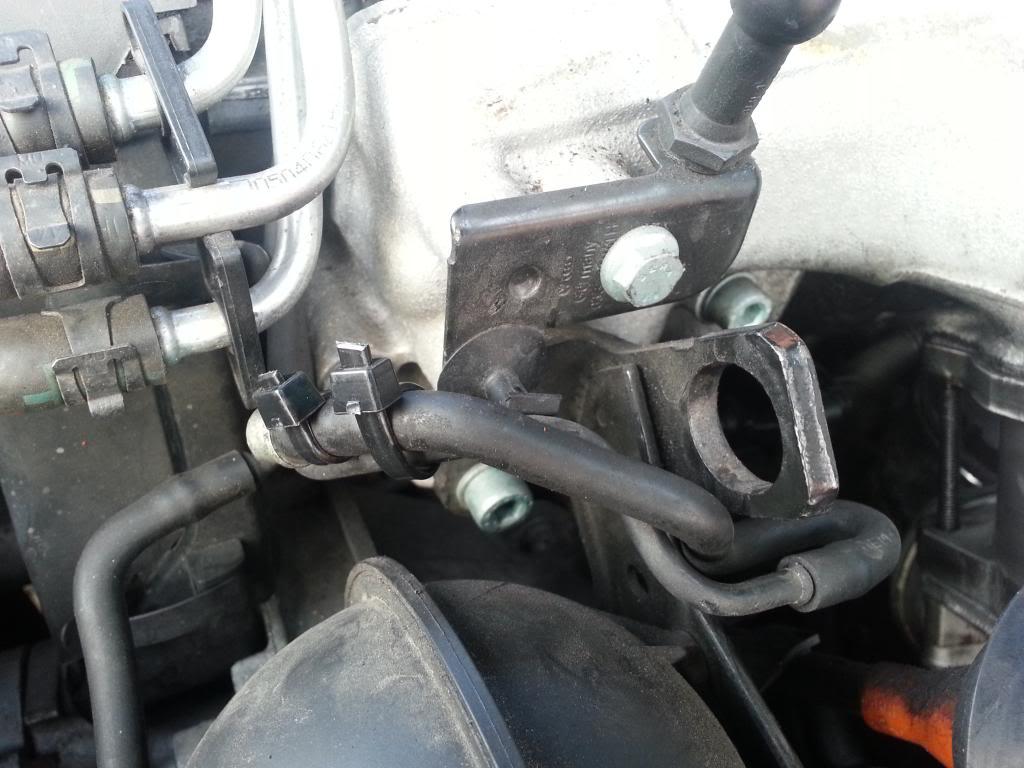
I used another cable to to keep the vacuum out the way.
Reconnect wiring connector to ASV.
 NOTE:
NOTE: This step is only required if you are not removing the EGR cooler at this stage.
If you are removing the EGR cooler now, do not fit the blanking plate.... read skip to the EGR cooler section of the guide!
-----------------------------------
-----------------------------------
Now to plug the hole left by the inlet / exhaust manifold connecting pipe using the EGR blanking plate.
You will need the EGR blanking plate from the EGR delete kit, 2 x 6mm allen bolts and a gasket from the inlet / exhaust manifold connecting pipe.
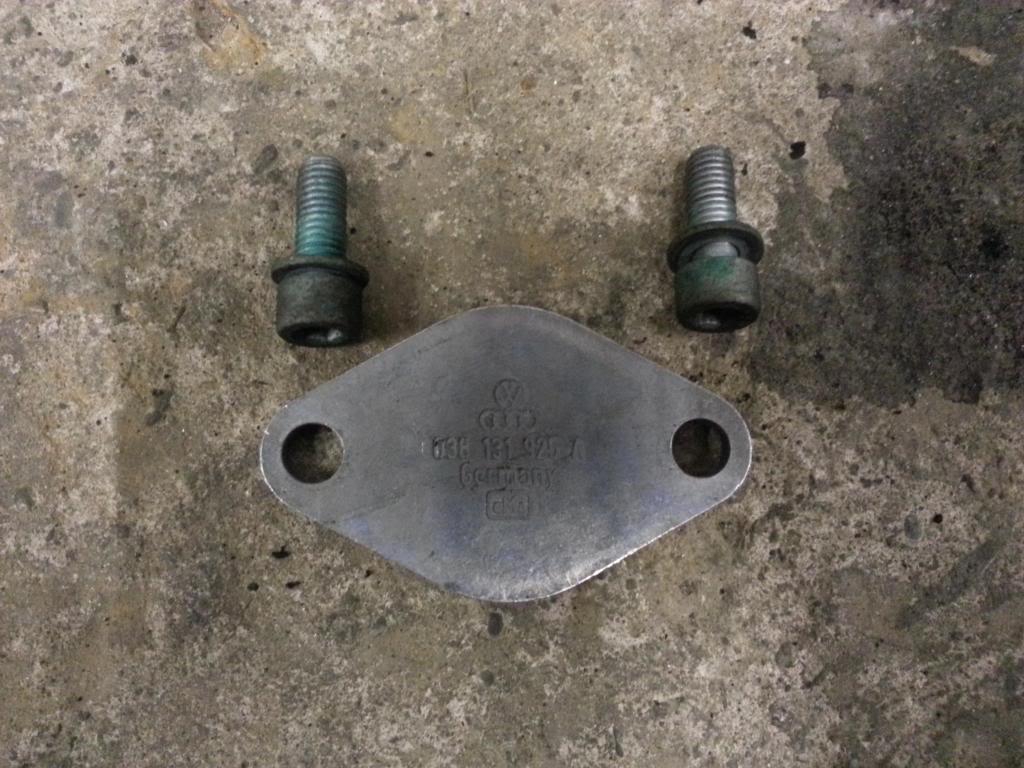
Secure the EGR blanking plate to the side of the EGR cooler.
Ensure the gasket is fitted correctly.
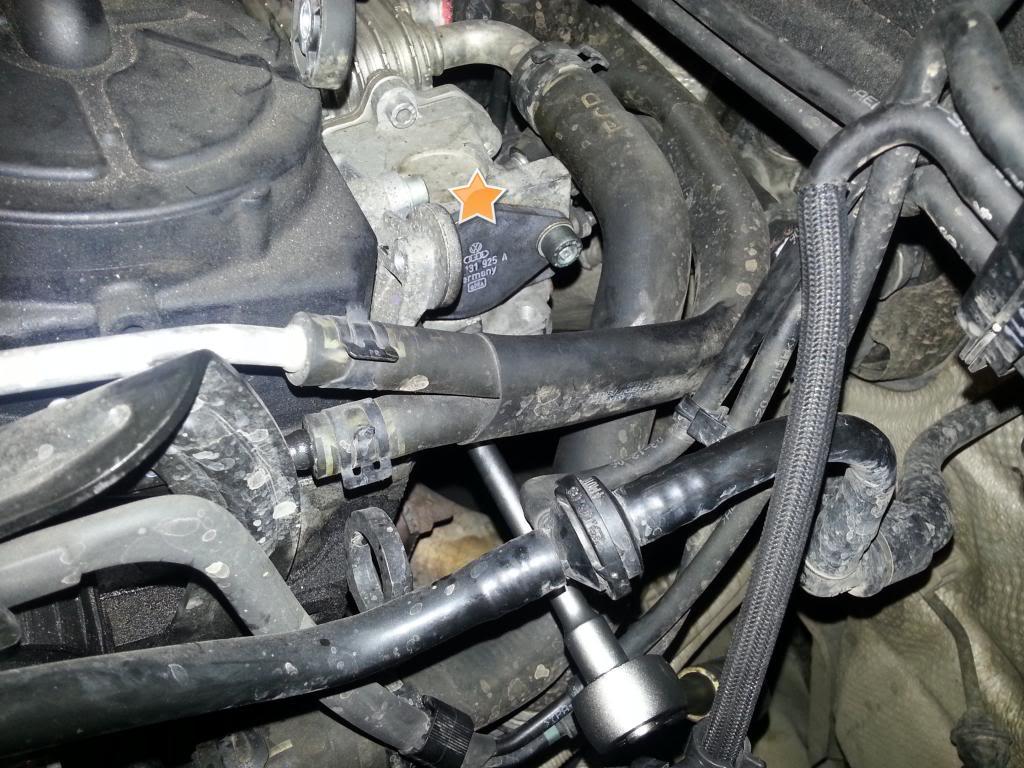
You should now be left with the EGR valve and inlet / exhaust manifold connecting pipe
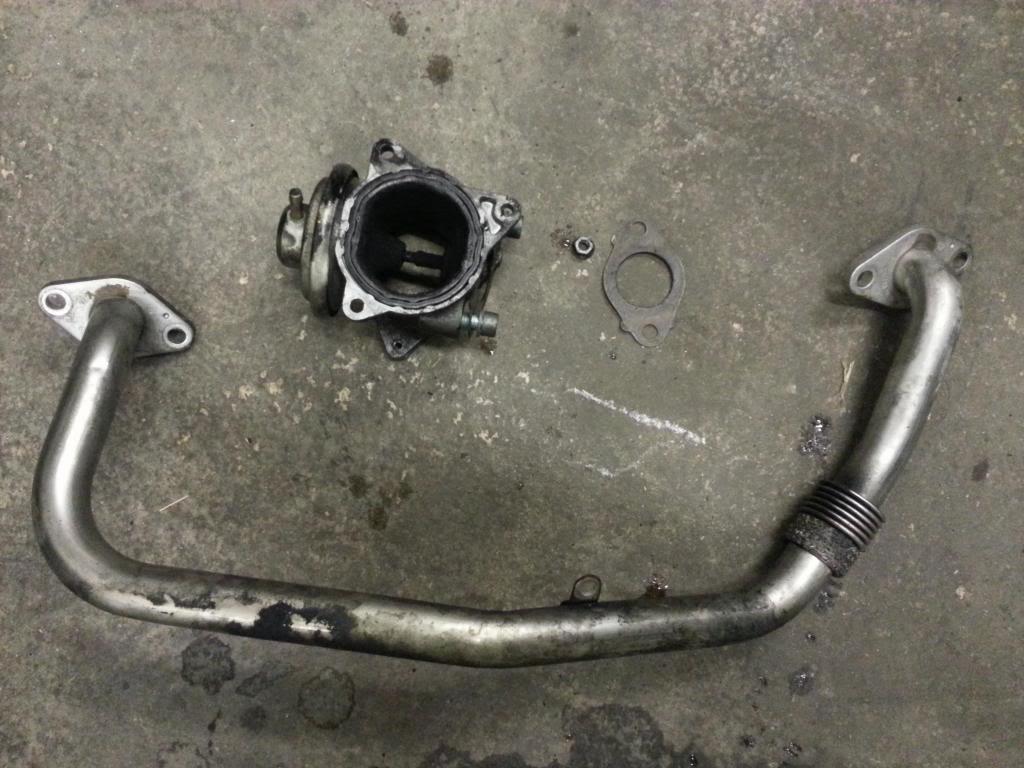
Skip to the
All done? section below!

-----------------------------------
-----------------------------------
Removing the EGR Cooler?? Read on...
-----------------------------------
EGR Cooler Delete-----------------------------------
This EGR Cooler delete guide relates to the PD 140 (BKD) engine.
The EGR cooler on the PD 170 (BMN) engine is mounted underneath the exhaust manifold and much more difficult to remove, this guide will help, but will not be exactly the same setup.
If you have previously remove the EGR valve and returned at a later date to remove EGR cooler, you will need to follow the start of the EGR Valve delete guide to remove the following:
- Airbox
- MAF Assembly
- turbo intake pipe retaining screw
To give access to the EGR cooler I would advise removing the turbo intake pipe...
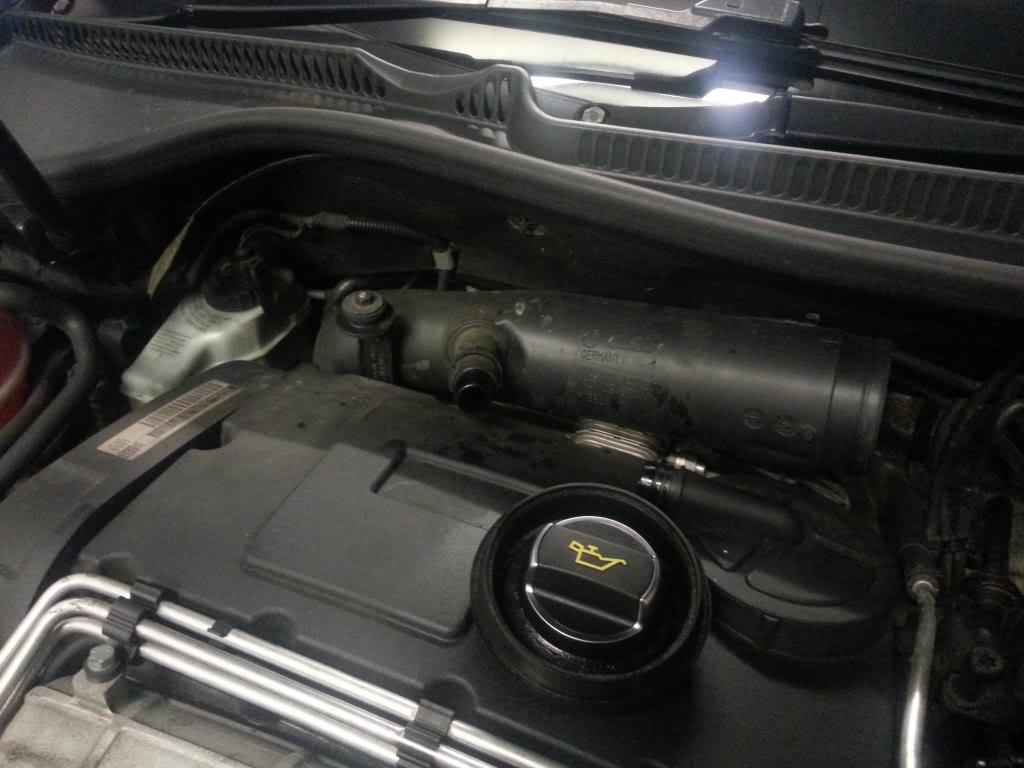
Firstly, remove another T30 retaining screw which secures the intake pipe below the left bottom corner of the EGR cooler. I could not picture this, but see a picture of the pipe once removed to note the location of the screws:
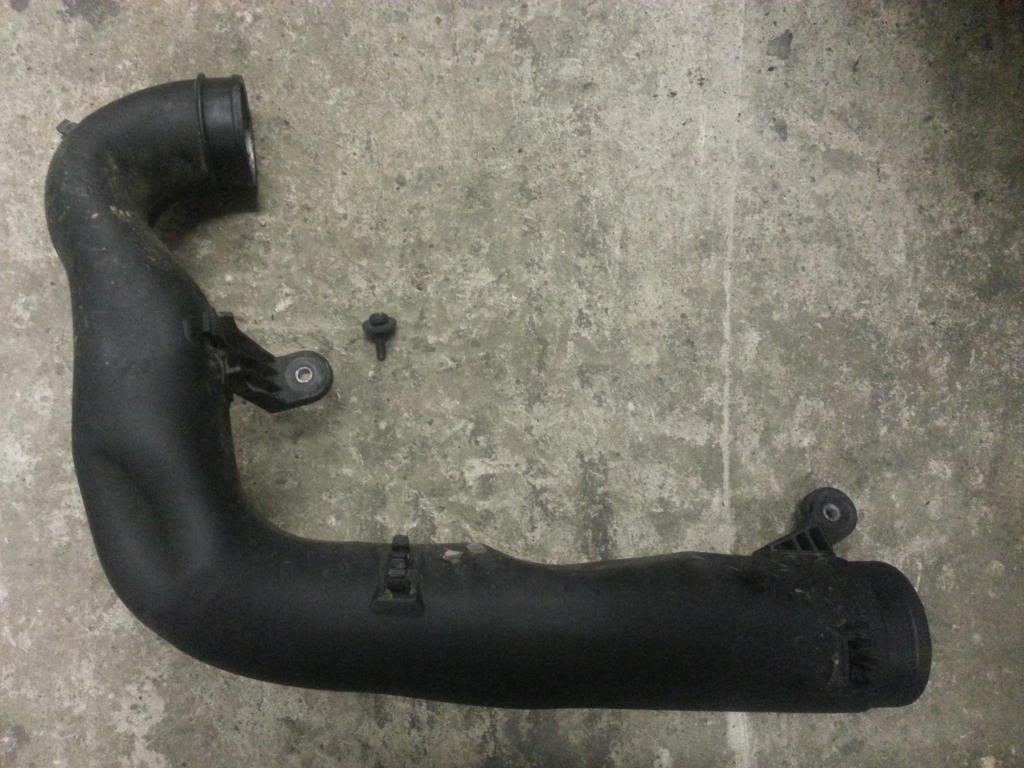
Once the screw is removed the only thing securing the intake hose is a clamp where it meets the turbo....
To access the turbo...
Jack up the front of the car and secure on axles stands.
Remove the under tray, secured with T25 screws and 3 x 10mm bolts.
To improve access, remove the connector plug from the sump
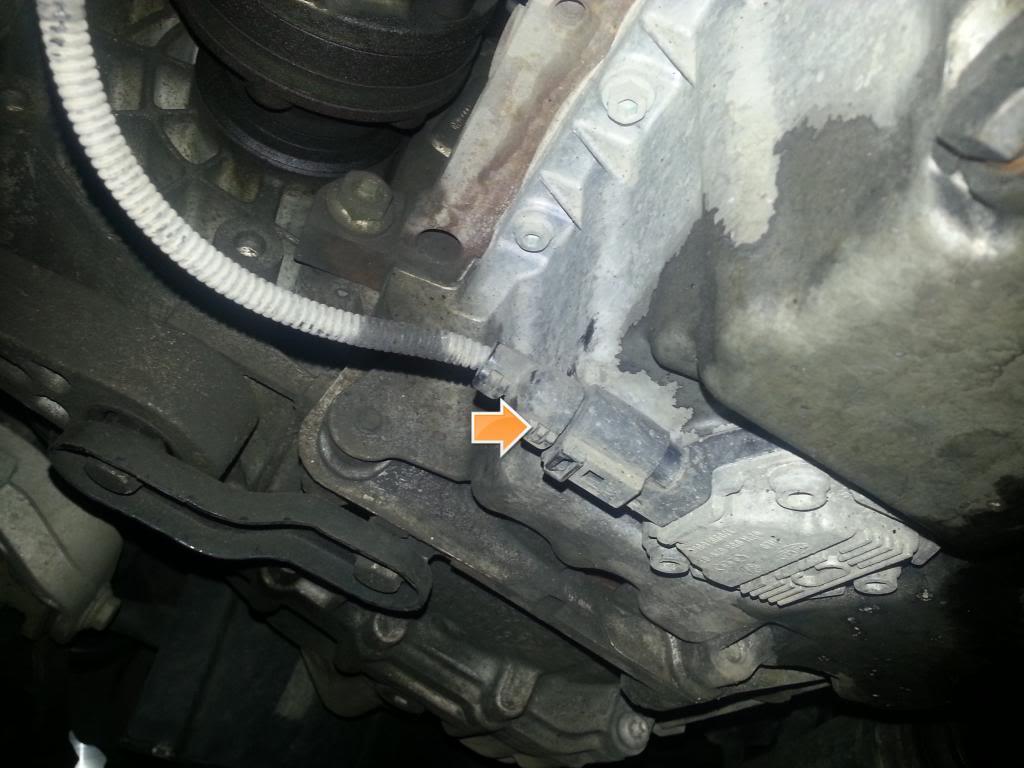
Get under the car and look up past the drivers driver shaft to see the turbo.
Locate the band clamp securing the turbo intake pipe (E). This is the same pipe that runs along the top of the EGR cooler, labelled in a the diagram at the start of this guide.
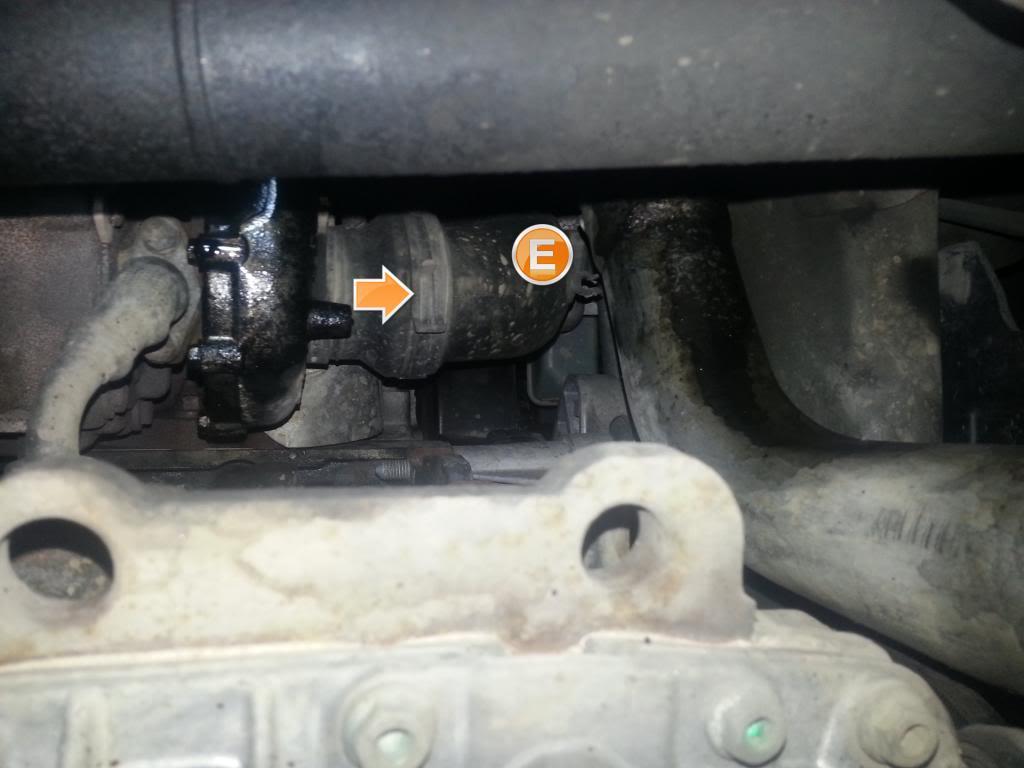
To remove the clamp you will most likely need a set of remote hose clip pliers, shown below with the clamp fully removed, for illustration:
With the clamp unsecured, pull the intake pipe from the turbo and withdraw the pipe up through the top of the engine bay.
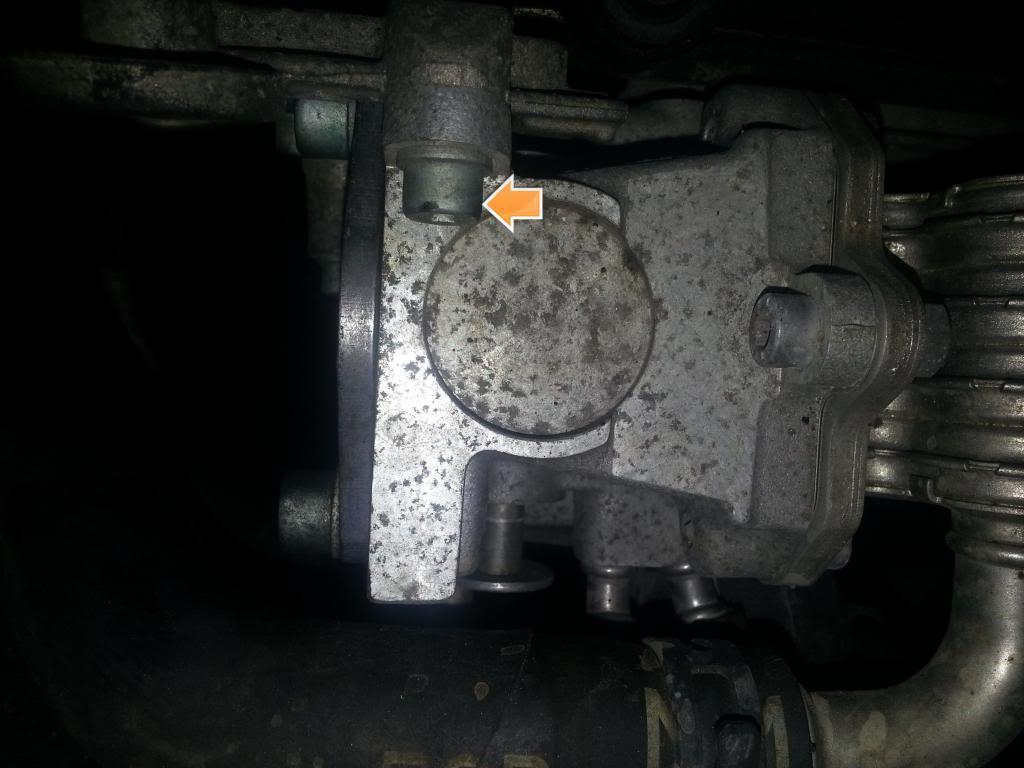
The EGR cooler is secured by 4 x 6mm allen bolts. Some of them are are difficult to see:
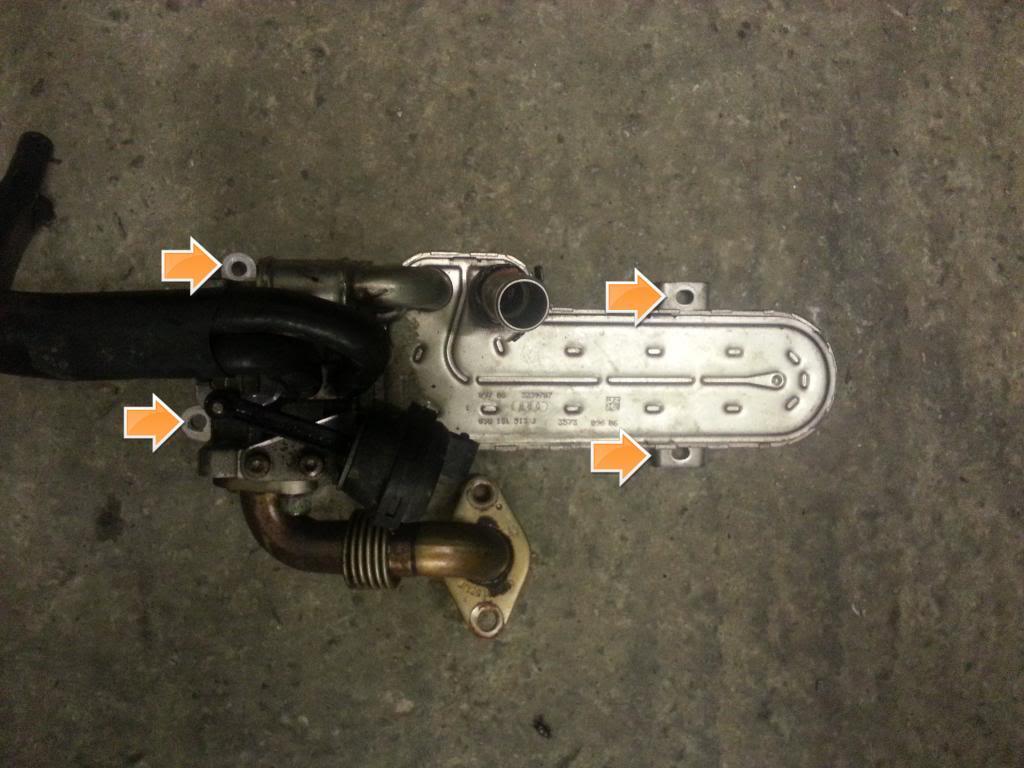
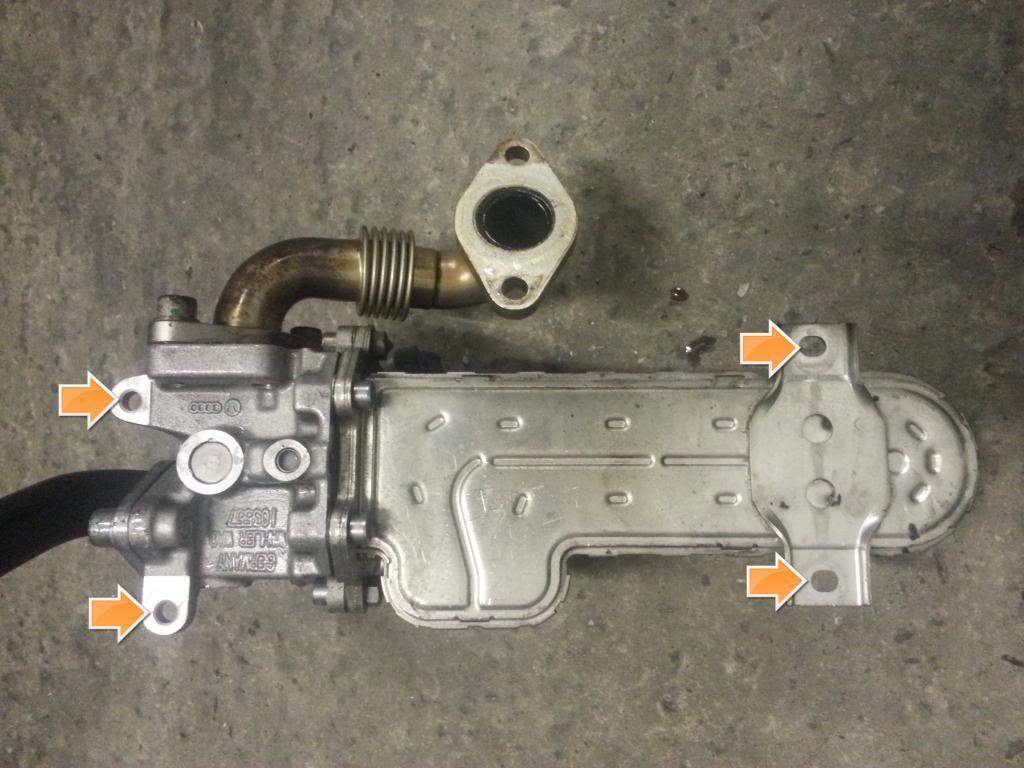
top left:
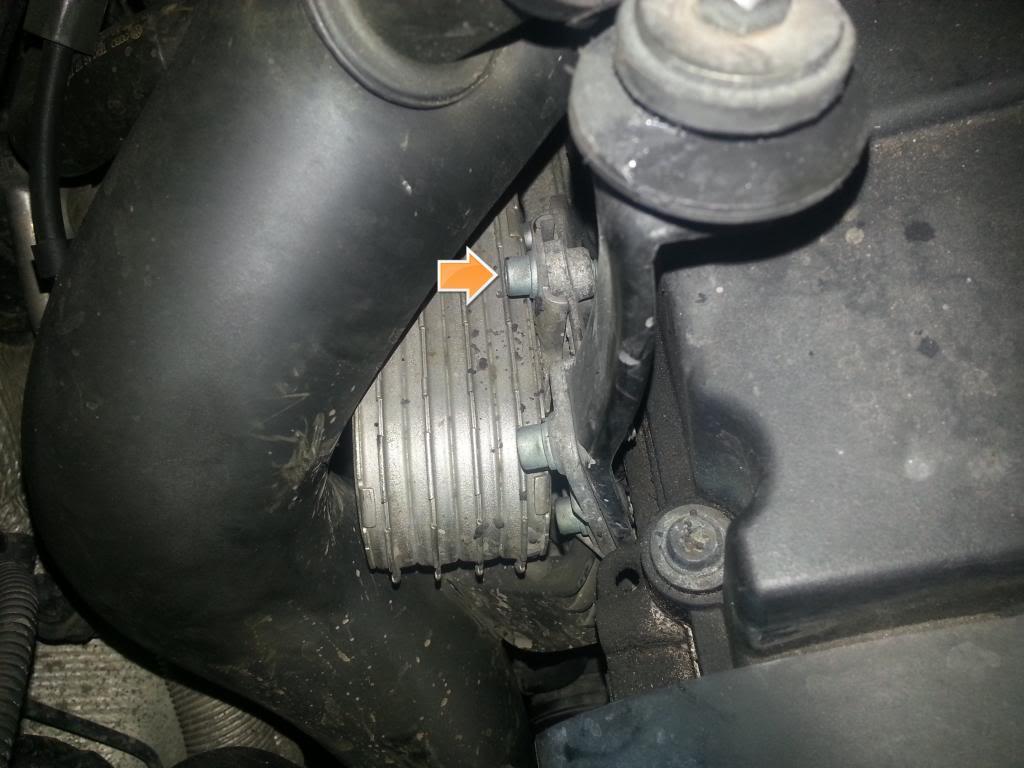
top right:
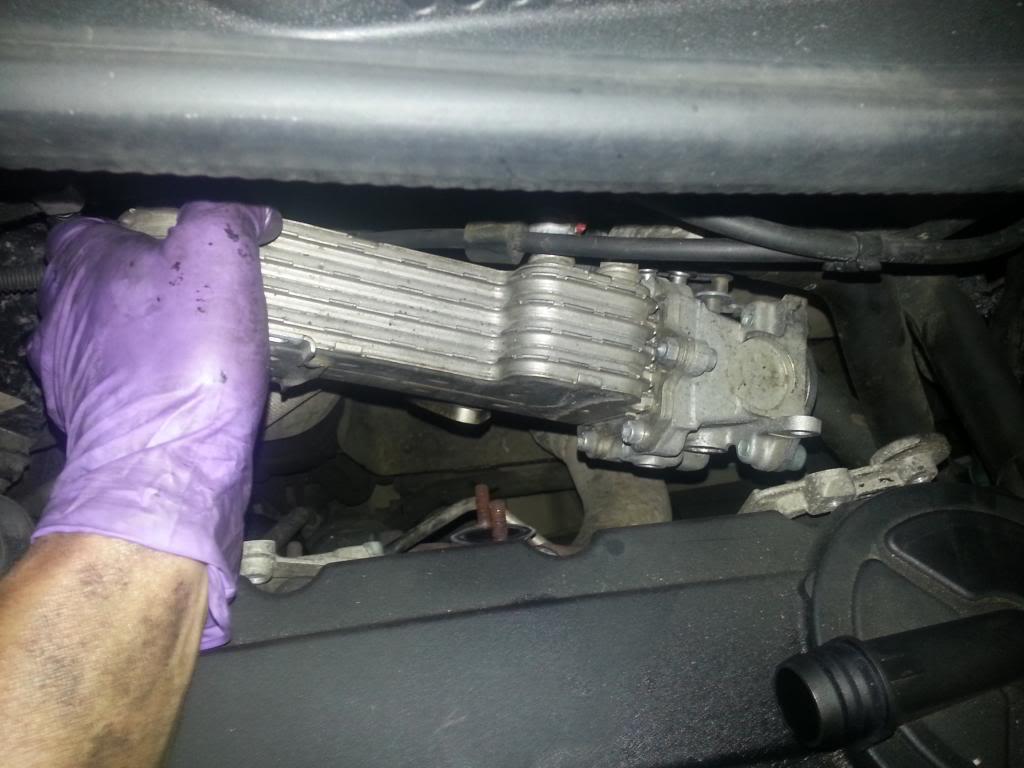
At the back of the engine bay, underneath the EGR cooler is a pipe connecting the EGR cooler to the exhaust manifold. This is secured by 2 x 10mm bolts that need to be removed.
Once removed, the EGR cooler will be free to pull off the exhaust / turbo manifold.
NOTE: It will still be attached by coolant hoses! Be careful to recover the gasket, dont let it drop down the engine bay!
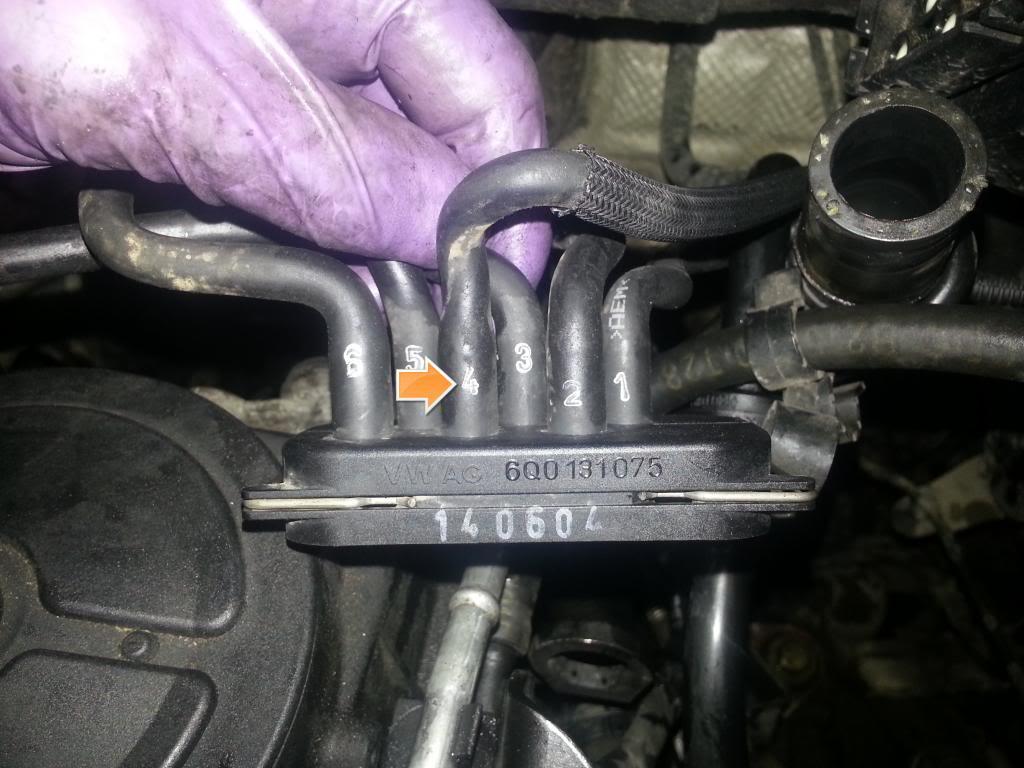
Disconnect the vacuum hose that runs from the turbo boost pressure solenoid to the EGR solenoid on the left side of the exhaust manifold.
The boost presure solenoid is a black box mounted on the bulkhead, near the battery, with several vacuum hoses going to/from it.)
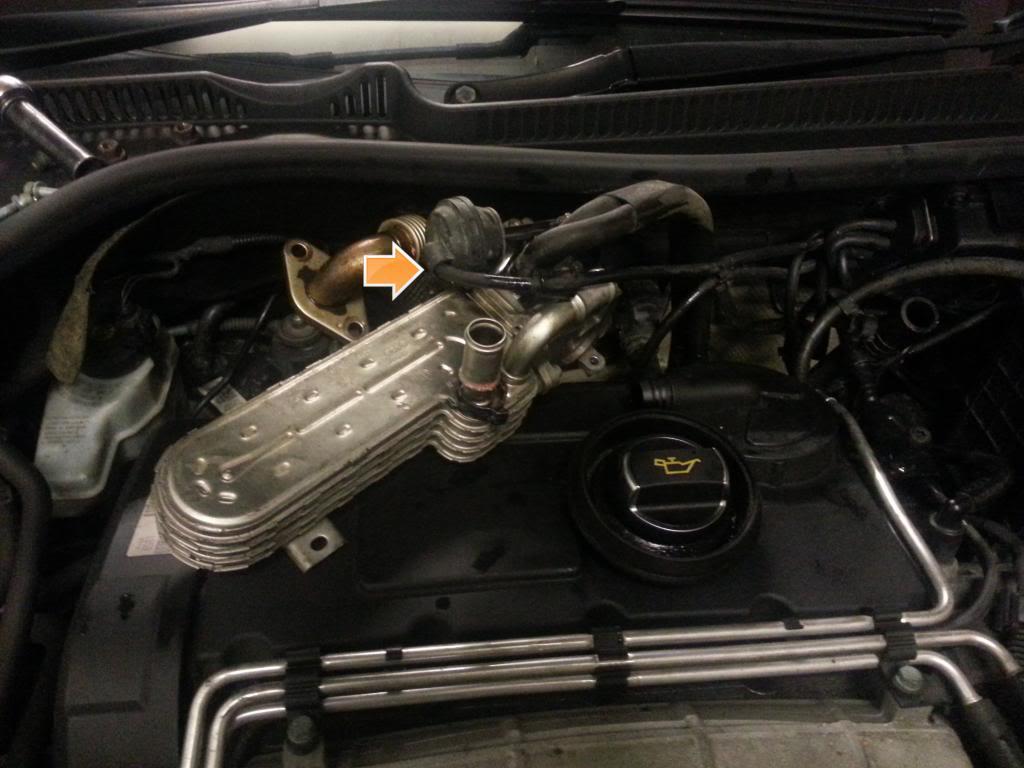
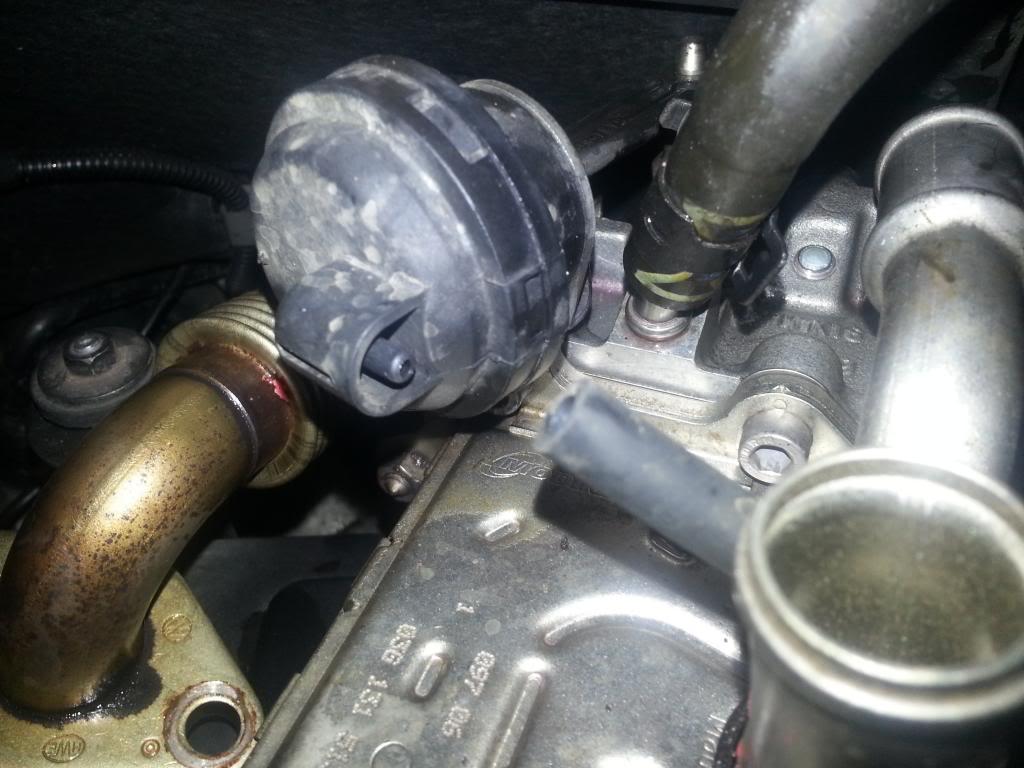
Boost presure solenoid vacuum hoses.
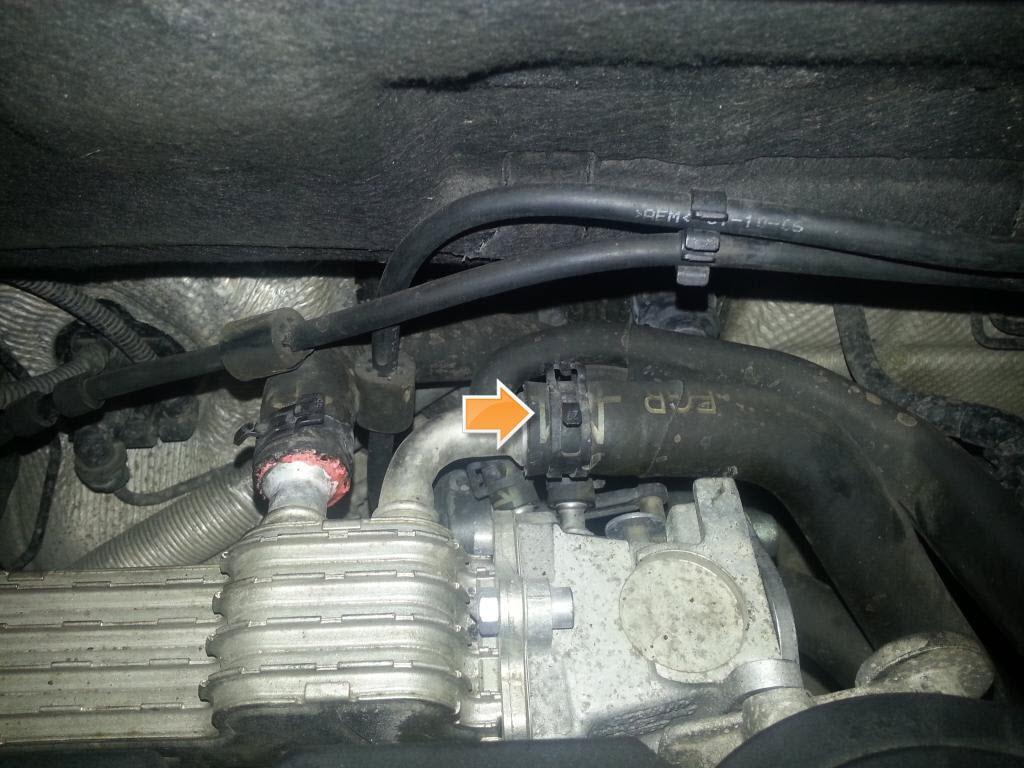
Take notes of the coolant hoses connecting the EGR cooler to the engine coolant system.
NOTE: Coolant will leak when these pipes are disconnected, unless you clamp them with hose clamps. If you dont have hose clamps, try and catch the coolant in a container, or let it drain to a containr on the floor.
If left to drain, all coolant in the expansion tank will drain out, but engine and radiator will remain filled.
Disconnect all hoses pictured and removed EGR cooler from engine bay.
You may want to put the EGR cooler in a bucket / container as it will also be filled with coolant.
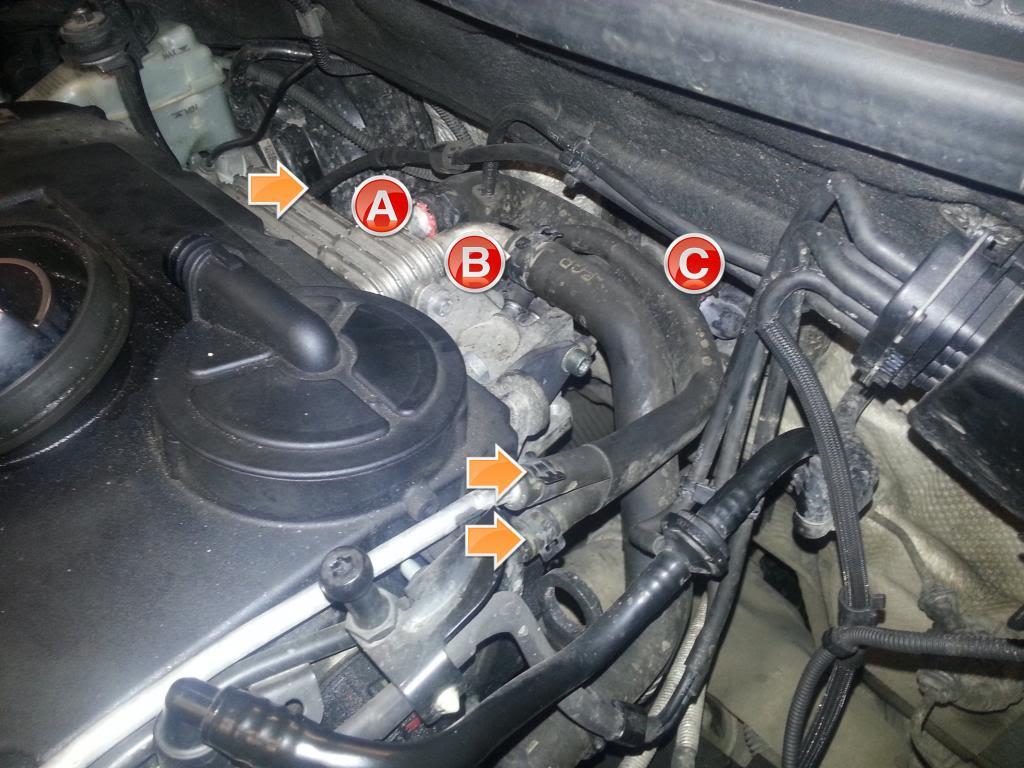
Now there are several hoses to reconnect to complete the coolant system.
Release clamp on hose (B).
Release clip on coupler (C) using flat head screw driver and pull the right angled water coupler to release hose (A) from the bulkhead.
This hose is no longer required.
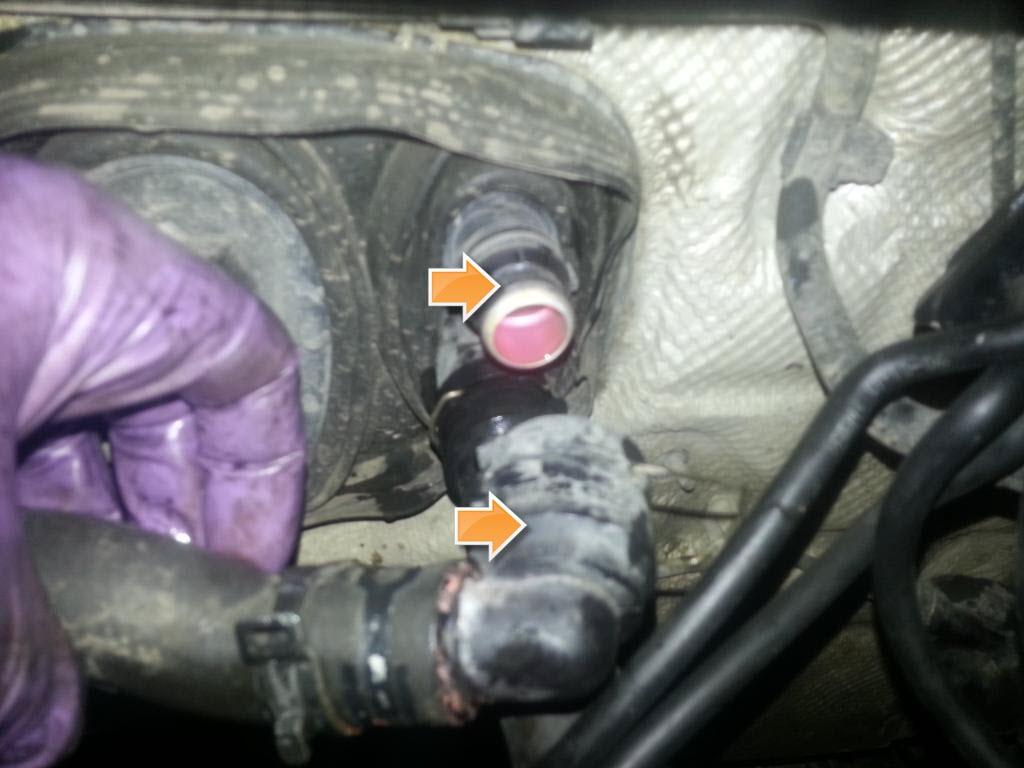
Using the new EGR cooler delete pipe, which is simply a slightly different water coupler (straight, not right angled), connect to hose (B) which comes from the engine and secure with hose clip.

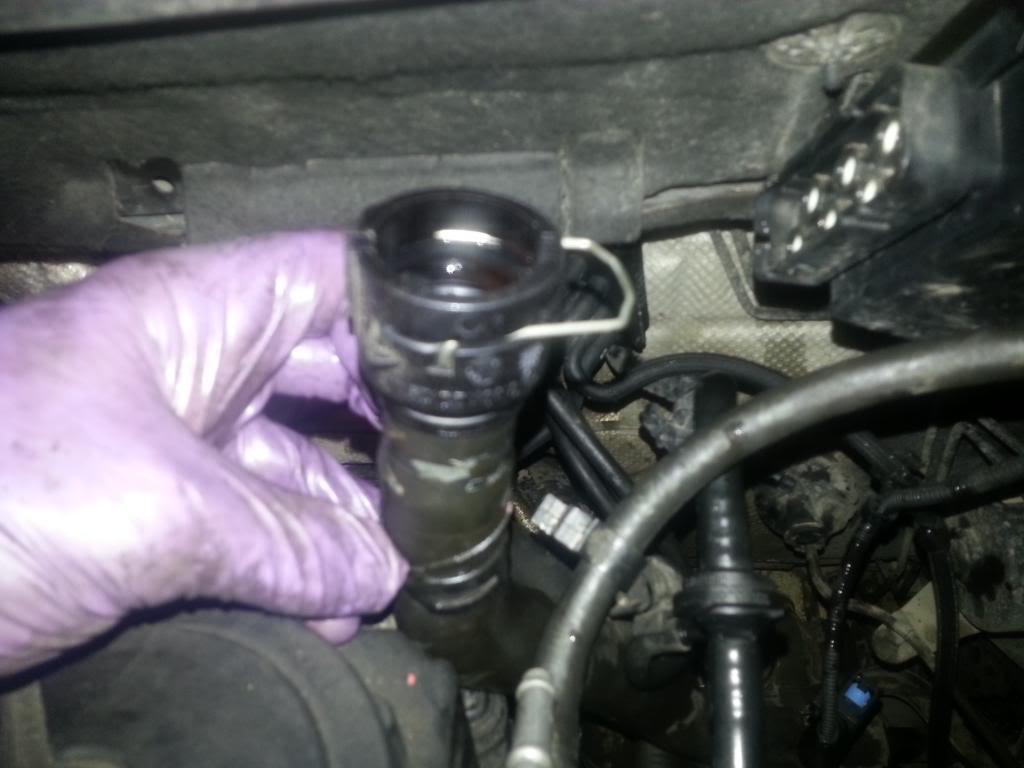
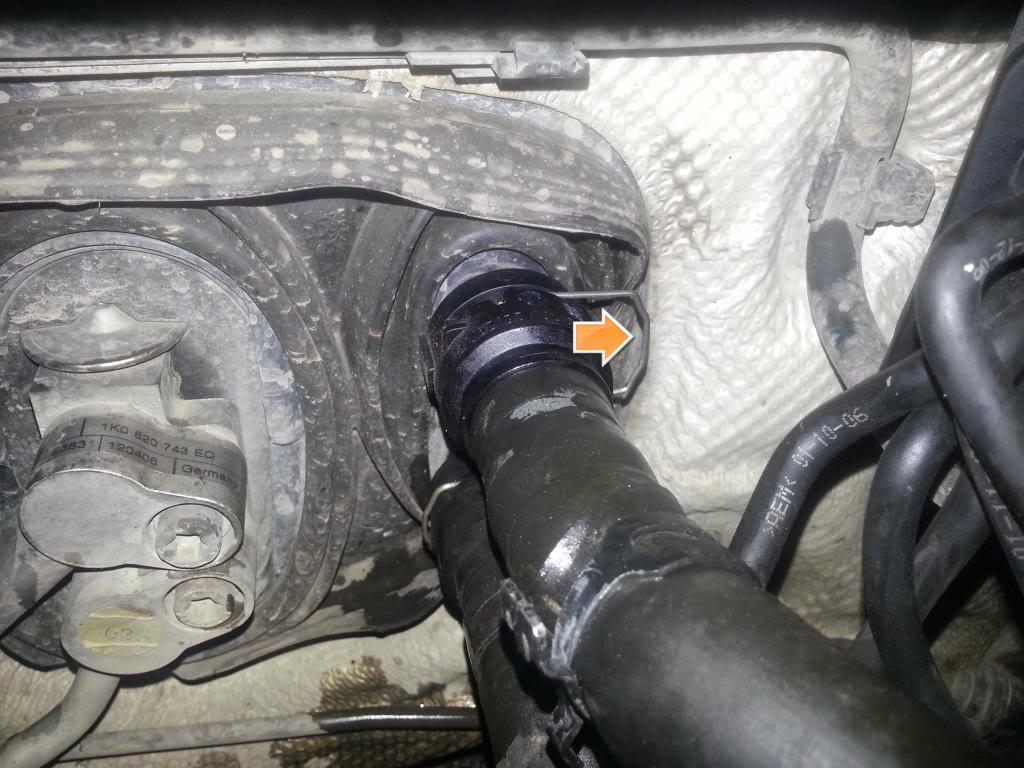
Push hose onto bulk head connector, you will have to slightly twist the pipe, ensure not to kink it. Once secure, push retaining clip in, to secure the pipe in place.
Now to bridge the gap left by two smaller water pipes which would originally run to / from the header tank.
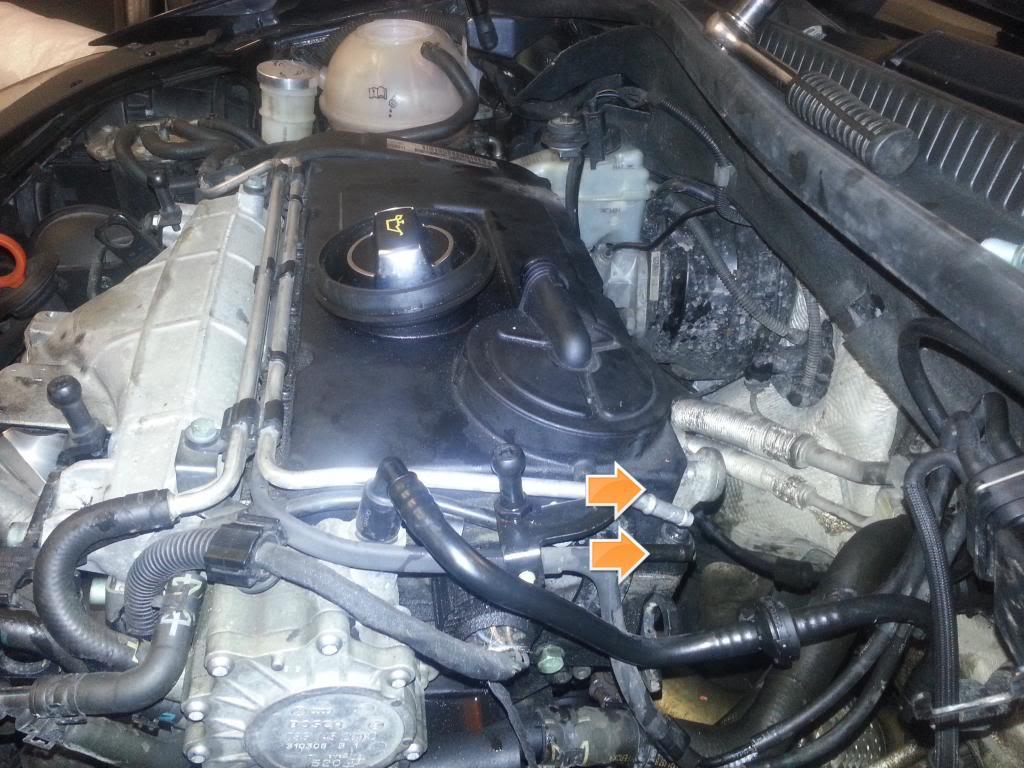
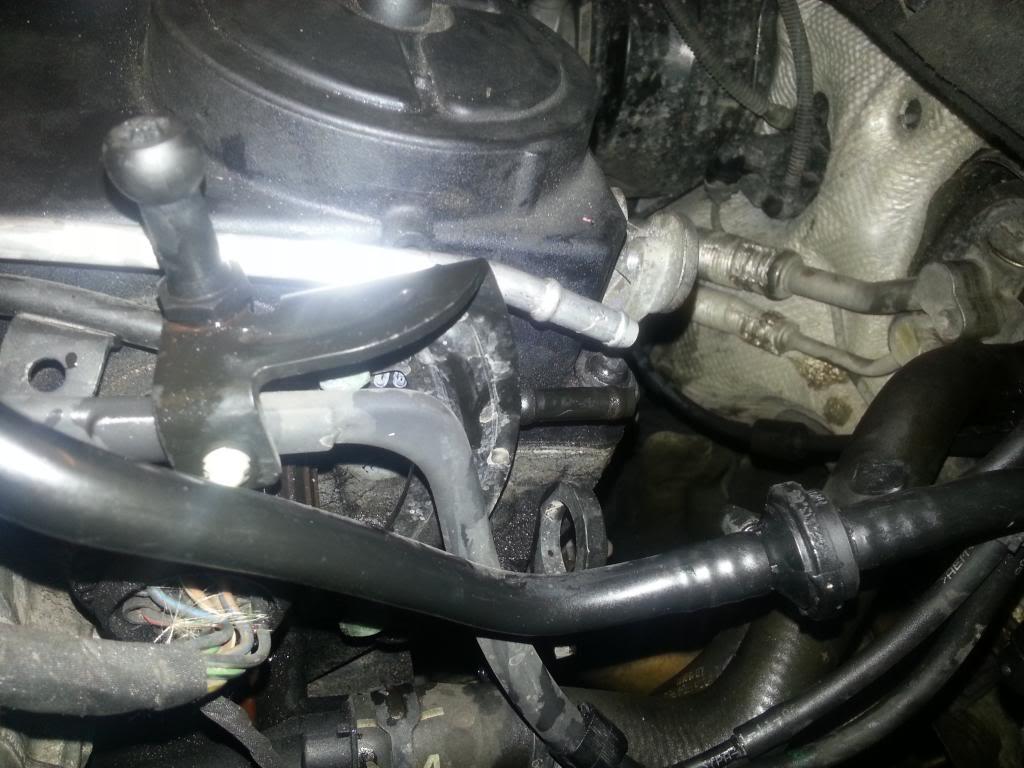
For this you will nee a length of hose of similar diameter.
You could use part number: 1K0 121 447 S (coolant hose) from VW which is the same hose running from the header tank.
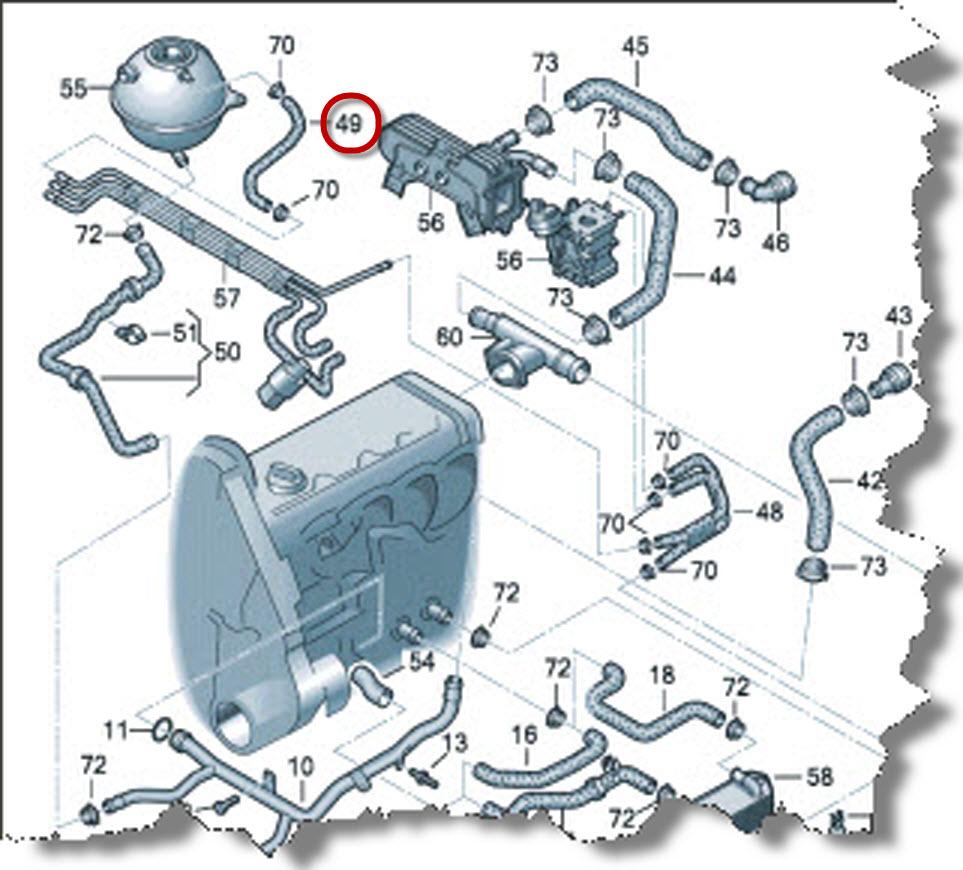
Or you could reuse one of the small hoses removed from the egr cooler, but this will mean cutting them and they will not be able to be used if you want to return to standard.
Ensure all hoses are secured with the original pipe clamps.
My spare piece of hose found in my garage, with pipe clamps removed from EGR cooler.
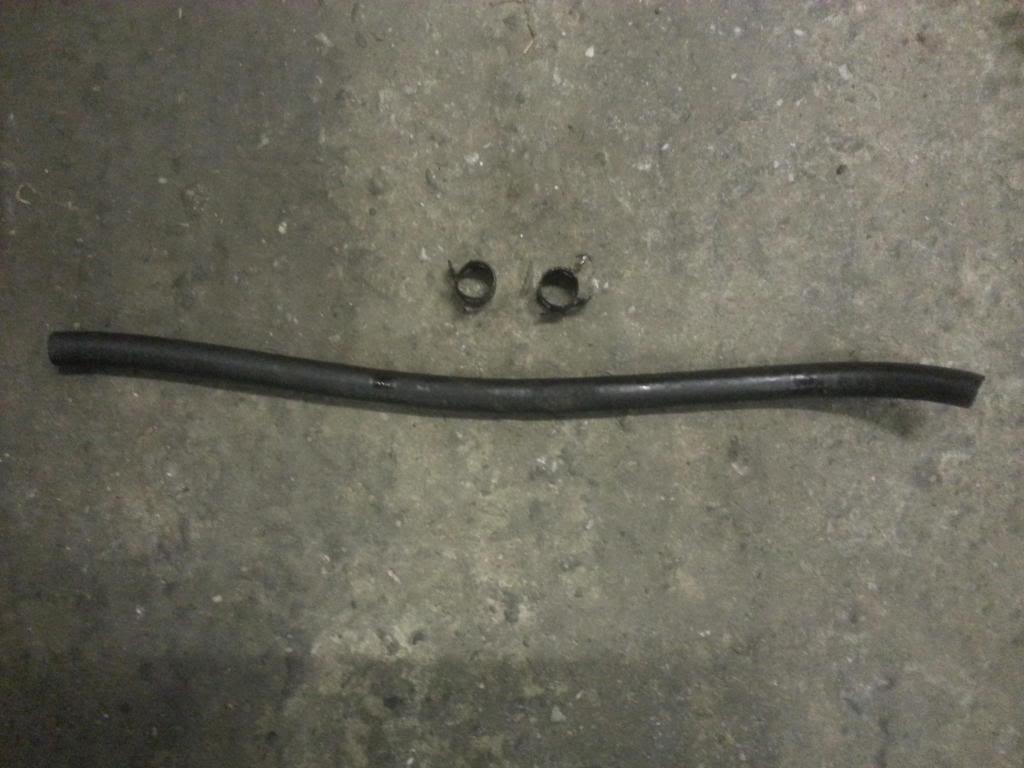
The hose will be used to bridge the two smaller water pipes.
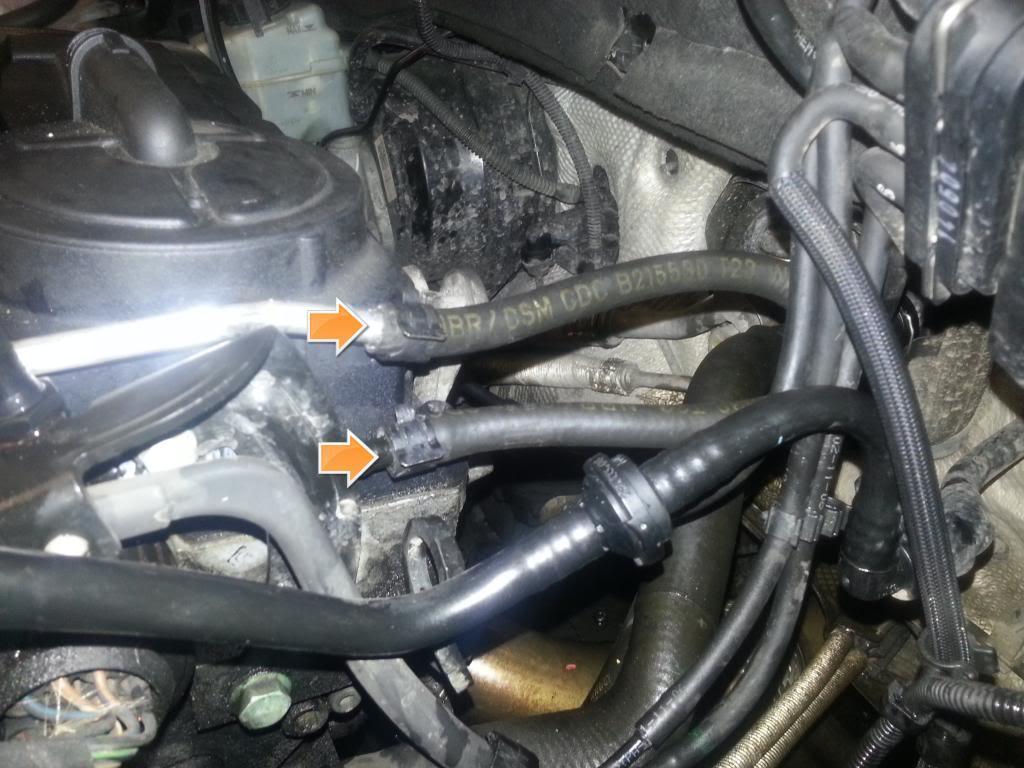
Now to plug the vaccum hose that originally went to the EGR solenoid. Plug it with one of the spare 5mm allen bolts.

I cable tied this to the Boost presure solenoid mounting bracket to keep it out of the way.
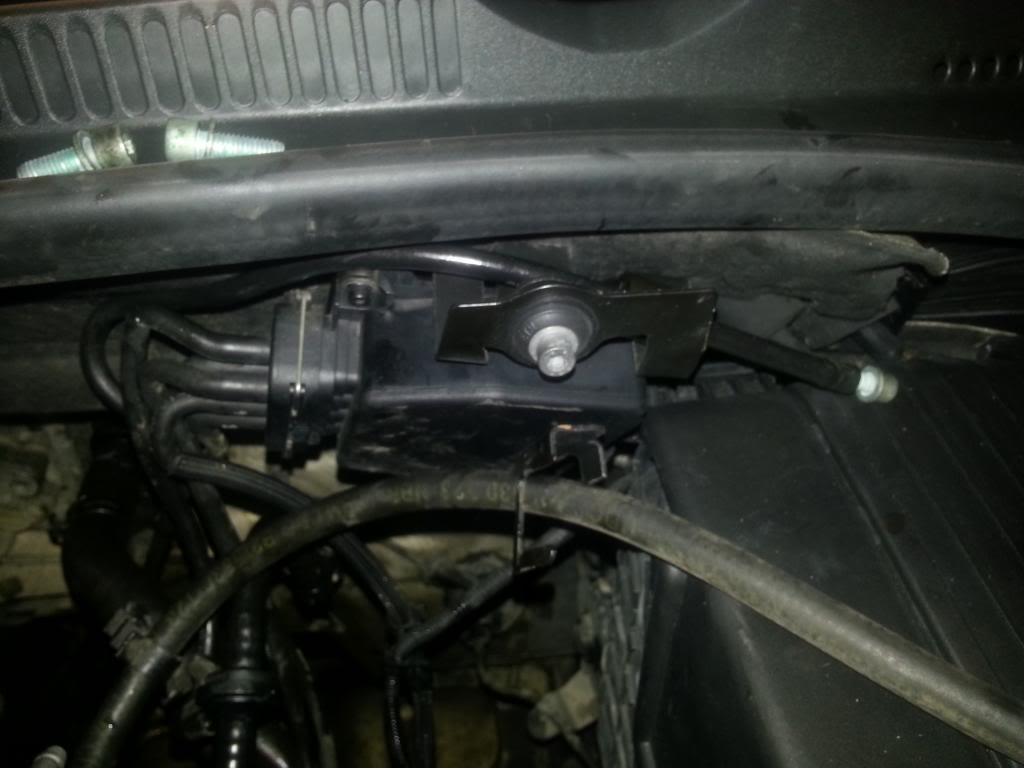
Finally, the EGR blanking plate can be fitted to the hole left on the exhaust manifold.
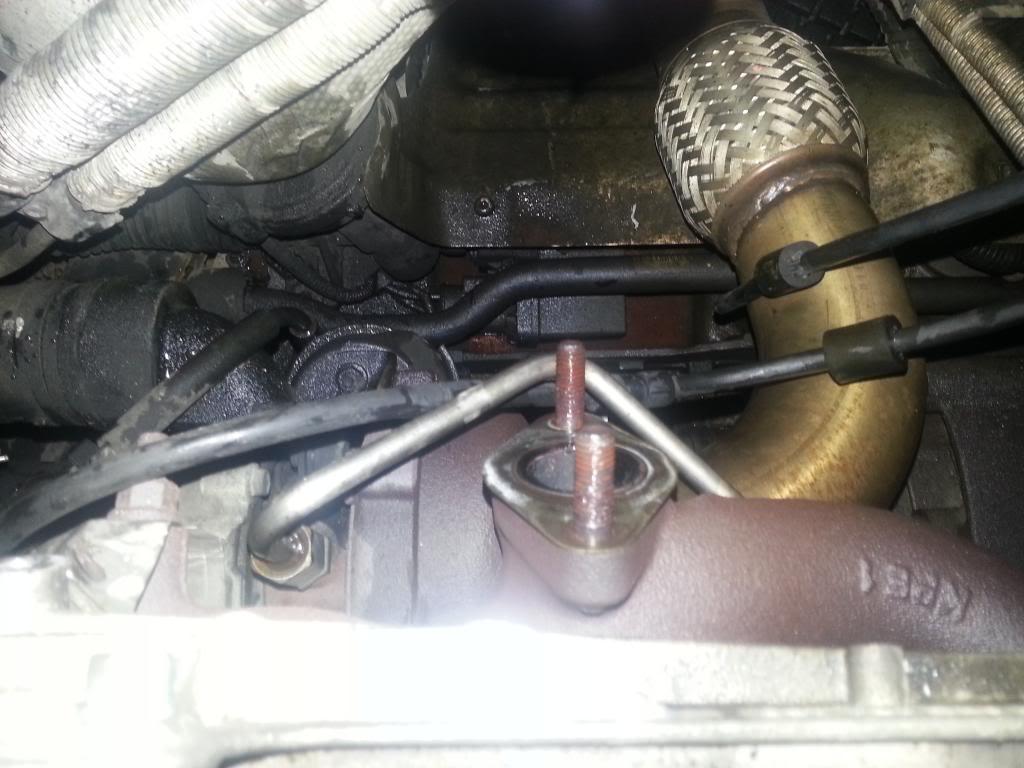
Ensure the gasket is refitted.
You can secure using the original 10mm nuts or use the new ones supplied with your EGR delete pipe.
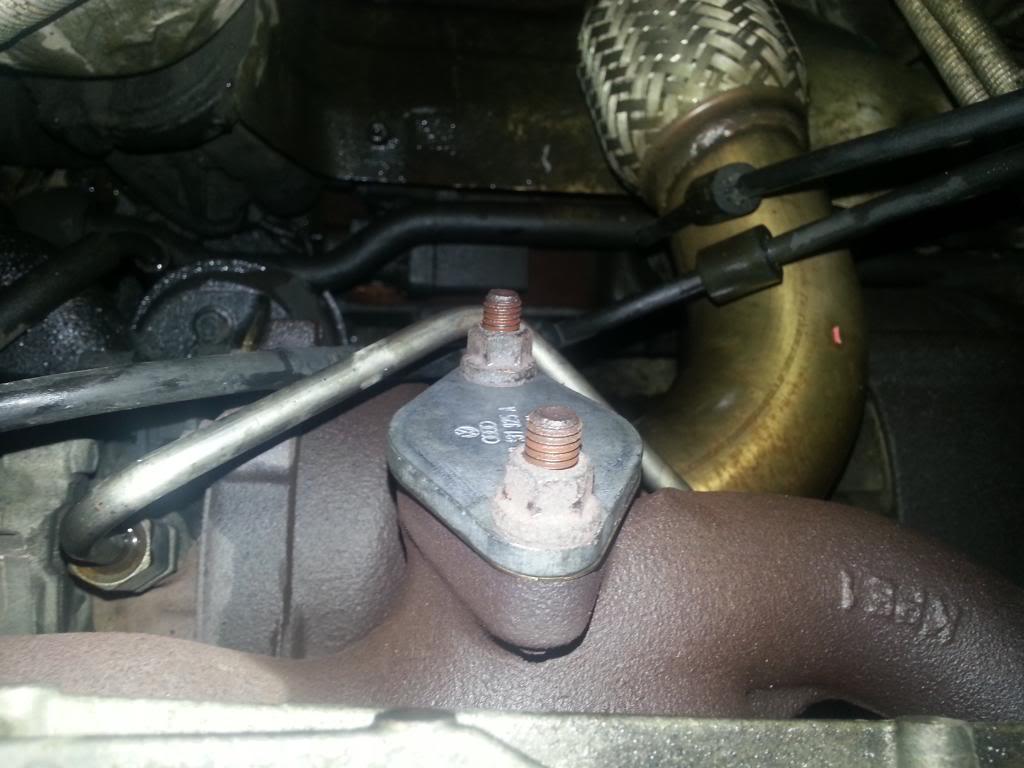
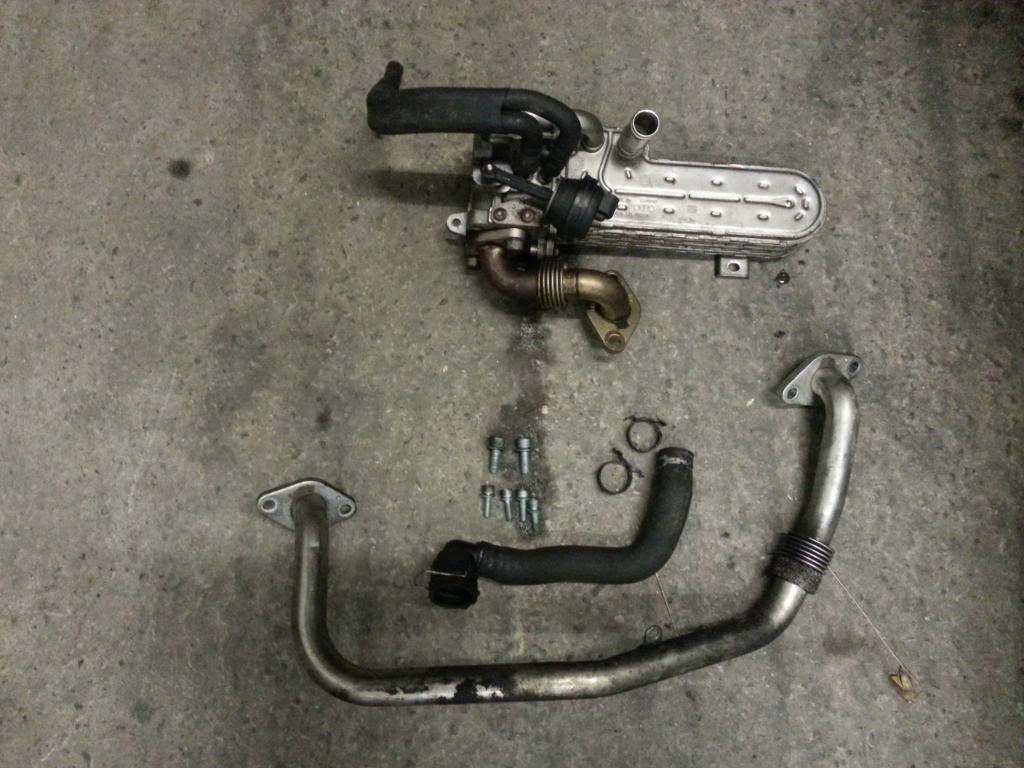
You should now be left with the EGR valve, EGR cooler and various other parts removed that are no longer required.
 Refitting
As in the haynes, refitting is a reverse of removal

, except you havent got as much to refit

For me the main struggle was getting the band clamp back on the turbo intake hose due to restricted access.
Aside from that everything else was relatively straight forward!
All done? 
Once everything is back together and car is lowered to the floor, double check:
- All coolant hoses connected
- All coolant vacuum connected or plugged
- Header tank topped up
- NO TOOLS LEFT IN ENGINE BAY
Start the car and let it idle. CHeck around and under the engine bay for leaks (air and water).
Let the engine warm upto temperature (90 degrees) after which point the fans should cut in.
Monitor coolant and engine temperature.

Take the car for a drive. At somepoint the engine management light will illuminate and MFD (highline) will show a fault:
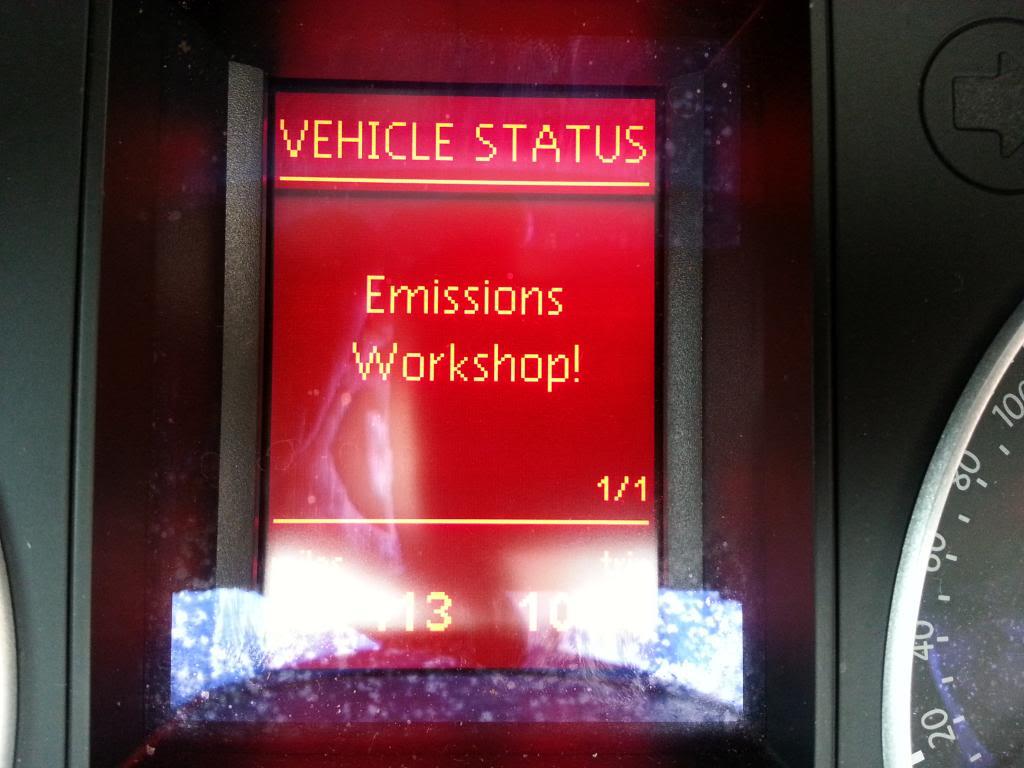
This is because the ECU is trying to open / close the EGR valve and is registering that its not there.
You will need to get the EGR mapped out of your ECU to remove the light (approx £70 at a tuners).
Thanks for reading and good luck!
